81
EN
Spot welding
Spot welding Spot welding can be carried out in the following welding processes:
PULSE SYNERGIC | SYNERGIC | MANUAL | LSC/PMC | SP (CMT)
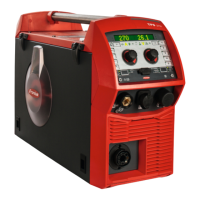
Select the desired welding process by pressing the "Welding process" button
Select the MODE by pressing the "Mode" button
"Spot" appears briefly on the display.
Setup menu / Process parameters / Spot welding
Press the right adjusting dial
The SPt (spot welding time) parameter is shown.
Enter the desired value for the spot welding time: press and turn the right adjusting dial
Setting range: 0.1 - 10.0 s
Factory setting: 1.0 s
Confirm the value by pressing the right adjusting dial
NOTE!
4-step mode is assigned as standard for spot welding.
Press the torch trigger - Spot welding process runs until the end of the spot welding time -
Press again to stop the spot welding time prematurely
► The spot welding setting can be changed to 2-step in the Setup menu under Settings
/ System / SPm
(more information on 2-step and 4-step mode for spot welding starts on page 116)
Select the filler metal, wire diameter and shielding gas
Open the gas cylinder valve
Set the shielding gas flow rate
CAUTION!
Risk of injury and damage from electric shock and from the wire electrode emerging
from the torch.
When pressing the torch trigger:
► Keep the welding torch away from your face and body
► Wear suitable protective goggles
► Do not point the welding torch at people
► Make sure that the wire electrode does not touch any conductive or earthed parts (e.g.
housing, etc.)
Spot welding
Procedure for producing a welding spot:
Hold the welding torch vertical
Press and release the torch trigger
Keep the torch in the same position
Wait for the gas post-flow time
1
2
3
4
5
6
7
8
9
10
1
2
3
4
 Loading...
