Installing the DocuPrint CM500 Series Upgrade Kit (Optional)
585
Appendix
14
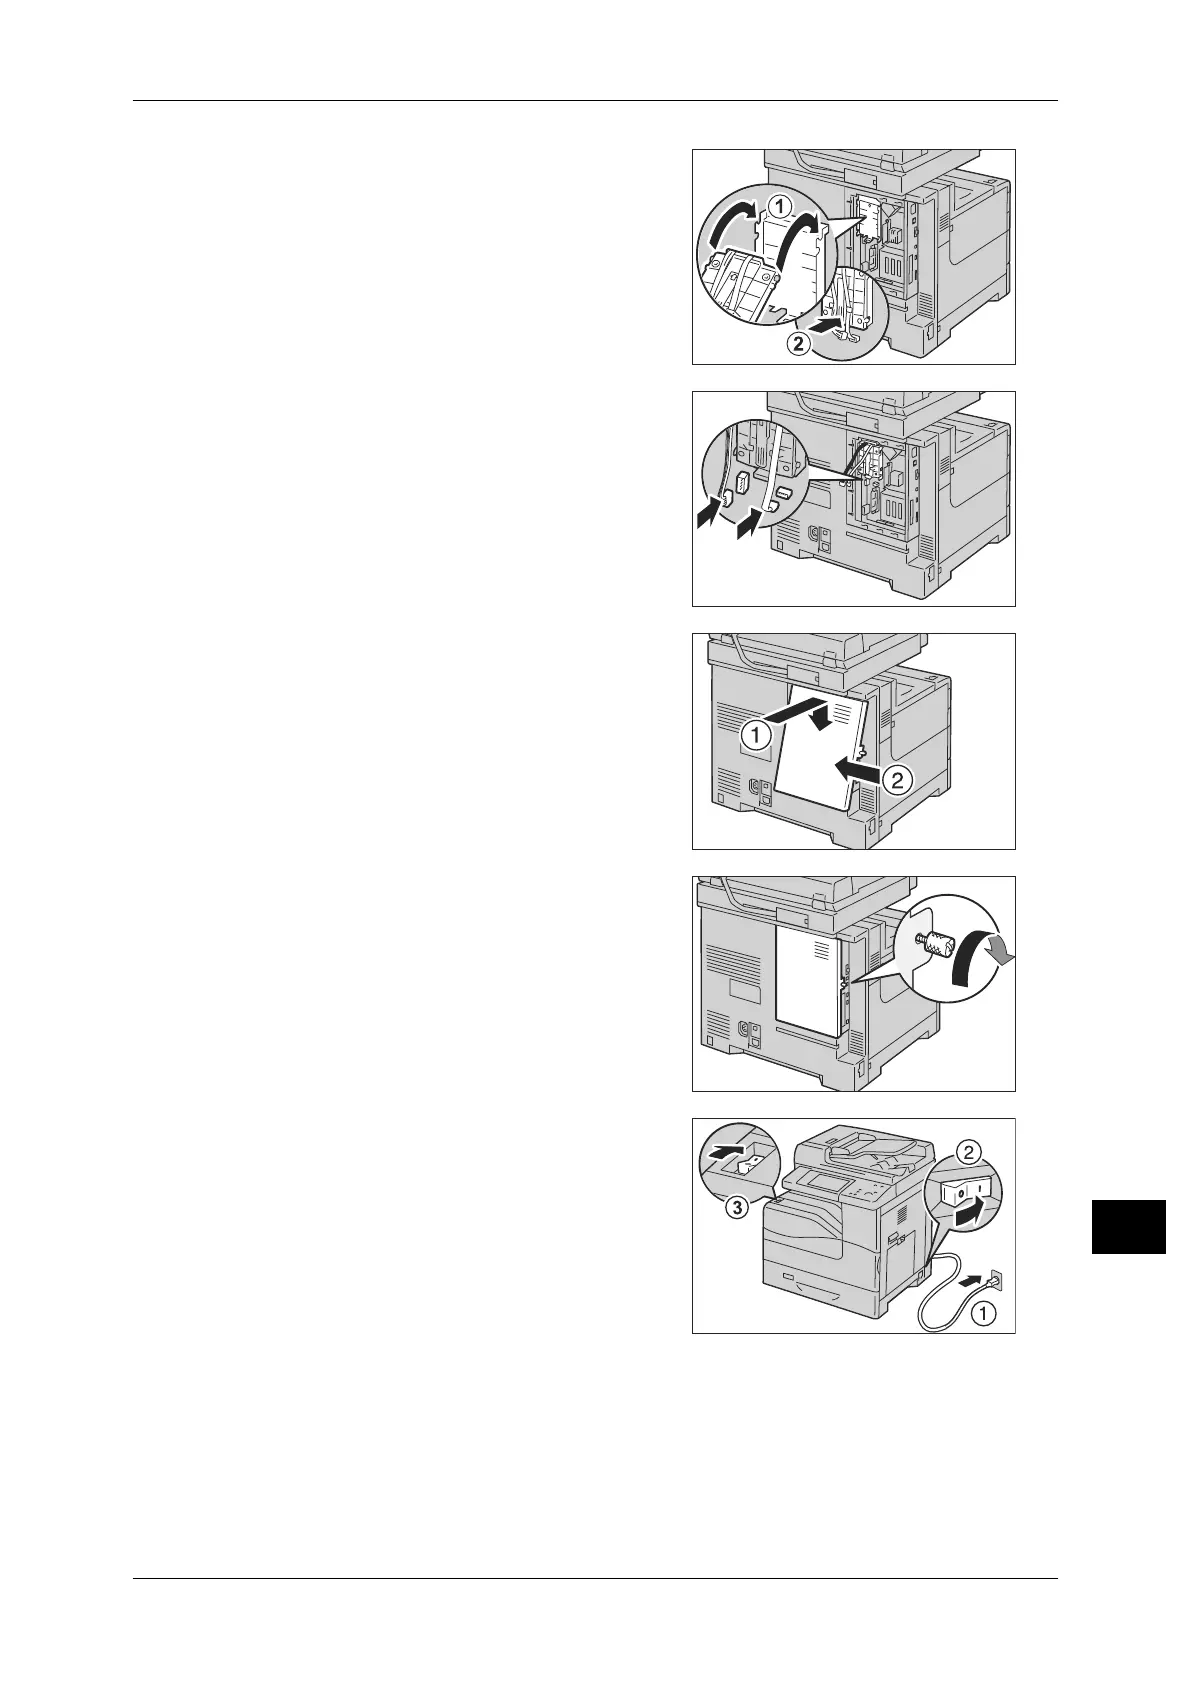
5 Align the tabs on both sides of the right part
of the HDD board with the slots on the
machine (1), and then push the left part of
the board until it clicks into place (2).
6 Insert the two connectors extending from the
left side of the HDD board to each slot on the
machine correctly.
7 Close the rear right cover.
8 Tighten the two screws loosened in step 3.
9 Plug the power cord into the power outlet (1),
switch on the main power (2), and then
switch on the power (3).
For information on how to switch on the power and the main power, refer to "2 Product Overview" >
"Power Source" in the User Guide.

 Loading...