Power-up and testing
6.8 EST3 Installation and Service Manual
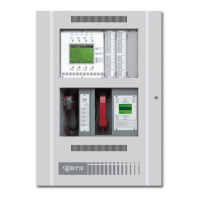
CPU with LCD module
1. Verify the module is properly seated in all four rail
connectors and secured with the four snap rivets. Verify that
removable terminal strips TB1 and TB2 are firmly seated.
2. Verify that all components are installed using accepted
workmanship standards.
3. Verify that the correct date and time are displayed on the
LCD module’s display, and the Power LED is on.
4. Activate the lamp test and verify all lamps operated as
follows:
Select the Command Menus button to obtain the Main Menu
screen.
Select Test to obtain the Test Menu screen, then select Lamp
Test.
5. Initiate a fire alarm and verify the following: the alarm LED
flashes, the Alarm relay transfers, the correct device message
appears at the top of the LCD window, the active point
counter increments, the event sequence indicates a “1,” the
active Alarm events counter at the bottom of the display
indicates A001, the event type indicates fire alarm, and the
local panel buzzer sounds.
Press the Alarm Silence switch and verify that the required
notification appliances are silenced and the Alarm Silence
LED lights.
Press the Panel Silence switch to verify that the panel buzzer
silences and the Panel Silence LED lights.
Press the Alarm queue switch and verify that the Alarm LED
lights steady.
Press the Details switch and verify that the alarm device’s
message, if any, is displayed. If a printer is connected to the
CPU, verify that all specified information appears on the
printer.
6. 6Initiate a second fire alarm and verify that: it appears at the
bottom of the LCD window, the active point counter
changes, the event sequence indicates a “2,” the active
Alarm events counter at the bottom of the display indicates
A002, the event type indicates fire alarm, the Alarm LED
flashes again, the local panel buzzer resounds, and the first
Alarm message remains at the top of the LCD window. Press
the Alarm queue switch and verify that the Alarm LED
lights steady.
7. Initiate a third fire alarm and verify that: its message appears
at the bottom of the LCD window, the active point counter