Zoom20/30/35 Pro | 86Calibration
13.5 Calibrating the Circular Level of the Instrument and Tribrach
Calibrate the circular
level step-by-step
1 Place and secure the tribrach onto the tripod, and then secure the instrument onto the tribrach.
2 Using the tribrach footscrews, level the instrument with the electronic level. To activate the electronic
level, turn on the instrument, and, if tilt correction is set to 1- or 2-axis, the Level & Plummet screen
appears automatically. Alternatively, press FNC from within any application and select Level &
Plummet.
3 The bubbles of the instrument and tribrach levels must be centered. If one or both circular levels are
not centered, adjust as follows.
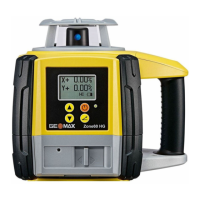
Instrument: If the bubble extends beyond the circle, use the Allen key supplied to center it with the
adjustment screws.
Tribrach: If the bubble extends beyond the circle, adjust it using the adjustment pin in conjunction
with the adjustment screws. Turn the adjustment screws:
• To the left: and the bubble approaches the screw.
• To the right: and the bubble goes away from the screw.
4 Repeat step 3 on the instrument and tribrach until both circular levels are centered and no further
adjustments are necessary.
After the calibration, no adjustment screw should be loose.
13.6 Inspecting the Laser Plummet of the Instrument
The laser plummet is integrated into the vertical axis of the instrument. Under normal conditions of use,
the laser plummet does not need adjusting. If an adjustment is necessary due to external influences, the
instrument has to be returned to a GeoMax service department.
Inspect the laser
plummet step-by-step
1 Set up the instrument on the tripod approximately 1.5 m above the ground and level up.
2 To activate the laser plummet, turn on the instrument, and, if tilt correction is set to 1- or 2-axis, the
laser plummet will be activated automatically, and the Level & Plummet screen appears. Otherwise,
press FNC from within any application and select Level & Plummet.
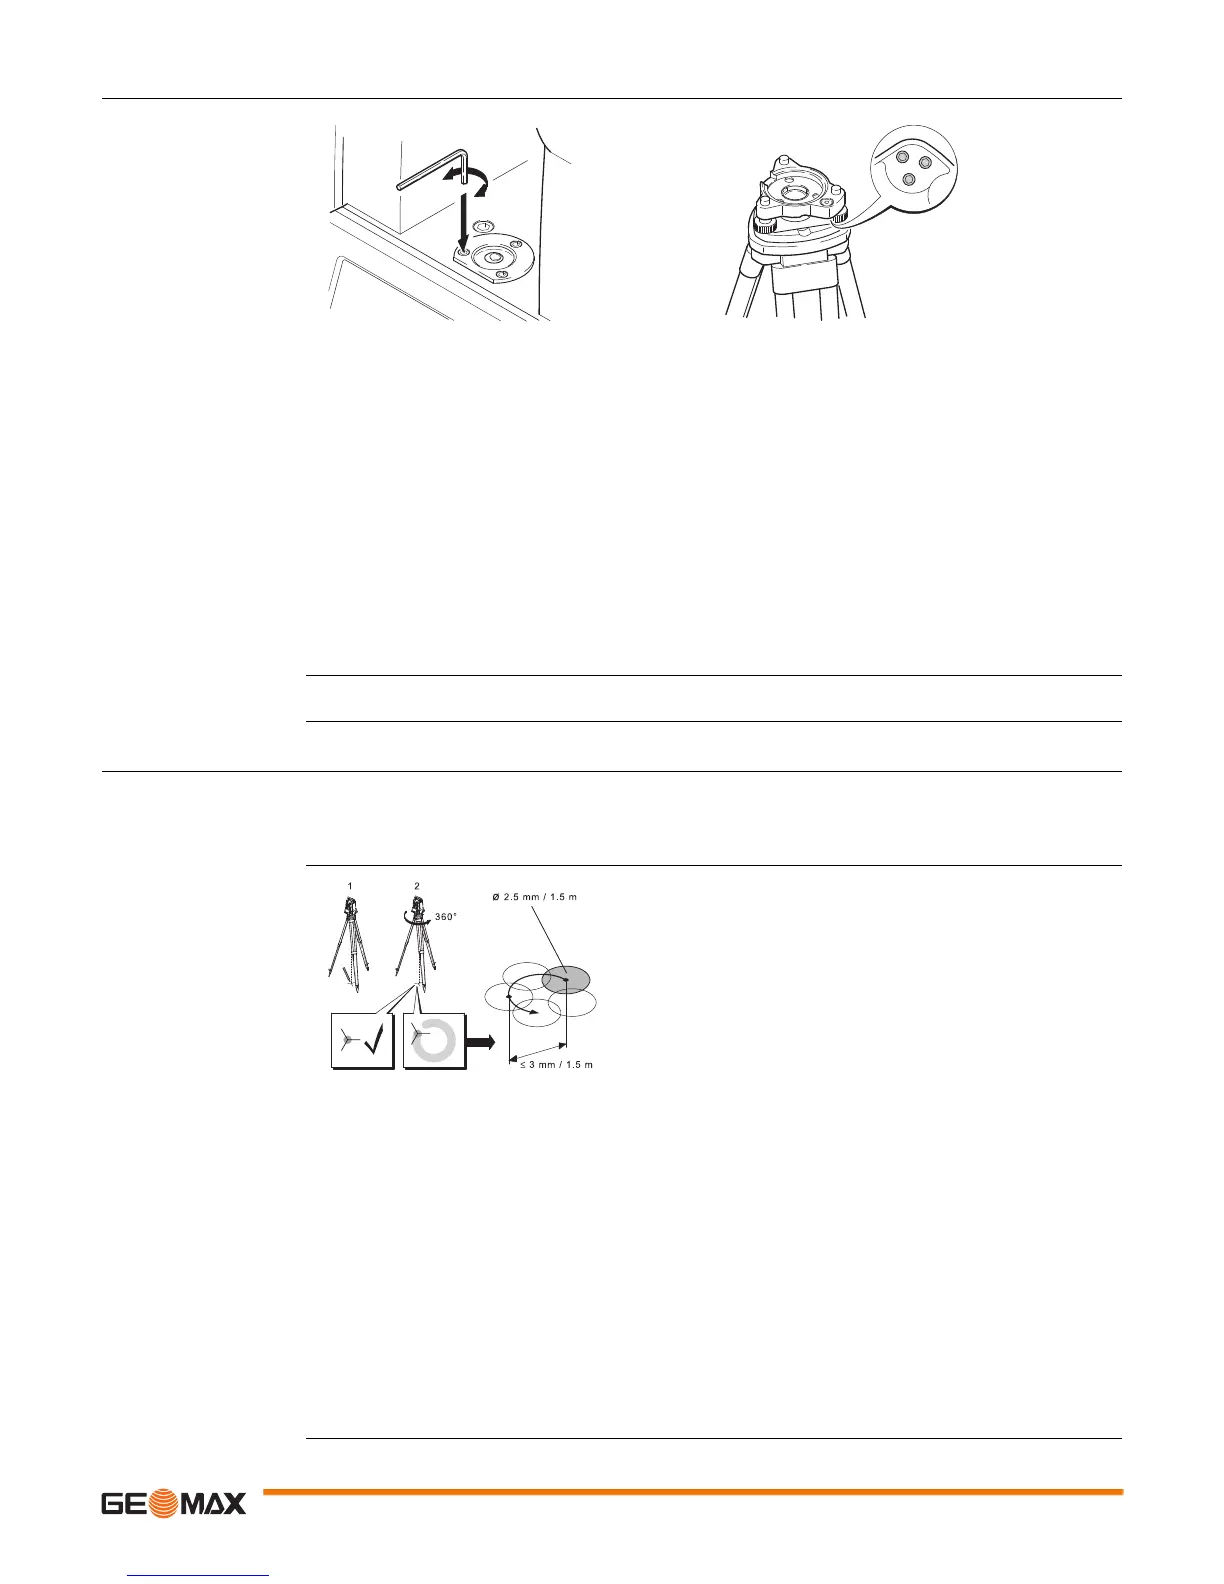
3 Mark the center of the red laser dot on the ground.
4 Turn the instrument slowly through 360°, carefully observing the movement of the red laser dot.
5 If the center of the laser dot makes a clearly circular movement, or moves more than 3 mm away from
the point which was first marked, an adjustment may be required. Call your nearest GeoMax service
centre. Depending on brightness and surface type, the size of the laser dot can vary. At a height of
1.5 m an average diameter of 2.5 mm is estimated.
Inspection of the laser plummet should be carried out on a bright, smooth and horizontal
surface, such as a sheet of paper.
The maximum diameter of the circular movement described by the center of the laser dot
should not exceed 3 mm at a height of 1.5 m.

 Loading...