EasyManuals Logo

GSi TYMPSTAR Series User Manual

GSi TYMPSTAR Series
224 pages
To Next Page IconTo Next Page
To Previous Page IconTo Previous Page
Page #150 background imageLoading...
Page #150 background image
Chapter 5
Step 1
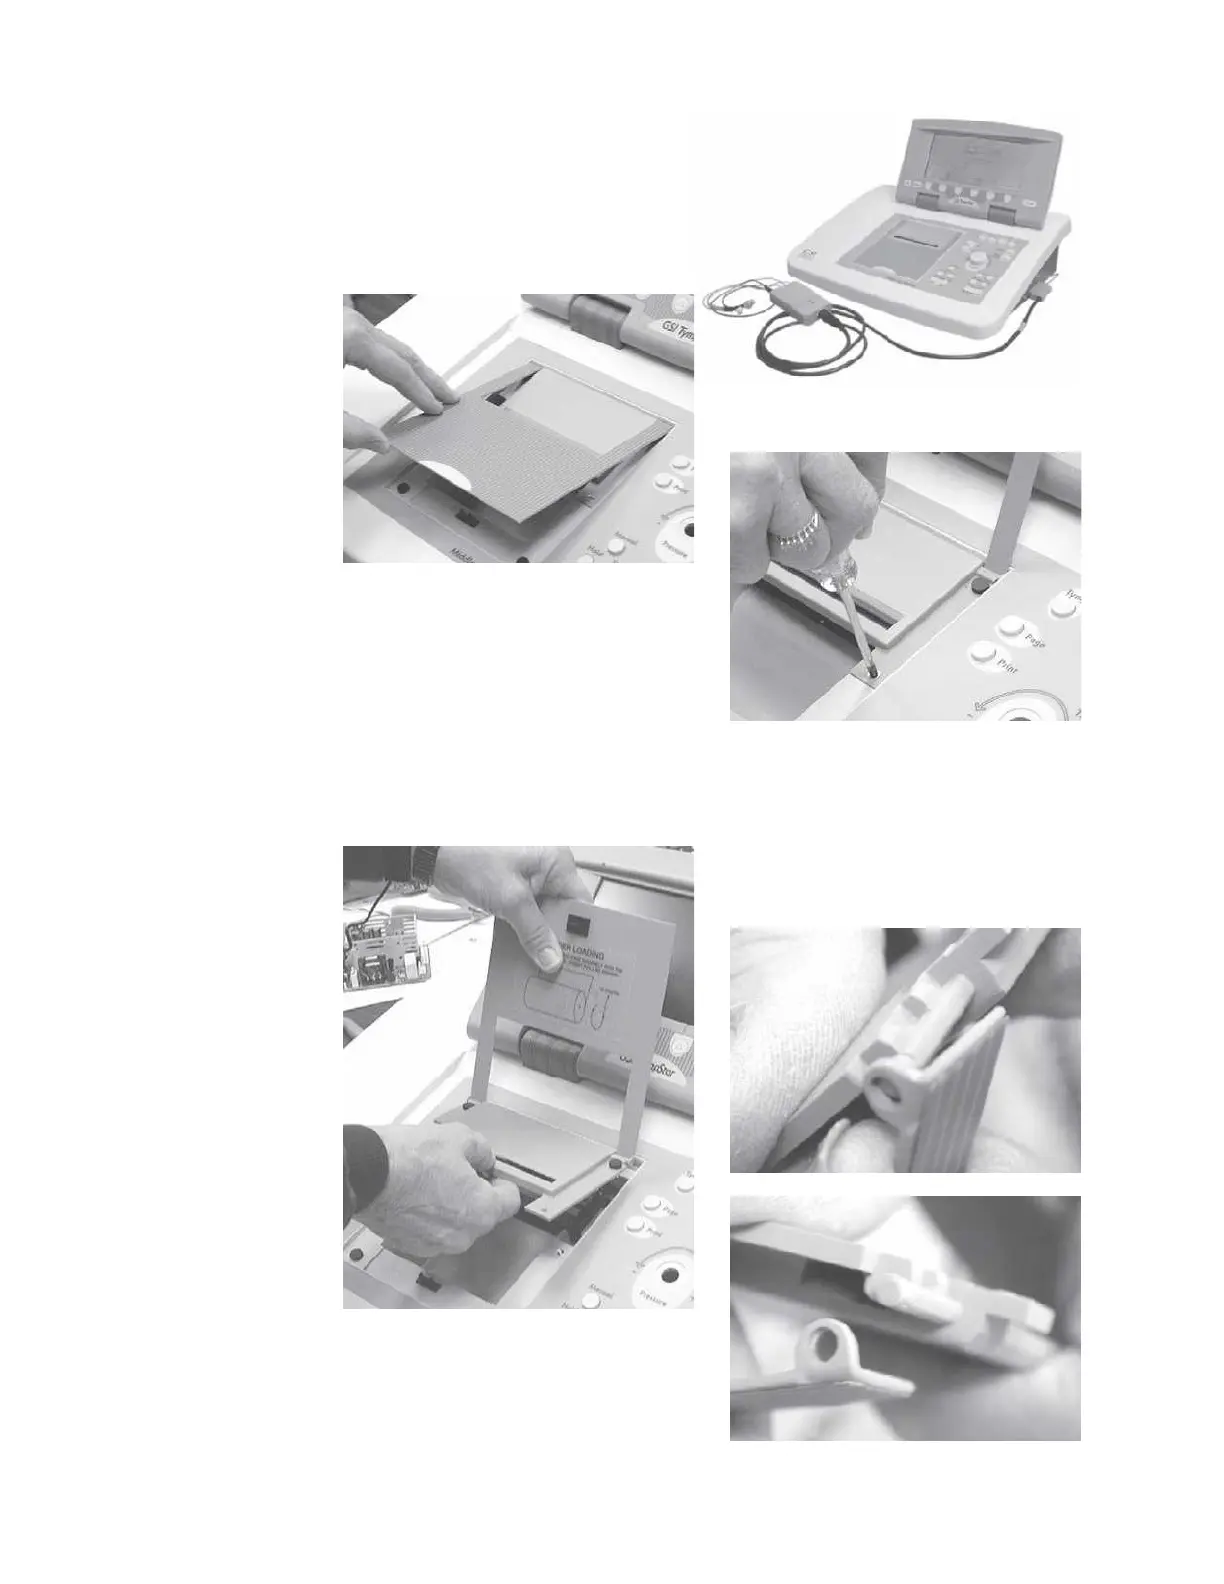
Remove the printer board as described earlier. Rotate the
LCD up and back away from the front panel.
Step 2
Open the printer door.
Step 3
Remove the two screws (left and
right) that secure the printer
doorframe to the cover.
Step 4
Remove the printer doorframe by holding the top and bottom together as the
assembly is lifted up and toward the front of the instrument. The two pieces of
the assembly can easily be separated
at the hinge by gently bending the top
piece.
Grason-Stadler
Removing the
printer
5 - 12

Table of Contents

Questions and Answers:

Question and Answer IconNeed help?

Do you have a question about the GSi TYMPSTAR Series and is the answer not in the manual?

GSi TYMPSTAR Series Specifications

General IconGeneral
BrandGSi
ModelTYMPSTAR Series
CategoryMeasuring Instruments
LanguageEnglish

Related product manuals