Design Shaping
Design shaping button
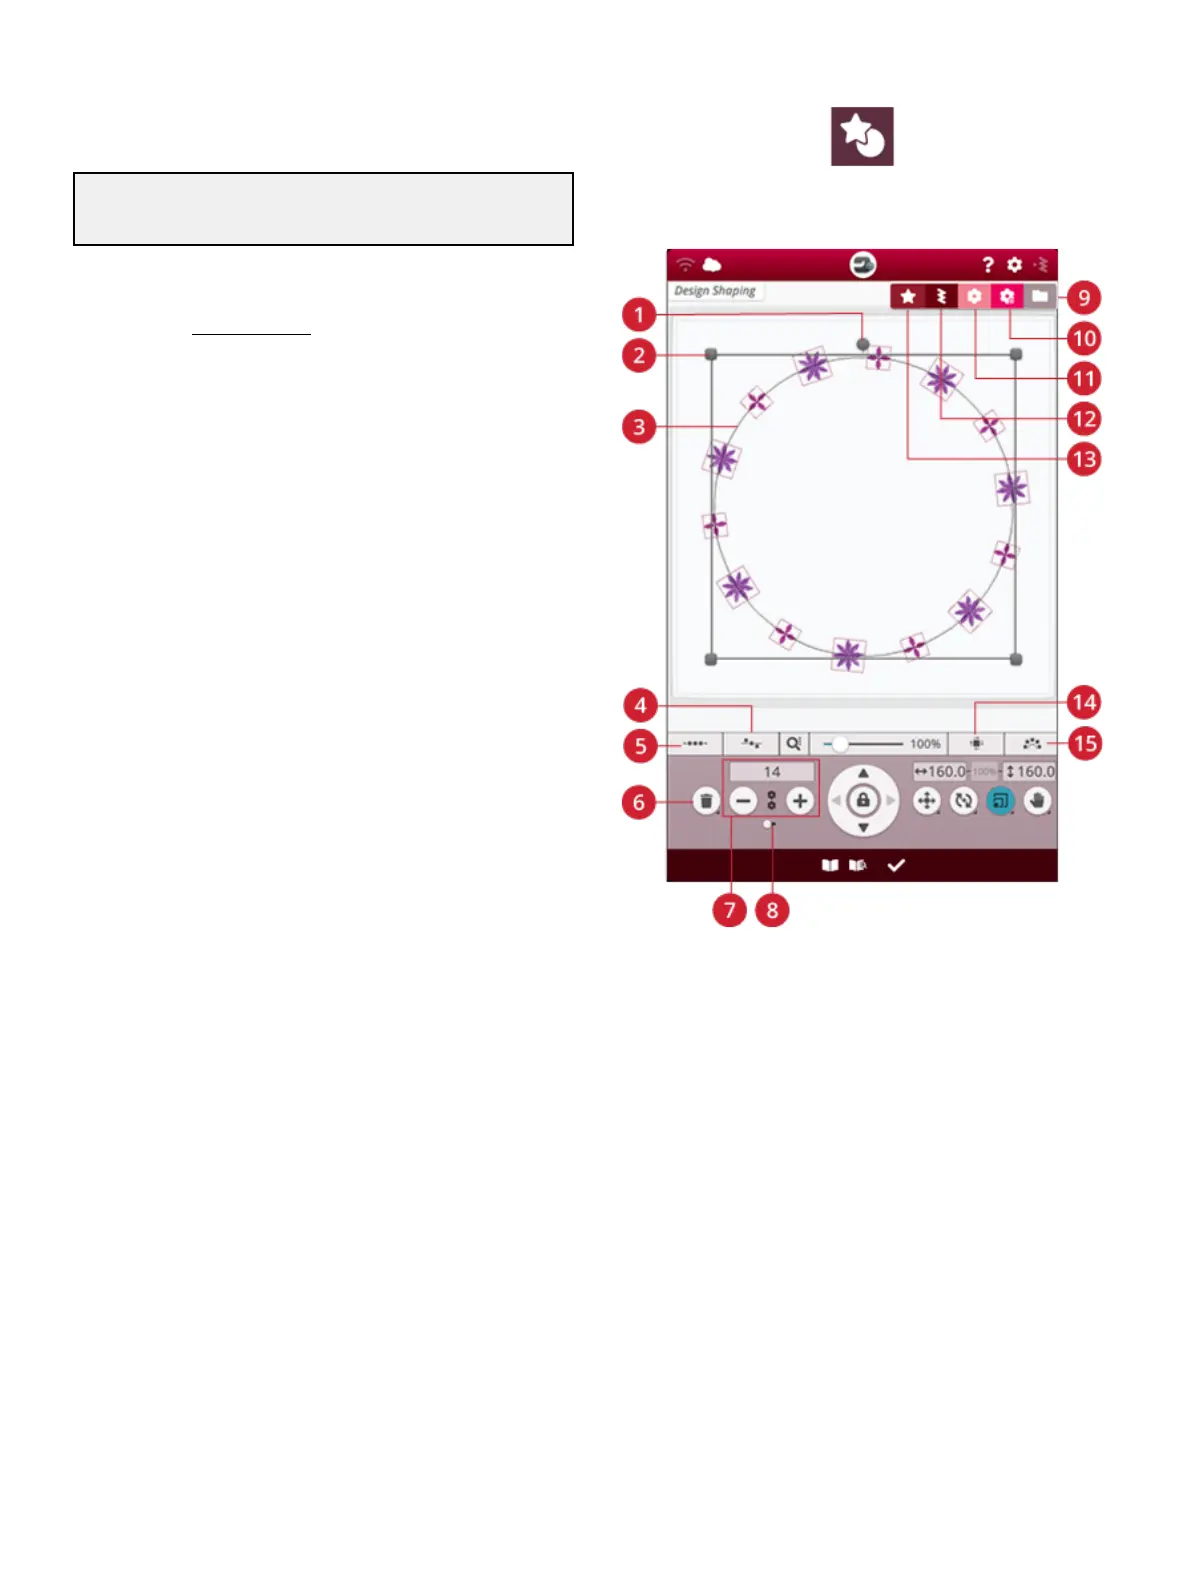
1. Rotate handle
2. Scale handles
3. Shape line
4. Select line positioning
5. Select spacing
6. Delete last/delete all
7. Set number of designs
8. Combination repeat/
duplicate last design
9. File manager
10. mySewnet™ library
11. Design menu
12. Stitch menu
13. Shape menu
14. Select side positioning
15. Fixed design angle
Design shaping is a unique way to take your creativity to
another level. Use your beautiful stitch programs or
embroidery designs to form one of several shapes.
Tip: Use your JoyOS ADVISOR™ feature to locate projects for
design shaping instructions.
Design Shaping Exercise
1. Touch the design shaping button in embroidery edit to
start a new shape.
2. Touch the shape menu and select one of the shapes in
the list. A shape line will be shown on the screen. The
small black arrow in the shape menu indicates the
direction your designs will follow when adding them onto
the shape line.
3. Add designs or stitches onto the shape from the design
menu, stitch menu or from file manager. Touch & hold a
design or stitch for a few seconds to load and then drag it
to the shape line without releasing your finger. Release
your finger to place the design or stitch onto the shape
line.
4. To change the size of the shape, touch one of the scale
handles in the corners of the design selection frame and
drag your finger on the screen. The touch function scale
will automatically be selected. To rotate your shape, touch
and rotate the rotate handle on the multi-touch screen.
The touch function rotate will automatically be selected.
122 8 Embroidery




 To Next Page