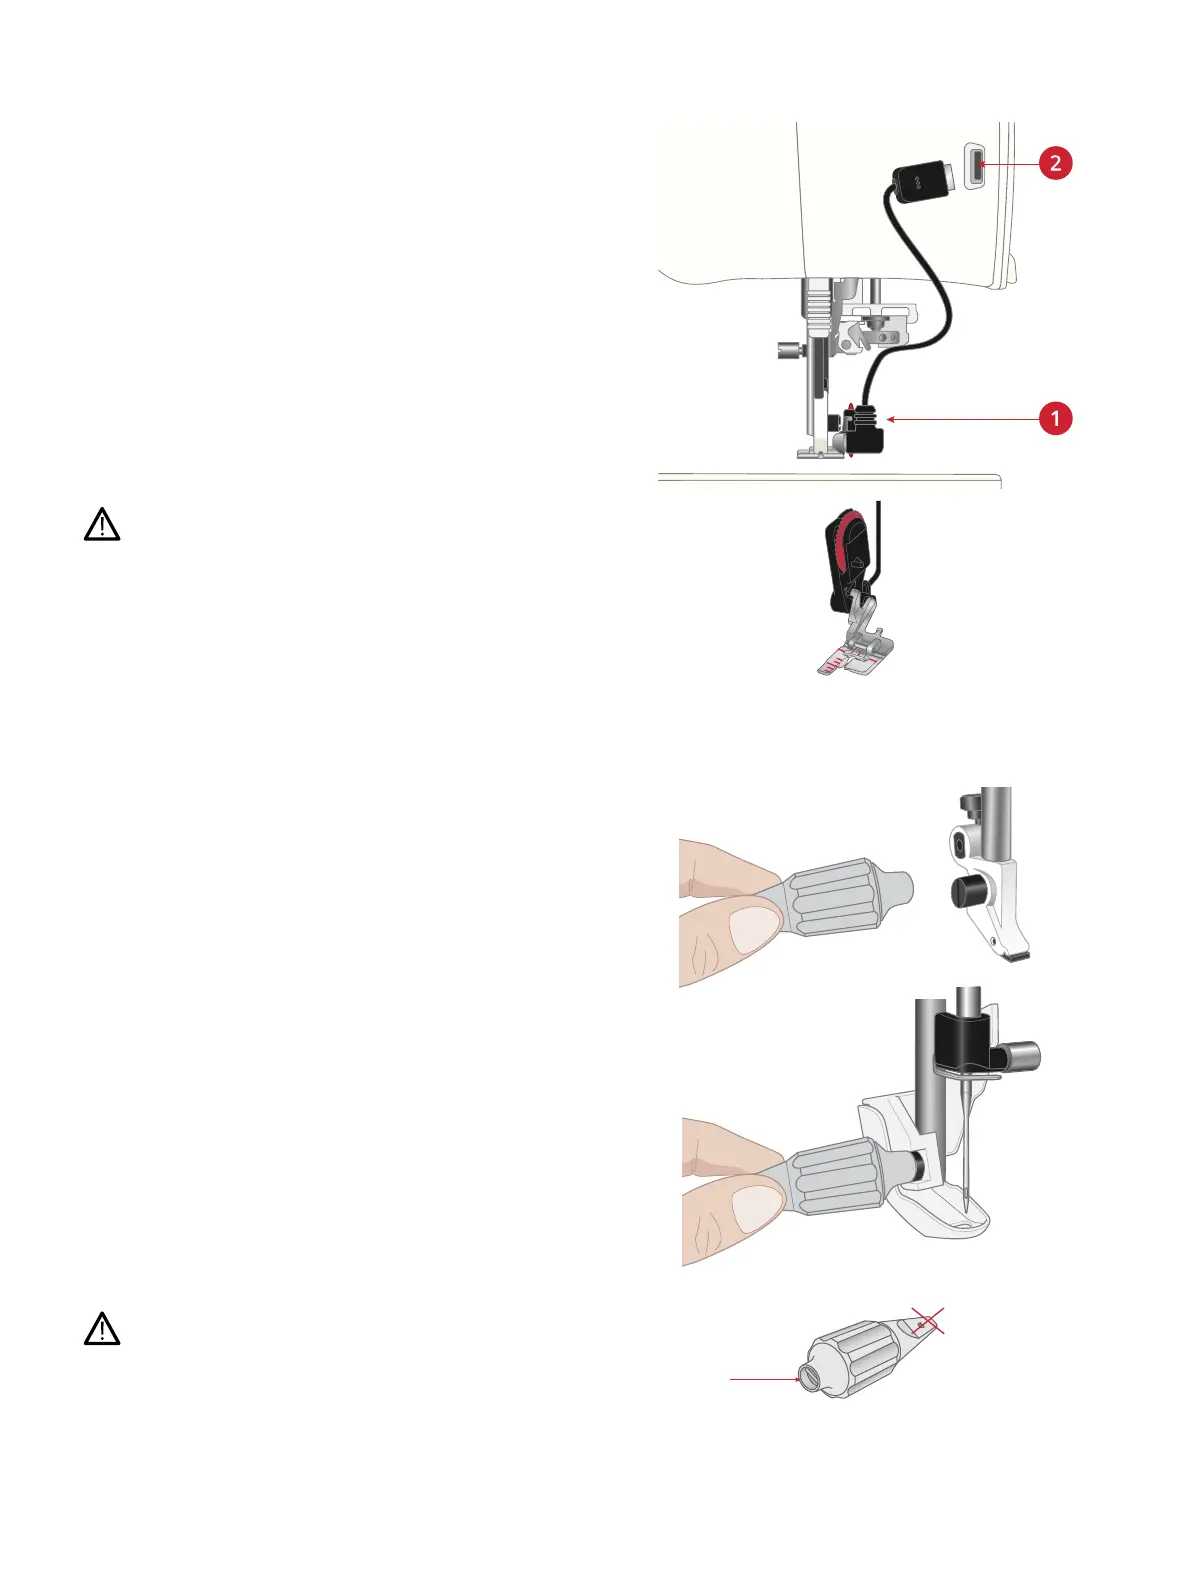
Attaching the Sensor One-Step
Buttonhole Foot
1. Snap on the Sensor One-Step Buttonhole Foot.
2. Insert the plug, with the three dots facing out, into the
accessory socket at the back of the sewing head.
Before using the automatic needle threader with the Sensor
One-Step Buttonhole Foot attached, lift the wheel of the foot
up to avoid damage to the needle threader and foot.
Attaching the Sensor Q-Foot
1. Using the universal tool, remove the presser foot ankle.
Note: Do not remove the presser foot ankle screw from the universal
tool after unscrewing it. The universal tool is magnetic and will hold
the screw, making it easy to replace and less likely to be lost.
2. Position the Sensor Q-Foot onto the presser foot bar
from behind, lining the hole on the foot up with the hole
on the presser foot bar. Lower the needle into the
opening of the foot by turning the handwheel towards
you. The arm of the presser foot should rest on top of
the needle screw. Insert and tighten the presser foot ankle
screw using the universal tool.
Use the rounded end of the universal tool to loosen and
tighten the screw. The universal tool is magnetic and will hold
the screw, making it easy to replace and less likely to be lost.
48 2 Preparations