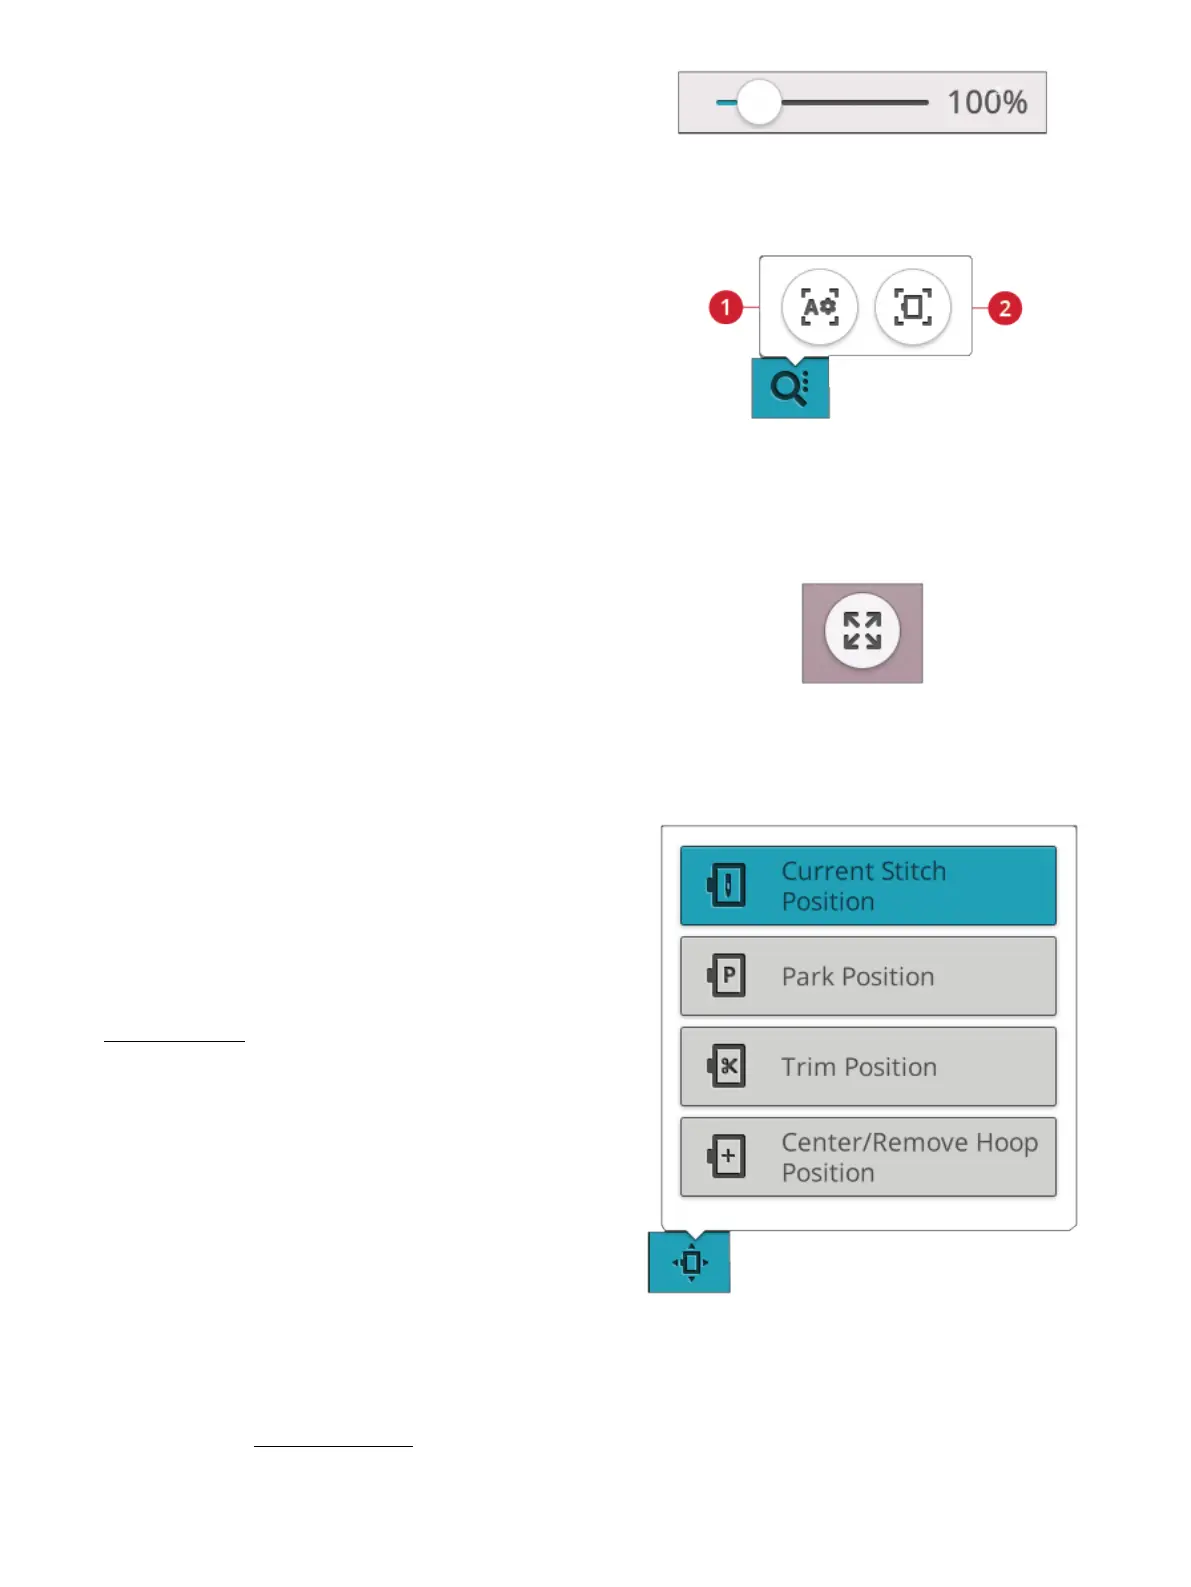
Alternatively use the zoom slider to zoom in and out in the
embroidery area. Move the slider to the right to zoom in and
to the left to zoom out. You will see how much you have
zoomed to the right of the slider.
Zoom Options
1. Zoom to all
2. Zoom to hoop
Touch zoom options to choose between zoom to all or zoom
to hoop. Zoom to all will show all the design(s) in the
embroidery combination. Zoom to hoop will zoom to show
the whole hoop on the screen.
Corner Check
Use corner check to trace the four corners of the design to
see where the design will be stitched out on the fabric.
Each touch on the corner check button will move the hoop
to the following positions and in the following order: upper
left, upper right, lower right, lower left and then go back to
the current stitch position.
Hoop Position Options
Use the hoop position options to move the embroidery arm
to different positions.
Current Stitch Position
When you want to return to the current stitch position and
continue embroidering after you have changed the hoop
position, touch the current stitch position. You can also press
the start/stop button once to return to the current stitch
position and start the embroidery.
Park Position
Use the park position when you want to move the
embroidery arm out of the way or when you want to pack the
embroidery unit in the carrying bag.
Note: Normally the embroidery unit is in park position when in
embroidery edit or sewing mode.
Trim Position
Trim position will move the hoop towards you, making it
easier to trim threads and fabric for specialty techniques.
Tip: You can also use the needle up/down button on your machine as a
shortcut to move the hoop to trim position.
9 Embroidery Stitch Out 133