EasyManua.ls Logo

Husqvarna VIKING Designer RUBY 90 - User Manual

Husqvarna VIKING Designer RUBY 90
192 pages
Print Icon
To Next Page IconTo Next Page
Loading...
RUBY 90
User’s Guide
KEEPING THE WORLD SEWING™

Table of Contents

Questions and Answers

  • J
    jessica69Sep 23, 2025
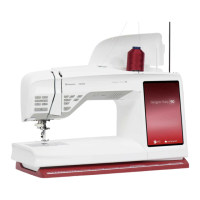
    What to do if I am using a specialty thread on my Husqvarna VIKING Designer RUBY 90 and the needle is not threaded?
    • S
      Stephanie OlsonSep 23, 2025
      If you're using a specialty thread on your Husqvarna sewing machine and the needle isn't threading, try using the automatic needle threader again or thread the needle manually. Specialty threads may not be caught correctly by the hook on the automatic needle threader.
  • B
    bradleymeganAug 25, 2025
    Why is my Husqvarna VIKING Designer RUBY 90 needle thread breaking?
    • K
      Kristi DelacruzAug 25, 2025
      If the needle thread breaks on your Husqvarna sewing machine, try the following: * Insert the needle correctly. * Use needle system 130/705 H. * Insert a new needle. * Remove the thread completely and rethread the machine. * Place the large spool holder with the flat side up under the spool on the spool pin, or for larger spools use a thread net over the spool. * Change the needle to the proper size for the thread. * Change to a new high-quality thread purchased from an authorized HUSQVARNA® VIKING® retailer. * Attach a spool cap slightly larger than the actual thread spool. * Try a different spool pin position (vertical or horizontal). * Change the needle plate. * Lower the thread tension in small increments until the problem is solved.
  • C
    Catherine AcevedoAug 25, 2025
    What to do if my Husqvarna VIKING Designer RUBY 90 Sewing Machine does not feed fabric?
    • R
      Russell VincentAug 26, 2025
      If your Husqvarna sewing machine isn't feeding fabric, here's what you can do: * Remove the thread completely and rethread the machine. * Remove the needle plate and clean the feed teeth with the brush. * Turn off free motion setting in sewing mode. * Ensure the feed teeth are not set to the down position in the settings menu. * Attach the correct presser foot.
  • D
    Derek ThompsonAug 27, 2025
    Why is my Husqvarna VIKING Designer RUBY 90 seam having uneven stitches?
    • S
      Sharon RubioAug 27, 2025
      If your Husqvarna sewing machine seam has uneven stitches, try the following: * Check needle thread tension. Remove the thread completely and rethread the machine. * Change the thread. * Check bobbin winding. * Insert a proper needle correctly. Use a needle suitable for selected fabric.
  • W
    Wayne RodriguezAug 27, 2025
    What to do if my Husqvarna VIKING Designer RUBY 90 Sewing Machine is not embroidering?
    • B
      brandybarrettAug 27, 2025
      If your Husqvarna sewing machine will not embroider, ensure that: * The embroidery unit is properly attached into the socket. * The correct hoop is properly attached.
  • M
    Michelle ConnerSep 14, 2025
    What to do if my Husqvarna VIKING Designer RUBY 90 Sewing Machine displays a pop-up message to gently remove any thread stuck in the automatic needle threader?
    • M
      Matthew HickmanSep 14, 2025
      If your Husqvarna sewing machine displays a pop-up message to gently remove any thread that has been stuck in the automatic needle threader or needle eye, remove the thread carefully so as not to damage the small hook that runs through the needle eye. Once the thread is removed, touch OK. This message appears if using thread that is too thick for the needle.
  • T
    Tamara KaiserSep 12, 2025
    What to do if I get a pop-up message that the calibration of the automatic needle threader has failed on my Husqvarna Sewing Machine?
    • R
      Richard ThomasSep 12, 2025
      If you see a pop-up message on your Husqvarna sewing machine indicating that the calibration of the automatic needle threader has failed, remove anything that may be blocking the needle threader and touch OK.
  • S
    Shaun CunninghamSep 13, 2025
    What to do if my Husqvarna VIKING Designer RUBY 90 Sewing Machine shows a pop-up message that the automatic needle threader seems to be blocked?
    • M
      Margaret BaileySep 13, 2025
      If your Husqvarna sewing machine displays a pop-up message saying the automatic needle threader seems to be blocked, touch OK to go to manual cleaning. A new pop-up message with further instructions will appear. If you cannot identify the problem or are unable to remove the thread, touch cancel. This may occur if using thread that is too thick for the needle.
  • D
    Dana HooverSep 4, 2025
    What to do if my Husqvarna VIKING Designer RUBY 90 needle breaks?
    • D
      Dr. Allison SmithSep 5, 2025
      If the needle breaks on your Husqvarna sewing machine, insert the needle correctly as described and use a needle suitable for the selected fabric.
  • A
    Andrew LongSep 2, 2025
    How to troubleshoot puckered embroidery design on Husqvarna Sewing Machine?
    • D
      Diana TaylorSep 2, 2025
      To address a puckered embroidery design on your Husqvarna sewing machine, ensure you are using the proper stabilizer for your technique or fabric type.

Summary

Introduction

Welcome and Navigation

Introduction to the user guide, finding topics, and navigating through its content.

Machine Overview

Identification of the machine's main parts and components from various views.

Key Machine Components

Details on the needle area, left side, and right side of the machine.

Accessory Tray and Embroidery Unit

Information on accessory storage and the embroidery unit.

Function Buttons and Controls

Explanation of the various function buttons and their operations.

Accessories and Presser Feet

Overview of included accessories, hoops, and different presser feet.

Stitch Overview

General overview of available stitches, including utility stitches.

Touch Screen Navigation

How to use touch screen gestures and the smart toolbox feature.

Preparations

Machine Unpacking and Setup

Steps for safely unpacking the machine and connecting power and foot control.

Connectivity: WiFi and mySewnet Services

Initial setup for WiFi, mySewnet™ Cloud, and related services.

Basic Machine Functions and Features

Explanation of LED lights, free arm, and manual thread cutters.

Threading and Bobbin Winding

Procedures for threading the machine and winding bobbins.

Needles and Threading Guidance

Information about needles, combinations, and threading procedures.

Embroidery Setup

Introduction to embroidery preparations, unit, hoops, and designs.

Hooping and Attaching Embroidery Unit

Procedures for hooping fabric and attaching the embroidery unit.

The Multi-Touch Screen

Common Screen Functions

Explanation of frequently used functions like OK, Cancel, and Edit.

Topbar Navigation

Description of the navigation bar including WiFi and mySewnet™ buttons.

mySewnet Services Access

Access to mySewnet™ features, firmware updates, and home screen.

Screen Interaction and Settings

Using quick help, accessing settings, and toggling modes.

WiFi & mySewnet Services

WiFi Connectivity Setup

Steps to connect to WiFi networks and manage connections.

Firmware Updates

Methods for updating machine firmware via WiFi or USB.

mySewnet Services Overview

Introduction to mySewnet™ services, account, cloud, and software.

Home Screen

Home Screen Overview and Features

General introduction to the home screen interface and its main features.

User Profile and Welcome Center

Information related to user accounts, machine nickname, and machine tips.

mySewnet Blog and Filtering

Access to the mySewnet™ blog and options to filter content.

Common Home Screen Functions

Using search, starting new projects, continuing, and loading smart saves.

Project Viewer and Animations

Displays project details, instructions, and how to play animations.

JoyOS ADVISOR System

Guide to the SEWING ADVISOR™, Fabric Selection, and Technique Groups.

Quilt and Embroidery Advisor Overviews

Guides for QUILT ADVISOR™ and EMBROIDERY ADVISOR™ features.

Knowledge Center Content

Access to stabilizer guides, quick start guides, and instructions.

Sewing

Getting Started to Sew

Initial steps for beginning to sew on the machine.

Sewing Mode and Stitch Selection

Overview of the sewing mode and how to choose stitches.

Stitch Adjustments and Settings Management

How to modify stitch parameters, save settings, and balance stitches.

Free Motion Sewing Options

Settings for free motion sewing techniques like spring action and floating feet.

Basic Sewing Techniques Explained

Overview of fundamental sewing methods like seams, overcast, and basting.

Buttonhole Creation Methods

How to sew manual, automatic, and corded buttonholes.

Specialty Stitch Categories Overview

Introduction to menus for dimensional, theme, embellished, and tapering stitches.

Sewing Pop-up Messages

Explanations of common messages encountered during sewing.

Embroidery

Embroidery Edit Overview

Explanation of the embroidery editing interface and its functions.

Workspace Customization and File Loading

Setting grid/background colors and loading embroidery files.

Design Selection and Manipulation Tools

How to select, arrange, group, and edit designs.

Design Positioning and Alignment

Precisely placing designs on fabric using wizards and tools.

Saving, Sending, and Editing Designs

Procedures for saving, transferring, and modifying embroidery designs.

Thread Color Editing

How to change thread colors within embroidery designs.

Programming Embroidery Text

Creating text designs for embroidery, including shaping and spacing.

Design Shaping and Appliqué Creation

Creating custom designs using shapes and applying appliqué techniques.

Design Resizing and Important Information

Adjusting design size and key considerations for resizing.

Embroidery Edit Pop-up Messages

Explanations of common messages encountered during embroidery editing.

Embroidery Stitch Out

Embroidery Stitch Out Overview

Explanation of the embroidery stitch out interface and its functions.

Embroidery Setup and Welcome Screen

Initial configuration before starting embroidery: hoop, plate, basting, foot.

deLuxe Stitch System and Thread Control

Explanation of the deLuxe™ system for embroidery thread control.

Color Block Management and View Options

Managing color information and adjusting the view of the embroidery.

Hoop Movement and Stitch Navigation

Controls for hoop positioning and navigating through embroidery stitches.

Design Positioning and Alignment Tools

Precisely placing designs on fabric using wizards and touch controls.

Automatic Save Features

Saving embroidery progress automatically via Smart Save and Auto Save.

Thread Color Information and Navigation

Displaying thread colors and moving between color blocks.

Time Estimates and Color Block Optimization

Managing time estimates and optimizing color blocks for stitching.

Stitching Process Aids and Messages

Features like basting options and explanations of stitch out messages.

Program

Program Overview

Introduction to creating and managing stitch programs.

Creating and Editing Stitch Programs

Step-by-step guides for creating new programs and editing existing ones.

Editing Program Elements and Commands

Tools for inserting, adjusting, deleting, and duplicating program components.

Saving and Executing Stitch Programs

Procedures for saving and running created stitch programs.

Stitch Program Pop-Up Messages

Explanations of messages related to stitch program creation and limits.

Settings

Temporary Sewing Settings

Adjusting sewing parameters temporarily for a project.

Automatic Thread Cutter and FIX Settings

Settings for automatic thread cutting and stitch tying.

Stitch Limiting Options and Safety Features

Features to prevent needle breakage and limit stitch width.

Twin Needle and Feed Teeth Options

Settings for twin needles and feed teeth movement.

Temporary Embroidery Settings

Adjusting embroidery parameters temporarily for a project.

Default Sewing and Embroidery Settings

Machine's default configurations for sewing and embroidery.

Machine Settings Management

General machine preferences: language, audio, display, and clock.

Connectivity and Account Settings

Managing WiFi connections and mySewnet™ account settings.

File Manager

File Manager Overview

Introduction to the file management system for designs, fonts, and stitches.

File Formats and Browsing

Supported file types and how to navigate the file manager.

File Operations and Organization

Procedures for opening, selecting, copying, moving, and deleting files.

Folder Management Tools

Navigating and organizing folders within the file manager.

File Manager Views and Filters

Switching between file views and filtering files by type.

File Manager Pop-up Messages

Explanations of alerts and messages encountered in the file manager.

Maintenance

Cleaning Procedures

How to clean the machine's exterior and internal areas.

Bobbin Area and Needle Plate Cleaning

Detailed cleaning instructions for the bobbin area and needle plate.

Replacing the Needle Plate

How to correctly reinstall the needle plate.

Troubleshooting Common Issues

Solutions for general machine problems and specific component failures.

Stitching and Feed Problem Troubleshooting

Diagnosing and fixing skipped stitches and feed irregularities.

Threading and Bobbin Problem Troubleshooting

Solutions for thread breaks, bobbin issues, and seam problems.

Embroidery Design Problem Troubleshooting

Diagnosing issues with distorted or puckered embroidery designs.

Connectivity Troubleshooting

Resolving WiFi and network connection problems.

Machine Synchronization and Service Information

Troubleshooting cloud sync issues and details on machine servicing.

Technical Specifications

Detailed technical data of the machine, including dimensions and power.

IMPORTANT

IMPORTANT SAFETY INSTRUCTIONS

Critical safety guidelines for machine operation and usage.

Electrical Shock Hazard Warnings

Specific warnings related to electric shock risks during operation.

Burn, Fire, and Injury Hazard Warnings

Warnings about physical safety risks like burns, fire, and injury.

Save These Instructions

Instruction to retain safety information for future reference.

Regional Safety Guidelines

Safety advice specific to European and other regions.

Servicing Double Insulated Products

Guidelines for servicing the machine's double insulation system.

Licenses

Information regarding software licenses and terms.

INTELLECTUAL PROPERTY

Husqvarna VIKING Designer RUBY 90 Specifications

General IconGeneral
TypeComputerized Sewing and Embroidery Machine
DisplayColor Touch Screen
Maximum Stitch Width9 mm
Maximum Stitch Length5 mm
Built-in MemoryYes
USB ConnectivityYes
Bobbin WindingAutomatic
Needle ThreaderAutomatic
LightingLED
Automatic Thread CutterYes
Speed ControlYes
Presser FeetIncluded
Buttonhole StylesMultiple

Related product manuals