USER MANUAL
INTEL® FALCON™ 8+ UAS
© 2018 Intel Corporation. All rights reserved 187
Figure 5.3: Spherical Panorama
To create images for a spherical panorama, the Intel® Falcon™ 8+ UAV will keep its
current position, and do multiple 360° turns around the yaw axis. The camera tilt
angle is set to point downwards during the first turn. With every subsequent turn, the
camera will be tilted upwards a bit further, until it will point fully upwards during the
last turn. Follow these steps to do a spherical panorama:
Do all necessary camera adjustments, take off and fly the Intel® Falcon™ 8+ UAV to
the desired position.
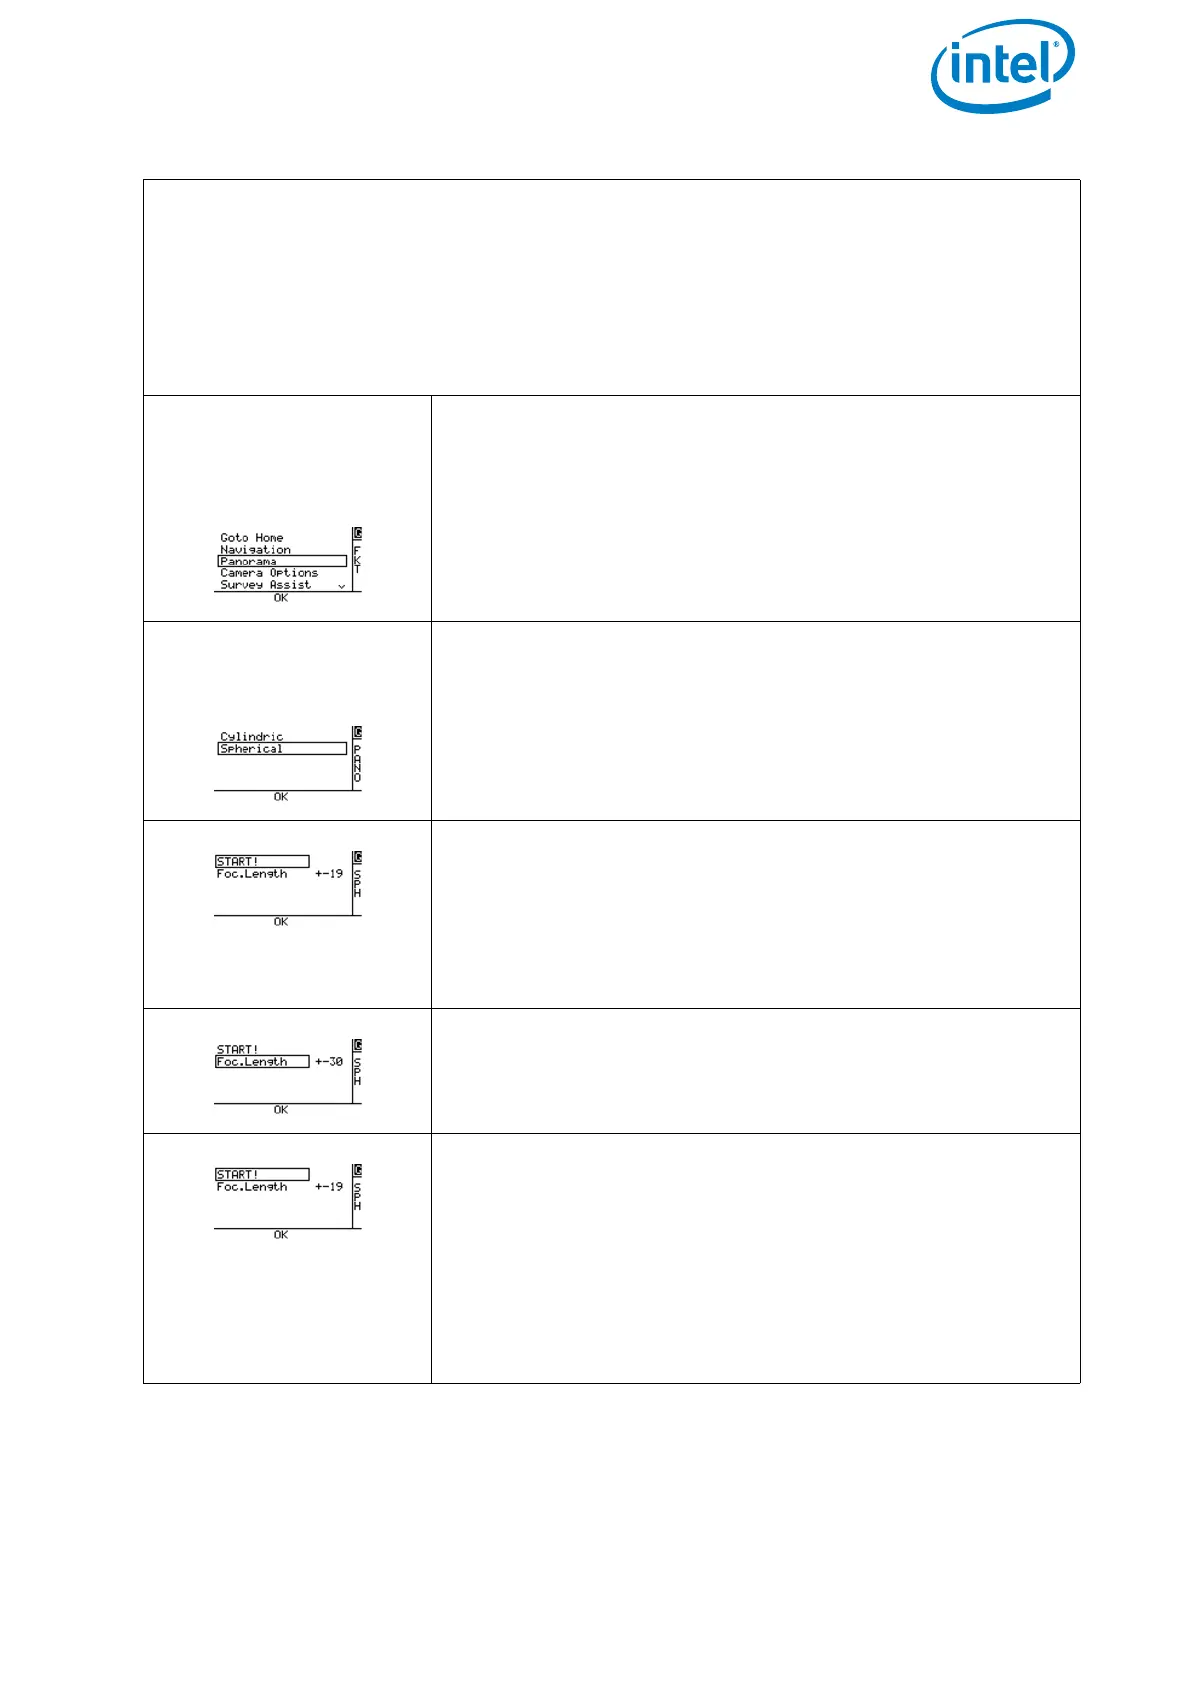
Push ENT on the Main
Screen of the Status
Display. The shown
screen is opened:
Selecting
Panorama
and pushing ENT opens
the following screen:
Selecting Spherical and pushing ENT opens the next
screen.
There are two presets available for focal lengths of 19
mm and 30 mm (referring to APS-C sized sensors, equals
approx. 28 mm and 45 mm referring to full frame). Use
the arrow RIGHT button to activate
Foc.Length and
confirm by pushing ENT. The field behind Foc.Length
is highlighted.
Use the arrow RIGHT/LEFT button to change the
focal length. Confirm by pushing ENT.
Use the arrow LEFT button to activate START! and con-
firm by pushing ENT.
The camera will be tilted downwards and the Falcon will
start doing multiple 360° turns while slowly tilting the
camera further upwards, until the spherical panorama is
completed.
The panorama can be stopped anytime by the pilot by
giving a strong control stick command on the CTR.