Hardware Installations and Upgrades
Intel® Entry Server Chassis SC5299-E DP/WS/BRP User Guide 15
Removing and Installing the Processor Air Duct
Warning: Always operate your server chassis with the processor air duct in place. This air duct is
required for proper airflow within the chassis.
Warning: The processor air duct must only be used with active thermal solutions.
When adding or replacing a processor, first remove the processor air duct, and then refer
to your server board User Guide for instructions on processor installation and removal.
Return to these instructions to reinstall the processor air duct after you have installed your
processor and heat sink.
Removing the Processor Air Duct
1. Observe the safety and ESD precautions listed in Appendix A, “Safety Information”.
2. Power down the server and unplug all peripheral devices and the AC power cable.
3. Remove the left side cover. For instructions, see “Removing the Left Side Cover”.
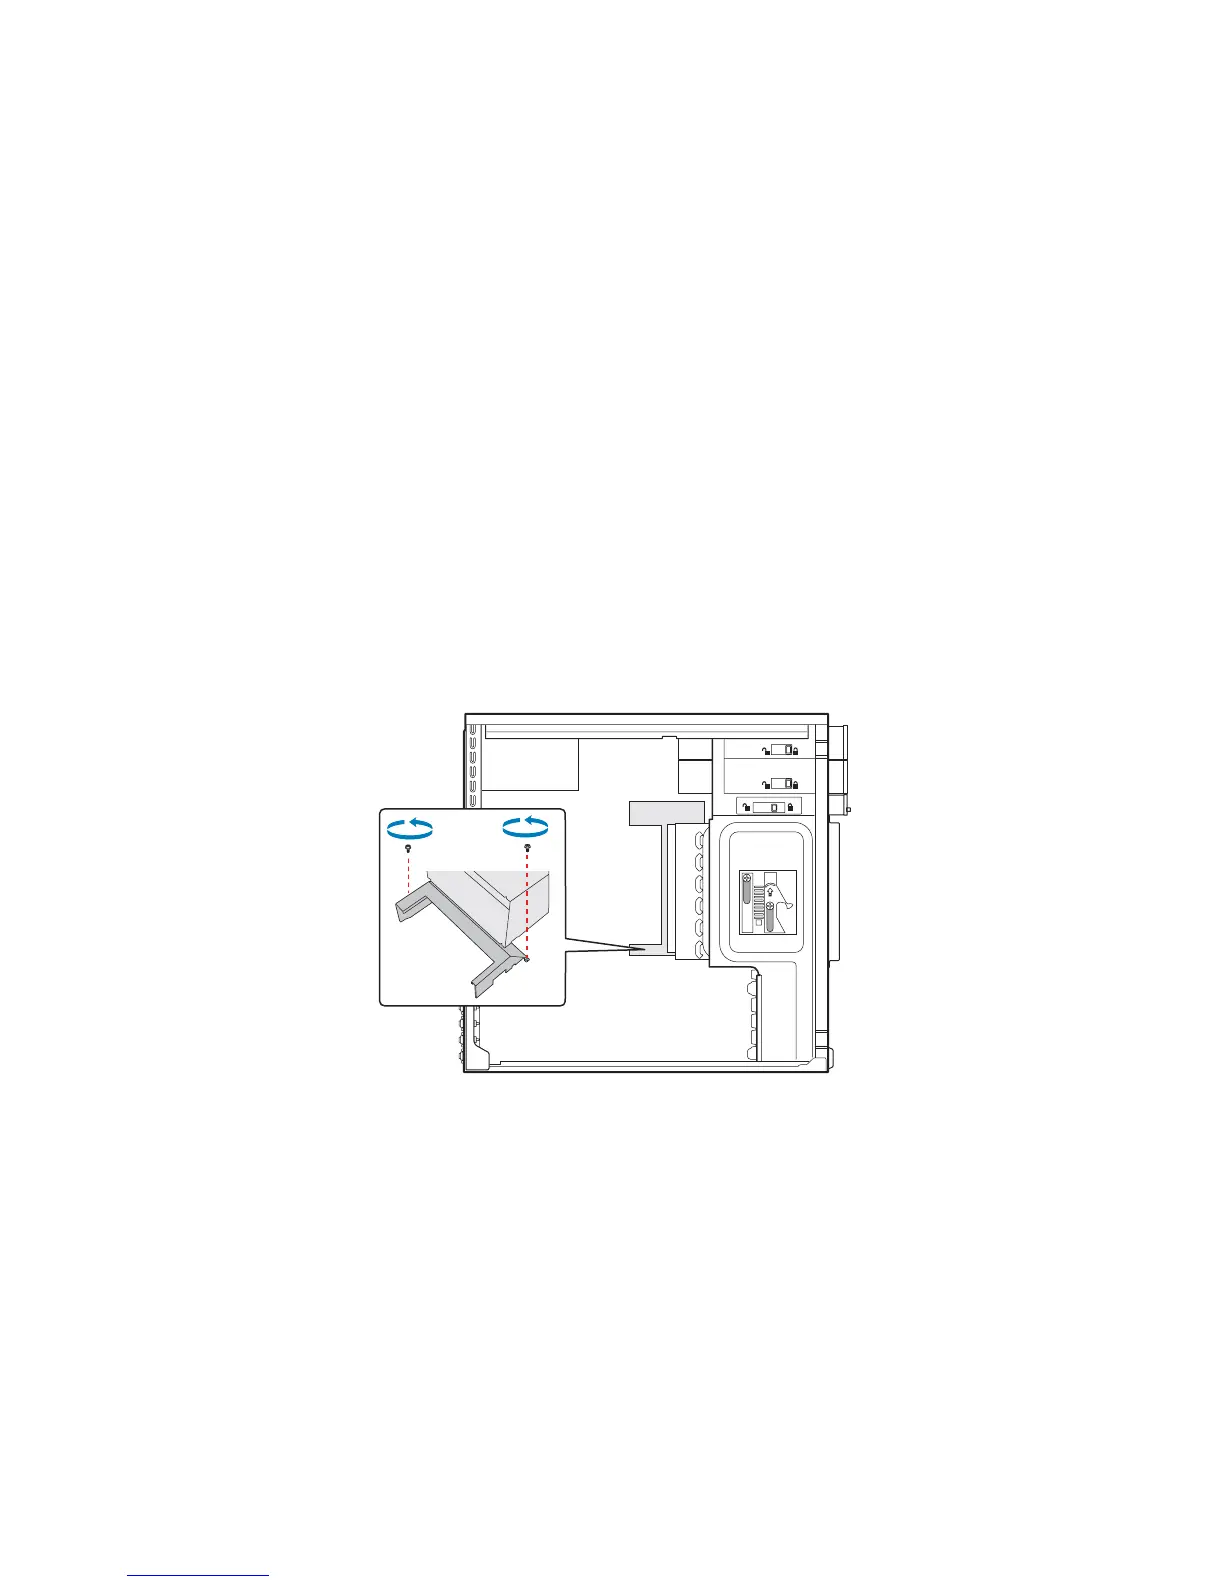
4. Loosen the two mounting screws and remove the processor air duct.
Figure 13. Removing Processor Air Duct
5. Save the screws. You will need them to re-install the processor air duct.
Installing the Processor Air Duct
Warning: DO NOT operate the server chassis without the processor air duct in place. The processor
air duct is required for proper airflow within the chassis.
1. Lower the processor air duct into the chassis and line it up with the two mounting
holes in chassis. Secure the processor air duct to the chassis with two mounting
screws.
TP01136