Hot Swap Drive Cage Upgrade Install Instructions (optional)
58 Intel® Entry Server Chassis SC5299-E DP/WS/BRP User Guide
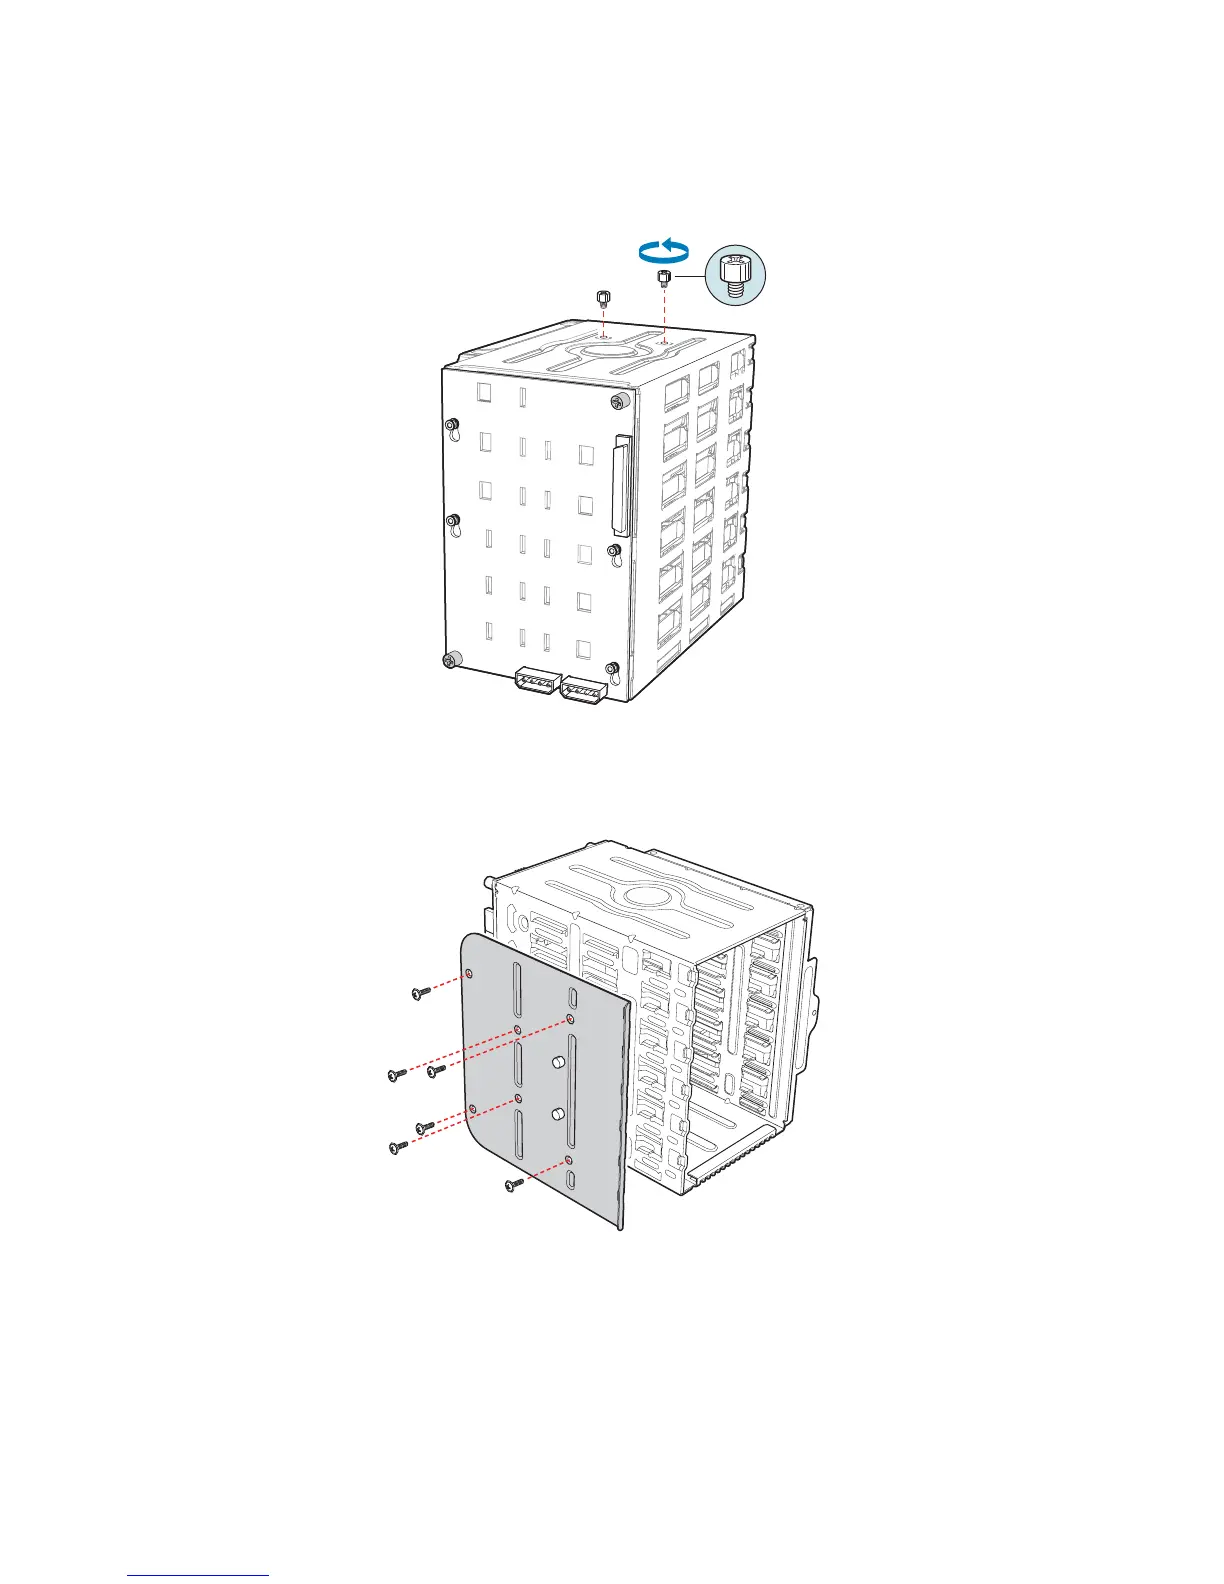
9. Remove the stud screws from the top of the hot swap drive cage.
Figure 73. Removing Stud Screws from Hot Swap Drive Cage
10. Attach the latch plate to the left side of the hot swap drive cage.
Figure 74. Attaching Latch Plate to Hot Swap Drive Cage
TP01135
TP01060