Hardware Installations and Upgrades
36 Intel® Entry Server Chassis SC5299-E DP/WS/BRP User Guide
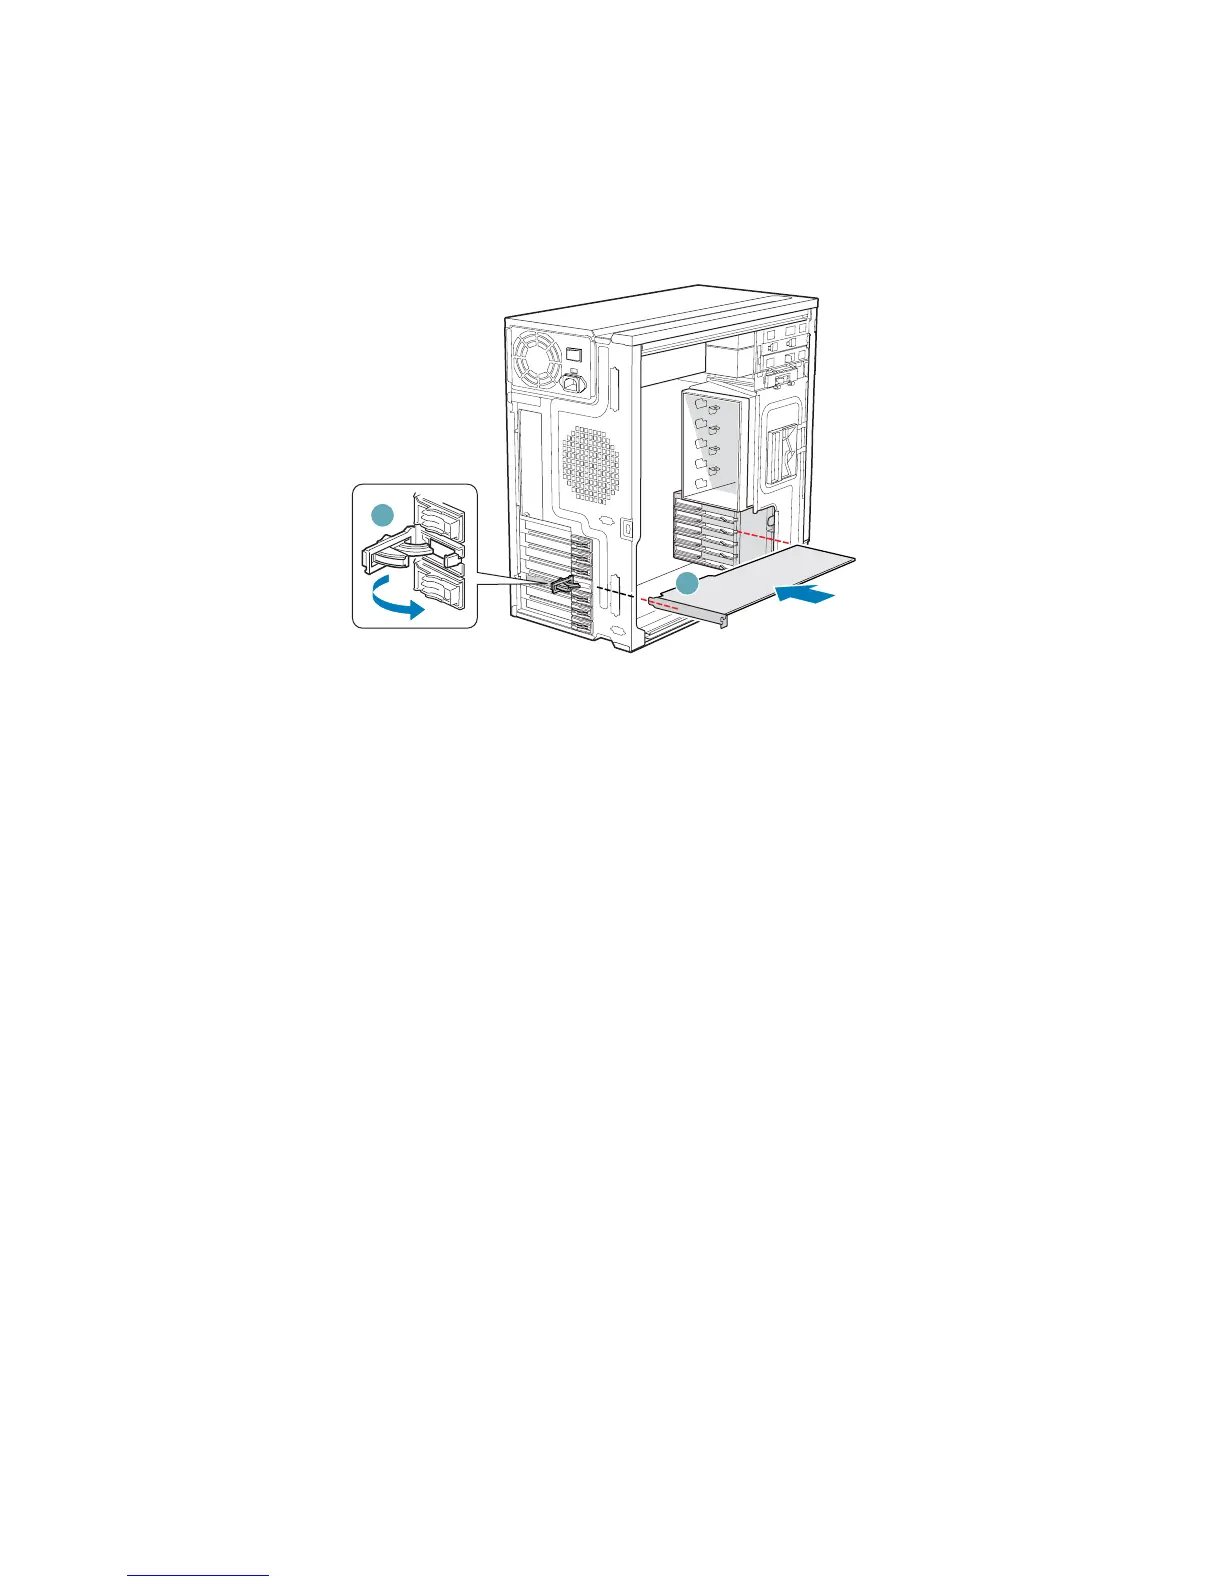
7. Hold the PCI add-in board by its top edge or upper corners. Firmly press the add-in
board into an expanision slot on the server board (see letter “A” in the following
figure). Close the back panel PCI Add-in Card Retention Device (see letter “B”).
Figure 41. Installing PCI Add-in Board
8. Repeat the previous steps until all PCI add-in boards are installed.
9. Attach cables, if necessary.
10. Reinstall the left side cover. For instructions, see “Installing the Left Side Cover”.
11. Reconnect all peripheral devices and the AC power cable. Power up the server.
Removing PCI Add-in Boards
Caution: PCI add-in boards can be extremely sensitive to electric static discharge (ESD) and
always require careful handling. After removing the add-in board from its protective
wrapper or from the server board, place it component side up on a grounded, static-free
surface or conductive foam pad. Do not slide the add-in board over any surface.
1. Observe the safety and ESD precautions listed in Appendix A, “Safety Information”.
2. Power down the server and unplug all peripheral devices and the AC power cable.
3. Remove the left side cover. For instructions, see “Removing the Left Side Cover”.
TP01745
B
A
B