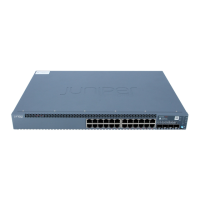
To replace a member switch, use the procedure that matches what you need to
accomplish:
Remove, Repair, and Reinstall the Same Switch on page 115■
■ Remove a Member Switch, Replace with a Different Switch, and Reapply the
Old Configuration on page 115
■ Remove a Member Switch and Make Its Member ID Available for Reassignment
to a Different Switch on page 116
Remove, Repair, and Reinstall the Same Switch
If you need to repair a member switch, you can remove it from the Virtual Chassis
configuration without disrupting network service for the other members. The master
stores the configuration of the member ID so that it can be reapplied when the
member switch (with the same base MAC address) is reconnected.
1. Power off and disconnect the member switch to be repaired.
2. Repair, as necessary.
3. Reconnect and power on the member switch.
Remove a Member Switch, Replace with a Different Switch, and Reapply the Old
Configuration
If you are unable to repair a member switch, you can replace it with a different
member switch and retain the old configuration. The master stores the configuration
of the member that was removed. When you connect a different member switch,
the master assigns a new member ID. But the old configuration is still stored under
the previous member ID of the previous member switch.
NOTE: If you have used a preprovisioned configuration, use the replace command
to change the serial number in the Virtual Chassis configuration file. Substitute the
serial number of the replacement member switch (on the back of the switch) for the
serial number of the member switch that was removed.
1. Power off and disconnect the member switch to be replaced.
2. If the replacement member switch has been previously configured, revert that
switch’s configuration to the factory defaults. See Reverting to the Default Factory
Configuration for the EX-series Switch.
3. Connect and power on the replacement member switch.
4. Note the member ID displayed on the front panel.
5.
Use the request virtual-chassis renumber command to change the member
switch’s current member ID to the member ID that belonged to the member
switch that was removed from the Virtual Chassis configuration).
Remove, Repair, and Reinstall the Same Switch ■ 115
Chapter 5: Replacing Hardware Components

 Loading...


