- Digital Microscope VHX-5000 User’s Manual -
Part Names and Functions
1-7
Before Using the VHX-5000
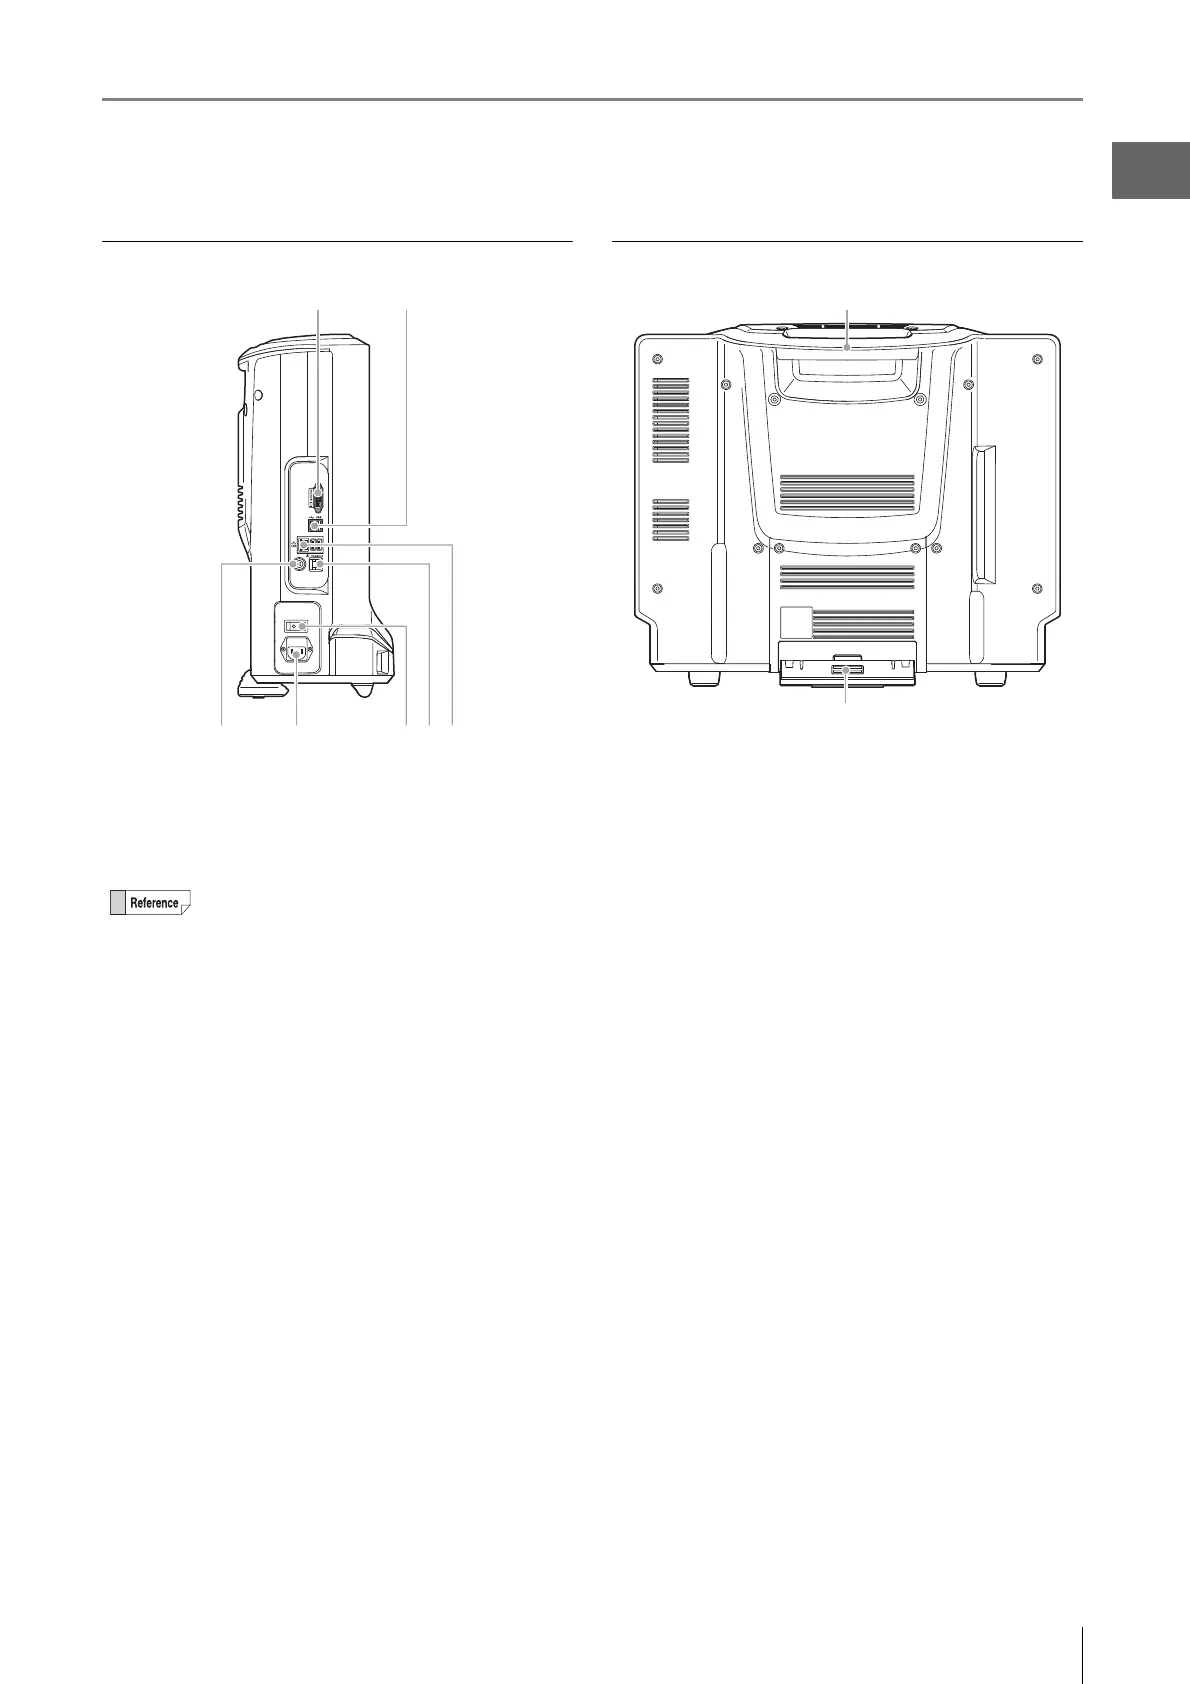
Left view
(1) MONITOR connection port
Connect an external monitor or projector equipped with a
DVI-I input (digital: full HD, 60 Hz/analog: full HD, horizontal
66 kHz, vertical 60 Hz).
(2) USB ports
Connect a keyboard, mouse, and USB memory including
other USB devices.
(3) REMOTE connection port
A switch (such as a foot-activated switch) can be connected
to the capture/pause REMOTE connection port to capture
and pause images.
(4) AC power supply connection port
Connect the AC power cord set. (100 to 240 VAC, 50/60 Hz)
(5) Main power switch
Turn the power on or off. When the main power switch is
turned off, the power switch on the front panel will not work.
This switch is normally left on. Turn this switch off when
moving the microscope to another location or removing the
camera unit.
(6) Console port
Connect the console.
(7) LAN port
Connect a LAN cable when connecting this microscope to a
LAN. (RJ-45 10BASE-T/100BASE-TX/1000BASE-T)
Rear view
(1) Handle
Used when carrying the microscope.
(2) Tilt stand
Used to support the VHX if it is tilted backward.
An analog monitor (full HD, horizontal 66 kHz,
vertical 60 Hz) can also be connected using a
commercially available DVI-I/analog RGB
converter.
(1)
(2)
 Loading...