- Digital Microscope VHX-5000 User’s Manual -
Enhancing Resolution and Increasing Gradation
7-3
Improving Images
1 Adjust the position of the object to be observed
and adjust the focus.
"Adjusting the Brightness and Focus" (Page 3-4)
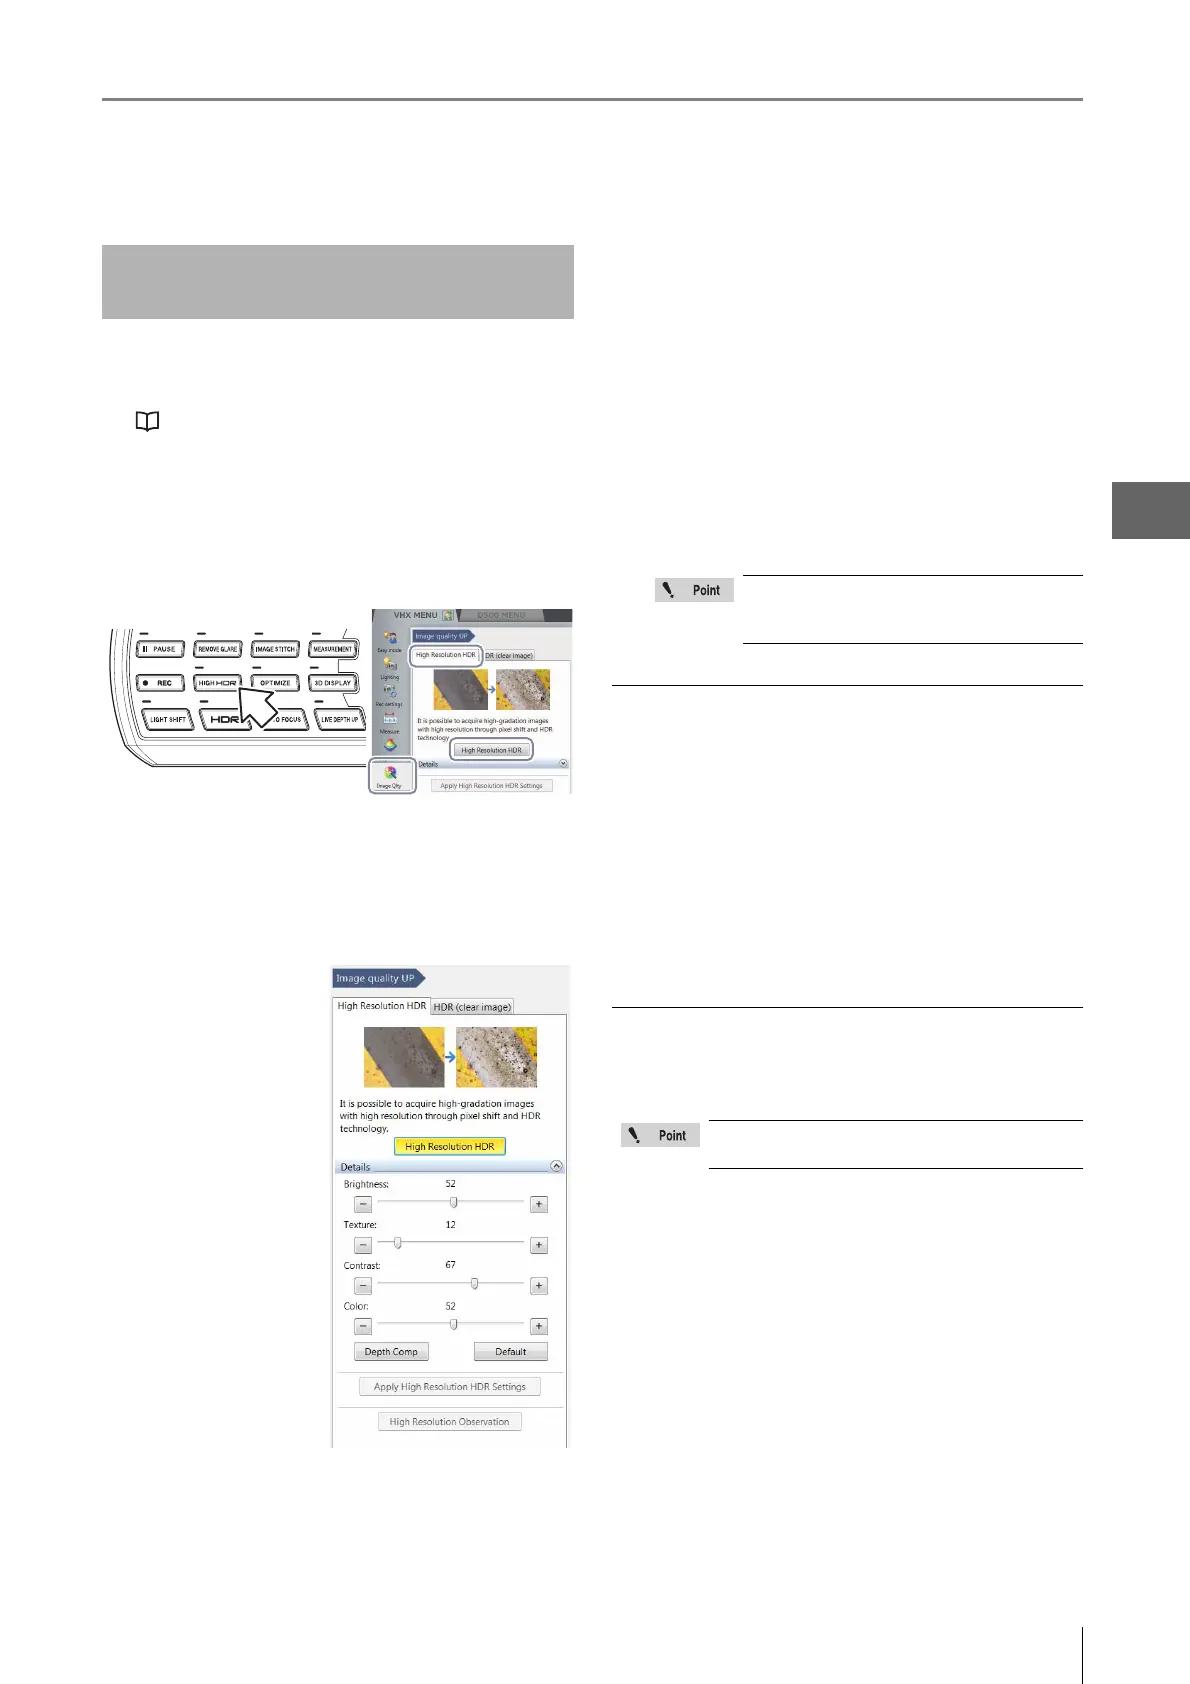
2 Press the [HIGH HDR] button on the console. You
can also go through the VHX MENU, click the
[Image Qlty], select the [High Resolution HDR] tab
and click [High Resolution HDR].
The high resolution HDR image appears in the
observation window and the "Details" menu appears.
3 Drag the sliders left or right as needed to adjust
each item.
Brightness
Adjusts the image
brightness.
Texture
Adjusts the image
texture.
Contrast
Adjusts the contrast of
the image.
Color
Adjusts the color
intensity of the image.
[Depth Comp] button
This produces a "quick
3D" (Page 10-4)
display using the high resolution HDR image.
[Default] button
Clicking the default button returns the settings to the
automatically set values.
[High Resolution HDR] button
This allows the user to apply previously used high
resolution HDR settings to a new image.
1. Set a new target on the stage for observation.
2. Play (Page 6-6) the high resolution HDR image with
the desired settings using the album function and
click the [High Resolution Observation] button.
Images will be recorded with the same settings.
Saving high resolution HDR images
1 Press the [Rec] button on the console or click [Rec]
from the on-screen menu options.
The [Rec] dialog box appears.
2 Check the [Save HHDR data] check box. Select the
folder where to save the data, enter the filename,
and click [Save].
Releasing the high resolution HDR
Click [Hight Resolution HDR] from the VHX MENU again to
release the activated state (yellow).
High resolution HDR Observation
Settings
These functions are only available when
high resolution HDR files are played from
the album.
While the high resolution HDR function is in
effect, some features will not be available.