2-14
Preparation before Use > Installing Software
Installing Software
Install appropriate software on your PC from the included Product Library CD-ROM (Product Library) if you want to use
the printer function of this machine or perform TWAIN / WIA transmission or Network FAX transmission from your PC.
Installing Printer Driver
Ensure the machine is plugged in and connected to the PC before installing the printer driver from the CD-ROM.
Installing Printer Driver in Windows
If you are connecting this machine to a Windows PC, follow the next steps to install the printer driver. The example
shows you how to connect your machine to a Windows 7 PC.
You can use either Express Mode or Custom Mode to install the software. Express Mode automatically detects
connected machines and installs the required software. Use Custom Mode if you want to specify the printer port and
select the software to be installed. For details, refer to Custom Installation in the Printer Driver Operation Guide on the
CD-ROM.
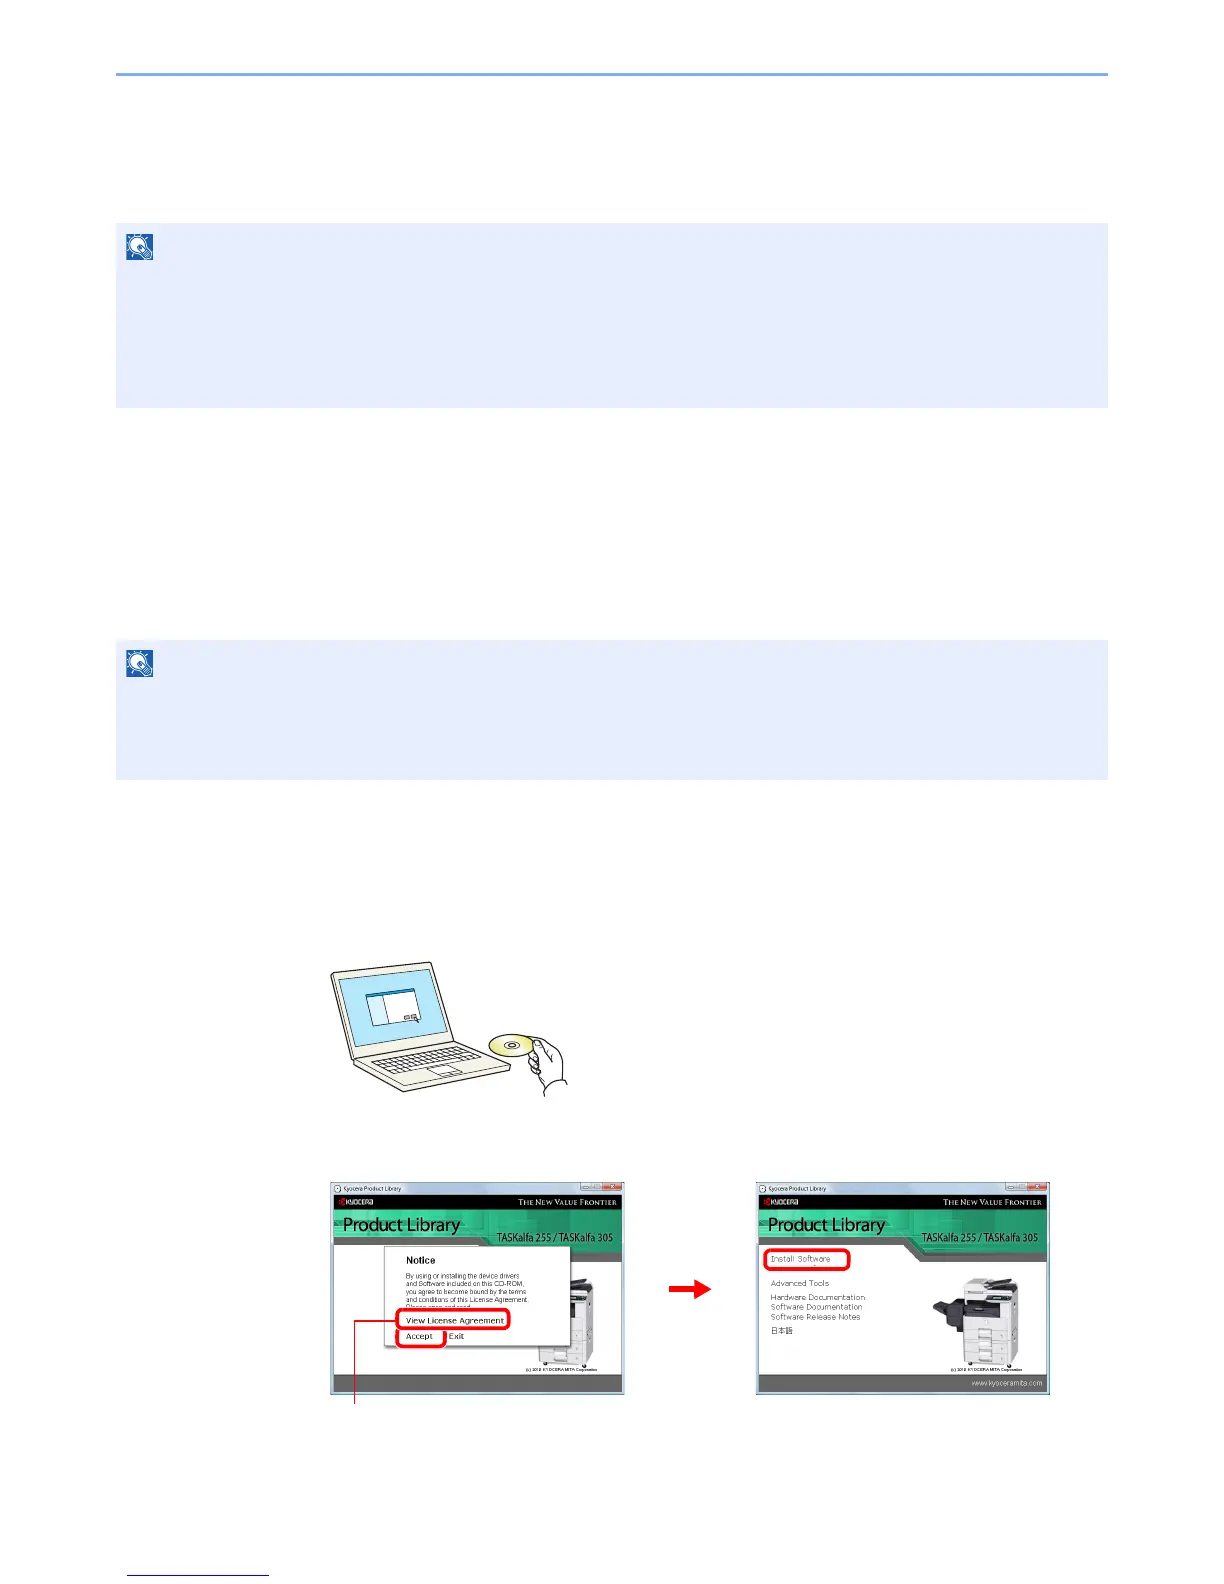
1
Insert the CD-ROM.
2
Display the screen.
Installation on Windows must be done by a user logged on with administrator privileges.
Plug and Play is disabled on this device when in Sleep. Wake the device from Low Power Mode or Sleep before
continuing. Refer to Low Power Mode and Auto Low Power Mode on page 2-20 and Sleep and Auto Sleep on page 2-
21.
The optional Fax Kit is required in order to make use of fax functionality.
If the Welcome to the Found New Hardware Wizard dialog box displays, select Cancel.
If the autorun screen is displayed, click Run Setup.exe.
If the user account management window appears, click Allow.