GL16 Repair
7-35
Gas/Air Mixer Adjustment
WARNING
Do not adjust or test gas
components unless you are
qualified to do so. Serious
injury and damage to
property may result.
WARNING
The burner flame needs to be
adjusted if the following
unsafe conditions exist, and
be prepared to reduce gas
flow immediately if:
• Flames are unsteady
• Flames are below brass
burner tips
• Lines of blue flame
throughout width of
ironing cylinder
The following procedure is used to adjust the
gas/air mixer.
1. Turn power OFF at the main disconnect
switch.
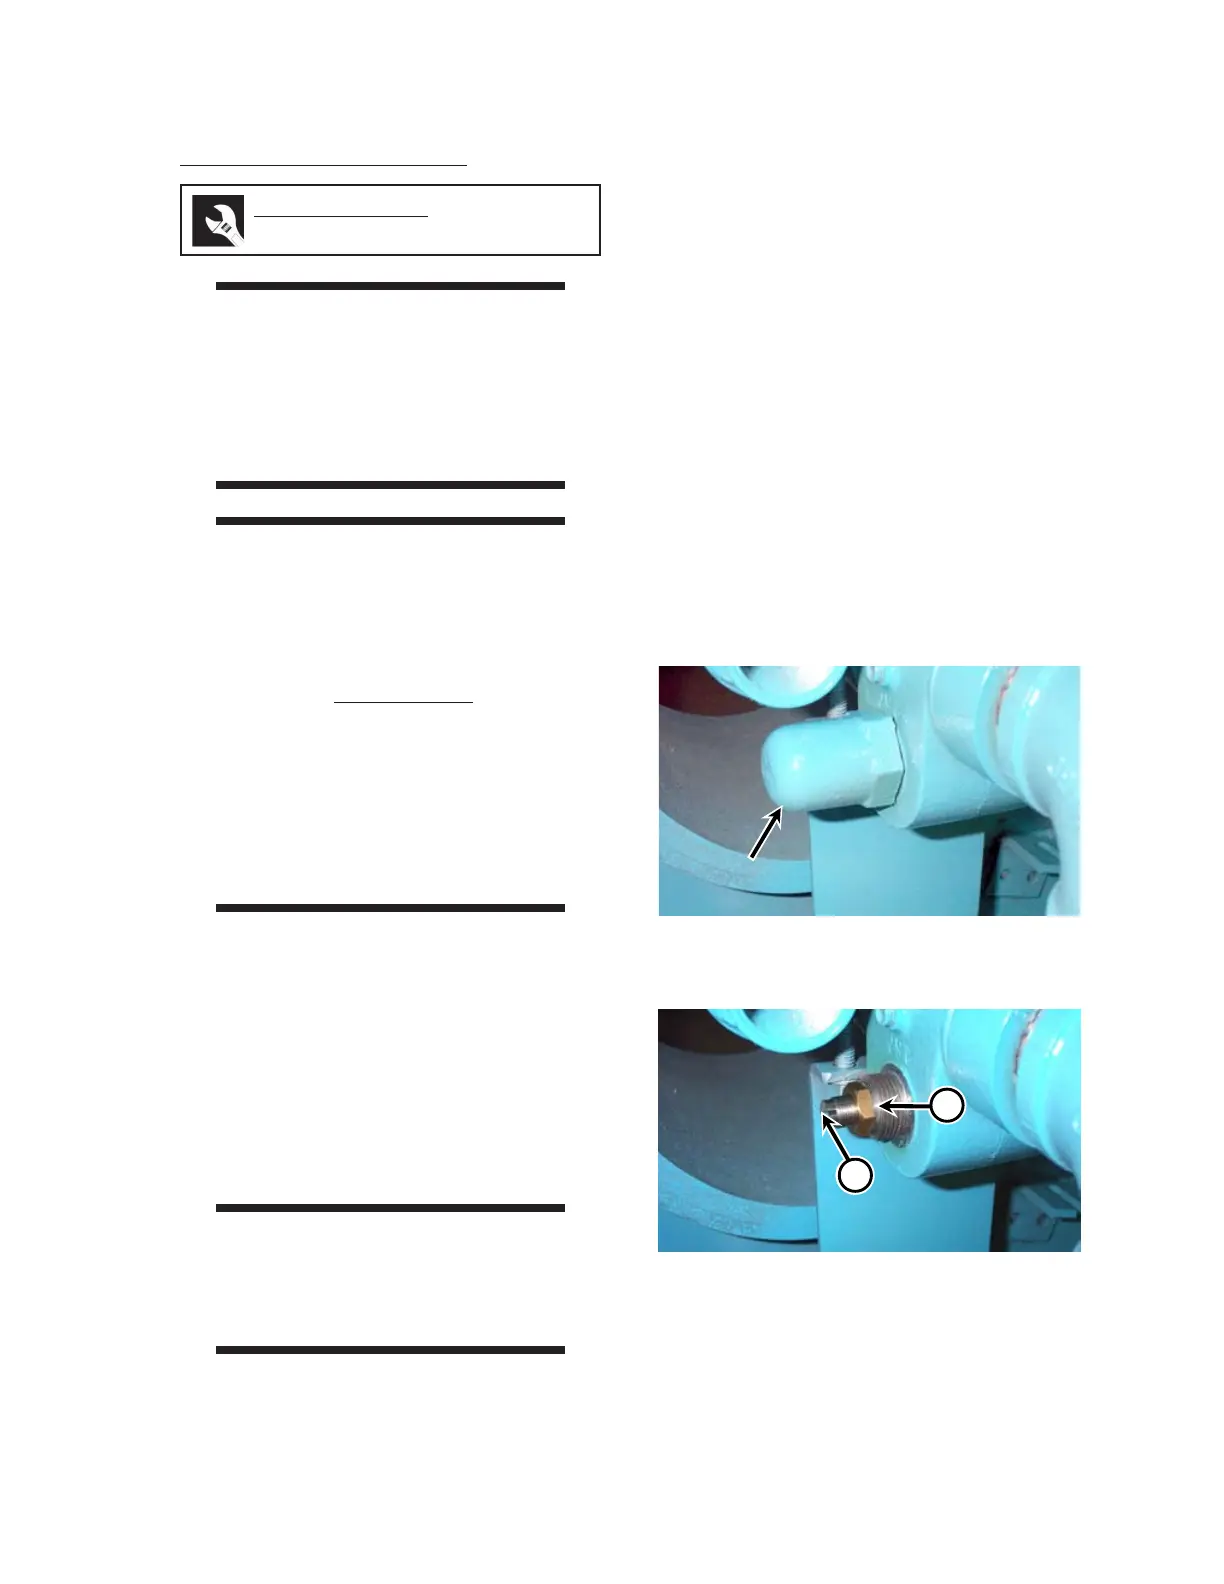
2. Locate and remove the gas mixer adjust-
ment cap nut (Figure 7-33).
3. Loosen the locknut (Figure 7-34, A).
WARNING
Adjust the screw in
increments of 1/8 turn
of a rotation.
• To close the valve and lower the flame,
turn the adjustment screw clockwise
in slight increments (Figure 7-34, B).
• To open the valve and increase the
flame, turn the adjustment screw coun-
terclockwise in slight increments. (Fig-
ure 7-34, B).
4. When a normal flame is established, reig-
nite the burner two or three times to make
sure the setting is correct.
5. Tighten the locknut (Figure 7-34, A) to se-
cure the adjustment.
6. Install the cap nut (Figure 7-33).
Figure 7-33: Gas/air mixer cap nut.
Required Tools
wrench, slotted screwdriver
Figure 7-34: Adjust the gas/air mixer by loosening
locknut (A) and rotating the
adjustment screw (B).
B
 Loading...