Toner density sensor removal
1 Remove the left cover. See “Left cover removal” on page 279.
2 Remove the main drive gearbox. See “Main drive gearbox removal” on page 281.
3 Remove the rear door and cover. See “Rear exit door removal” on page 369 and “Rear cover removal”
on page 370.
4 Remove the power supply. See “Power supply removal” on page 339.
5 Remove the power supply shield. See “Power supply shield removal” on page 340.
6 Remove the duplex. See “Duplex removal” on page 341.
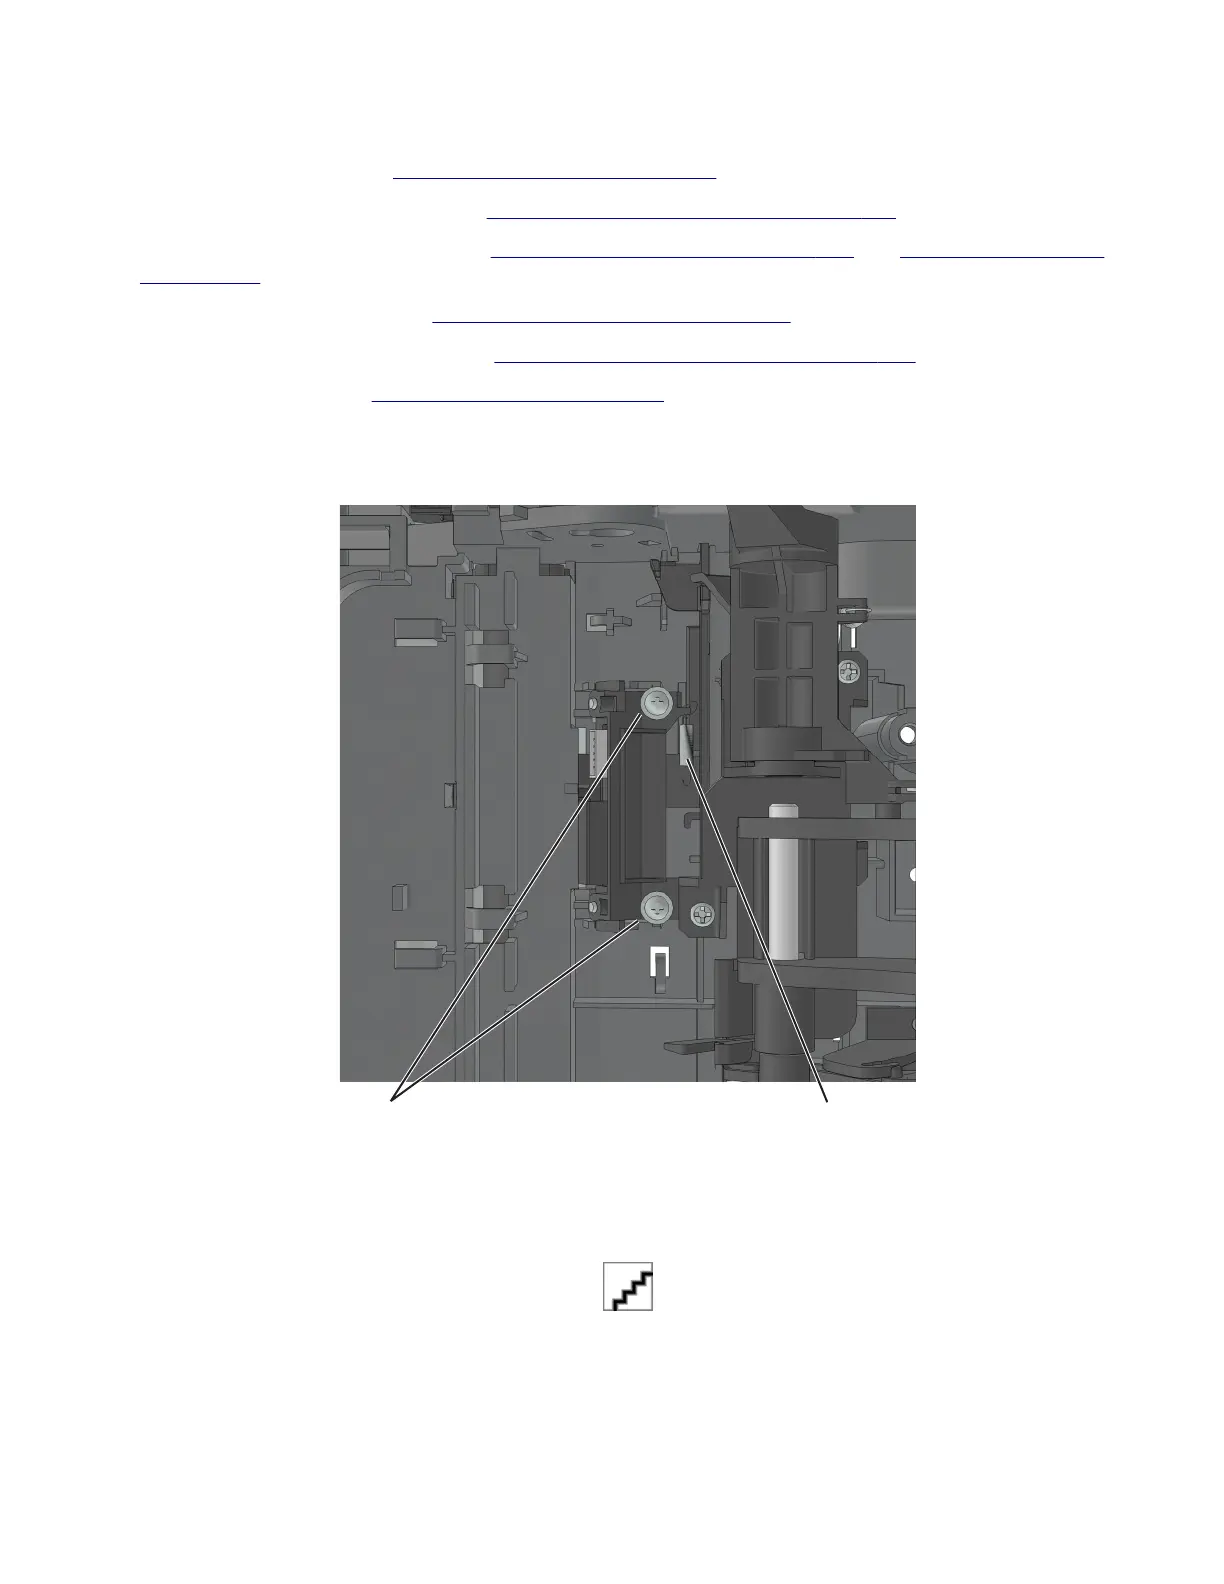
7 Disconnect the spring (A) from the printer.
8 Remove the two screws (B).
AB
9 Disconnect the cable from the sensor.
Installation notes:
a Apply the RheoGel 739 to the top and bottom of the shutter blade extension.
b Apply the RheoGel 739 to the point of contact between the bracket (A) and cam.
7015
Parts removal
349