Linksys Voice System Administration Guide 121
Configuring the SPA9000 and SPA9xx Call Progress Tones
Localization
a. Click the PBX Status link.
b. Find the phone that you want to configure, and then click the hyperlink in the IP Address
column.
c. Click Regional.
d. In the Call Progress Tones section, enter the values from Table 8-1 into the corresponding
fields.
e. Click Submit All Changes.
f. Repeat this step as needed for each phone.
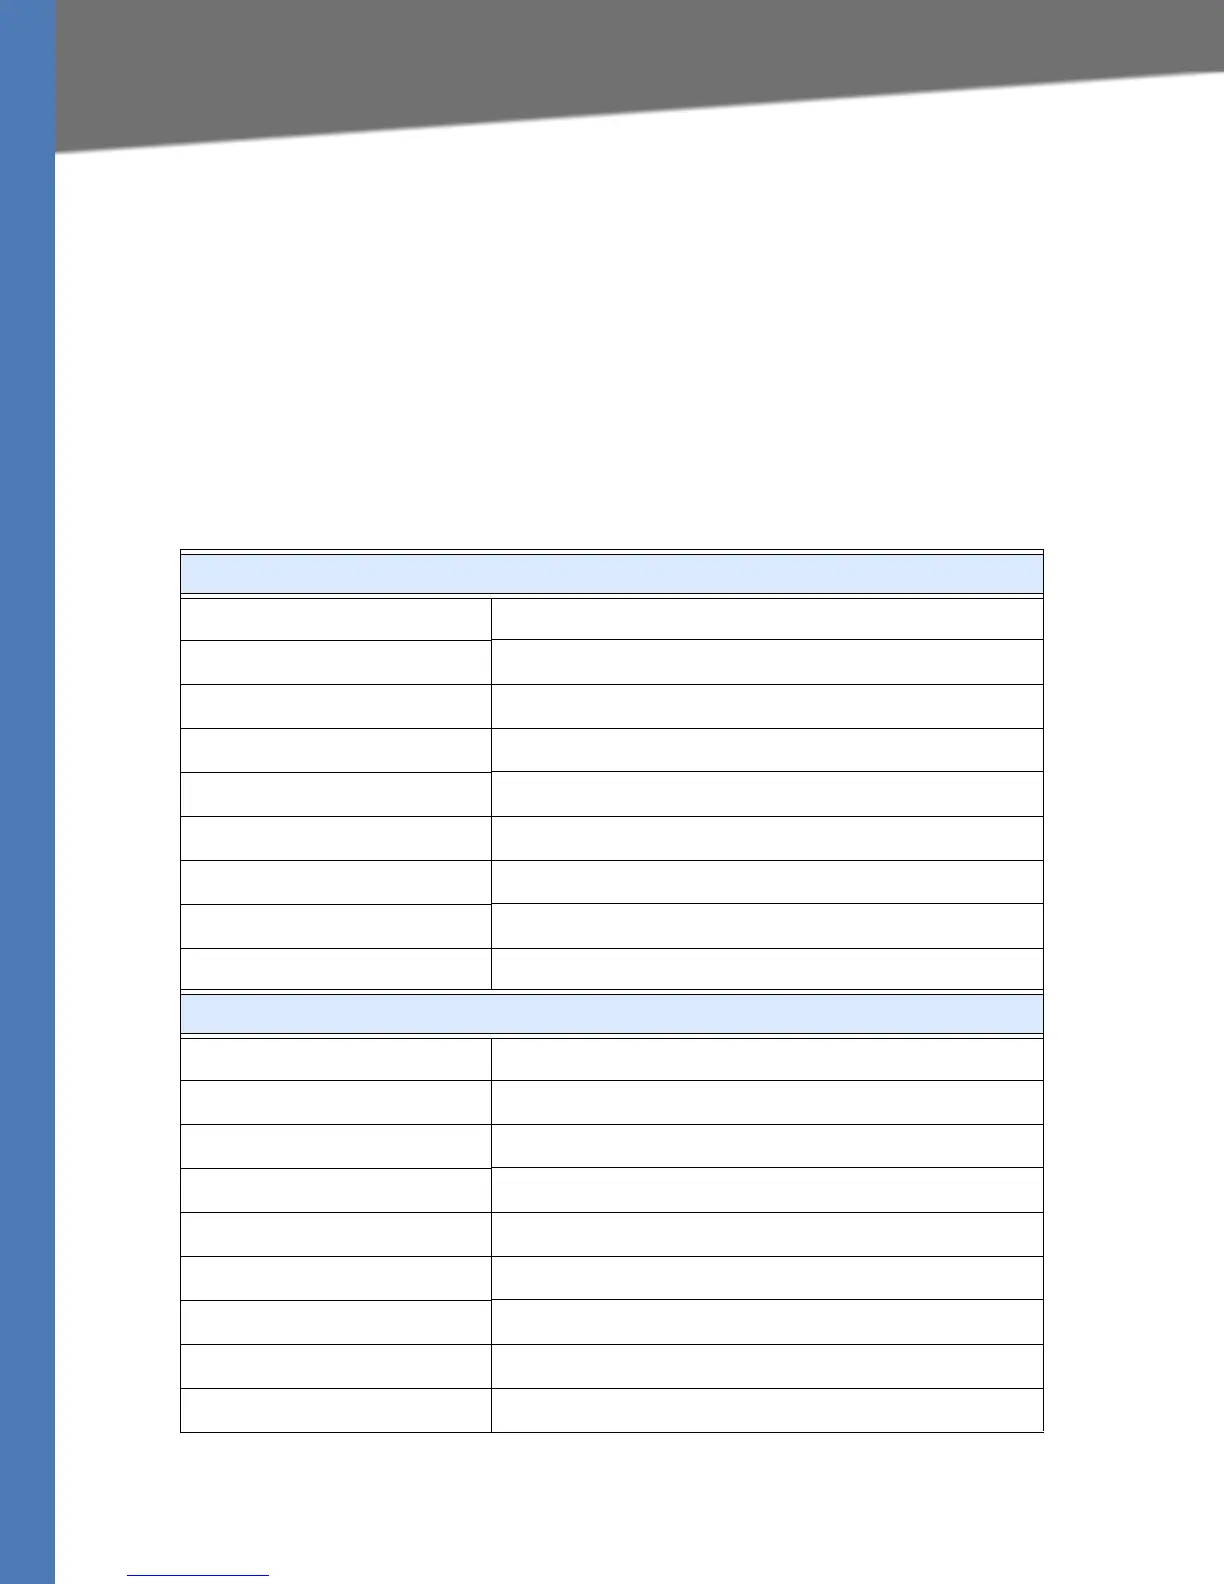
Table 8-1 SPA9000 Call Progress Tones by Country
Australia
Dial Tone
400@-19,425@-19;10(*/0/1+2)
Outside Dial Tone
420@-16;10(*/0/1)
Prompt Tone
520@-19,620@-19;10(*/0/1+ 2)
Reorder Tone
425@-19;*(2.5/.5)
Off Hook Warning Tone
480@-10,620@0;10(.125/.125/1+2)
Ring Back Tone
400@-19,425@-19;*(.4/.2/1+2,.4/2/1+2)
Busy Tone
425@-16;10(.375/.375/1)
Call Waiting Tone
400@-20;30(0.1/2/1)
Confirm Tone
600@-16;1(.25/.25/1)
Denmark
Dial Tone
425@-10;*(*/0/1)
Outside Dial Tone
425@-16;10(*/0/1)
Prompt Tone
425@-19,620@-19;*(*/0/1+2)
Reorder Tone
425@-10;*(0.25/0.25/1)
Off Hook Warning Tone
425@-10;*(.2/.2/1,.2/.6/1)
Ring Back Tone
425@-10;*(1/4/1)
Busy Tone
425@-10;10(0.25/0.25/1)
Call Waiting Tone
425@-20;30(0.2/0.2/1,0.2/3.6/1,0.2/0.2/1,0.2/0/1)
Confirm Tone
425@-16;1(.25/.25/1)
 Loading...