QX-830 Compact Industrial Scanner User’s Manual 1-3
Quick Start
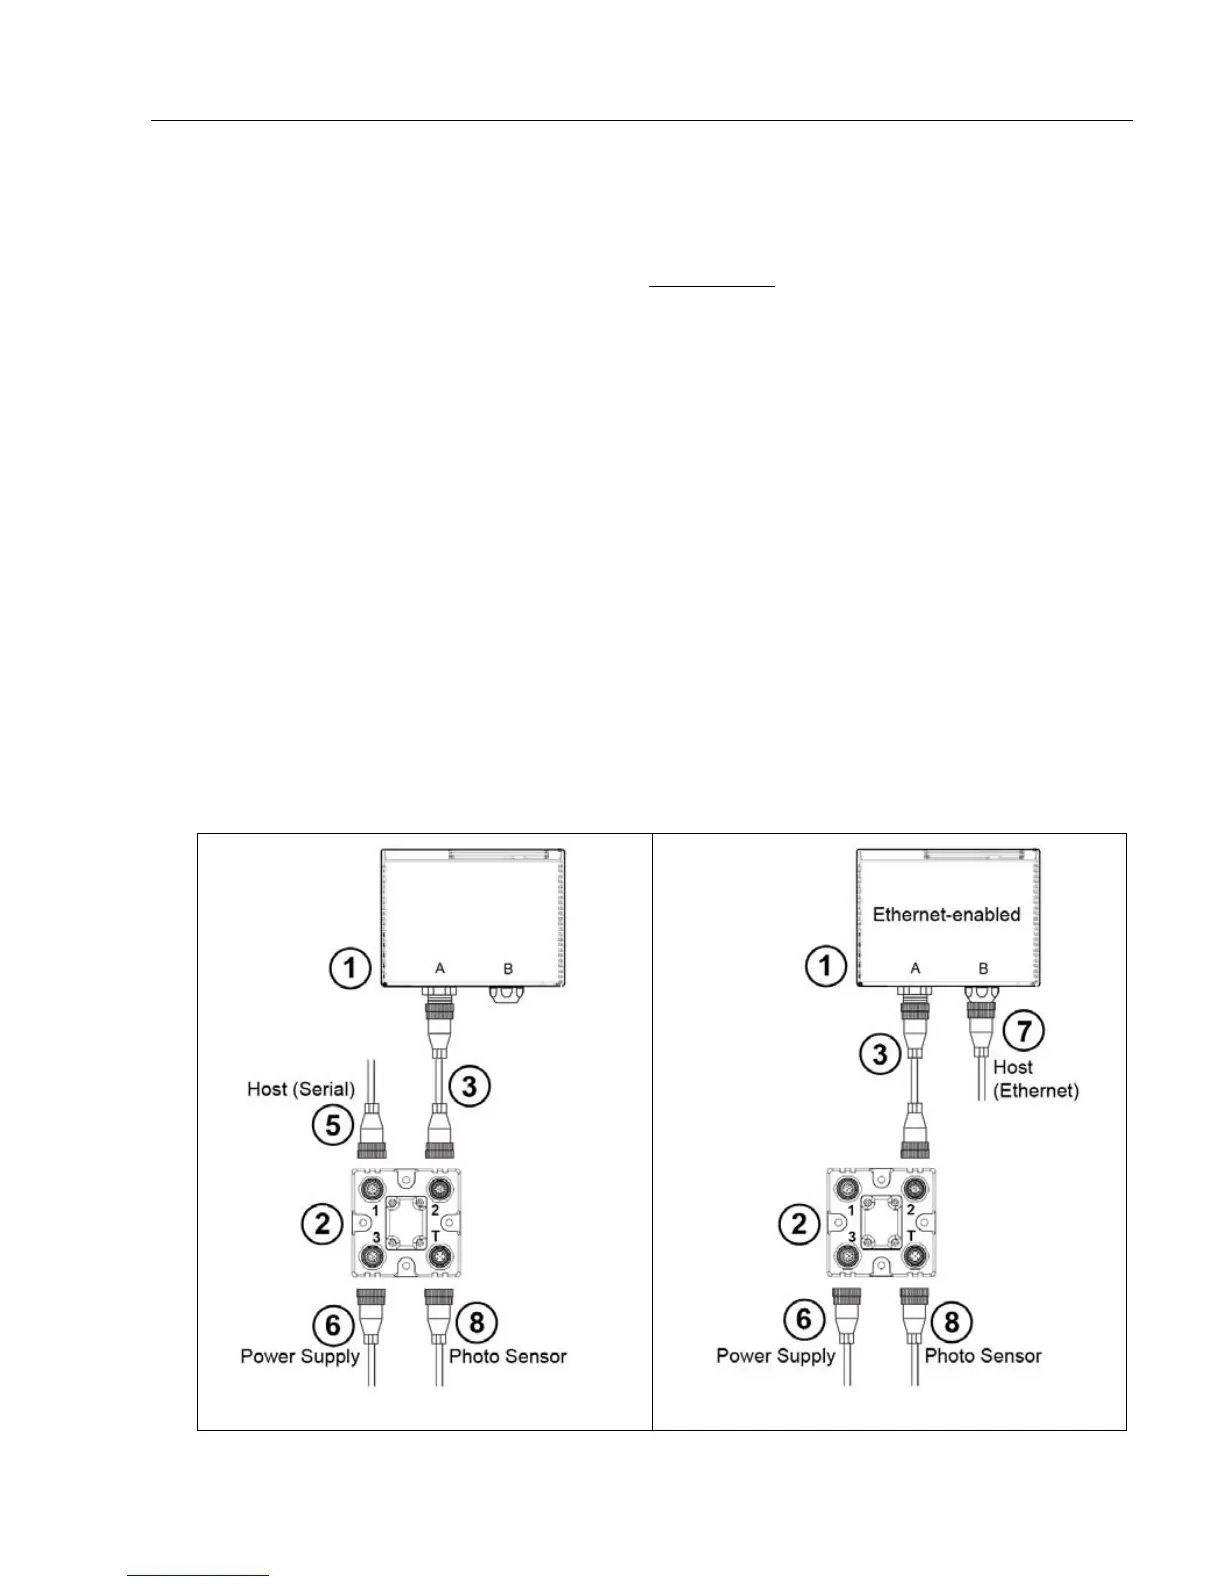
Step 2 — Connect the System
Important: When connecting Ultra-Lock cordsets to the QX-830 and QX-1, align the pins
first and then push the connector into place. Do not twist
the connectors, as this will bend
the pins.
RS-232
• Connect the Serial Communication Cable from “A” on the QX-830 to “2” on the QX-1.
• Connect the host cable from “1” on the QX-1 to the host computer.
• Connect the photo sensor to “T” on the QX-1.
• Connect the power supply to “3” on the QX-1.
• Plug in the power supply.
Ethernet
Note: The QX-830 does not require an Ethernet crossover cordset, because the scanner
itself performs automatic internal crossover (transmit-to-receive switching). Microscan
offers a standard straight-through (un-crossed) Ethernet cordset (61-000160-01).
• Connect the Ethernet Cable from “B” on the QX-830 to the network.
• Connect the photo sensor to “T” on the QX-1.
• Connect the power supply to “A” on the QX-830.
• Plug in the power supply.
Serial Standalone (with QX-1)
Ethernet Standalone (with QX-1)