17 - 84 Operator’s Manual
17 Probes and Biopsy
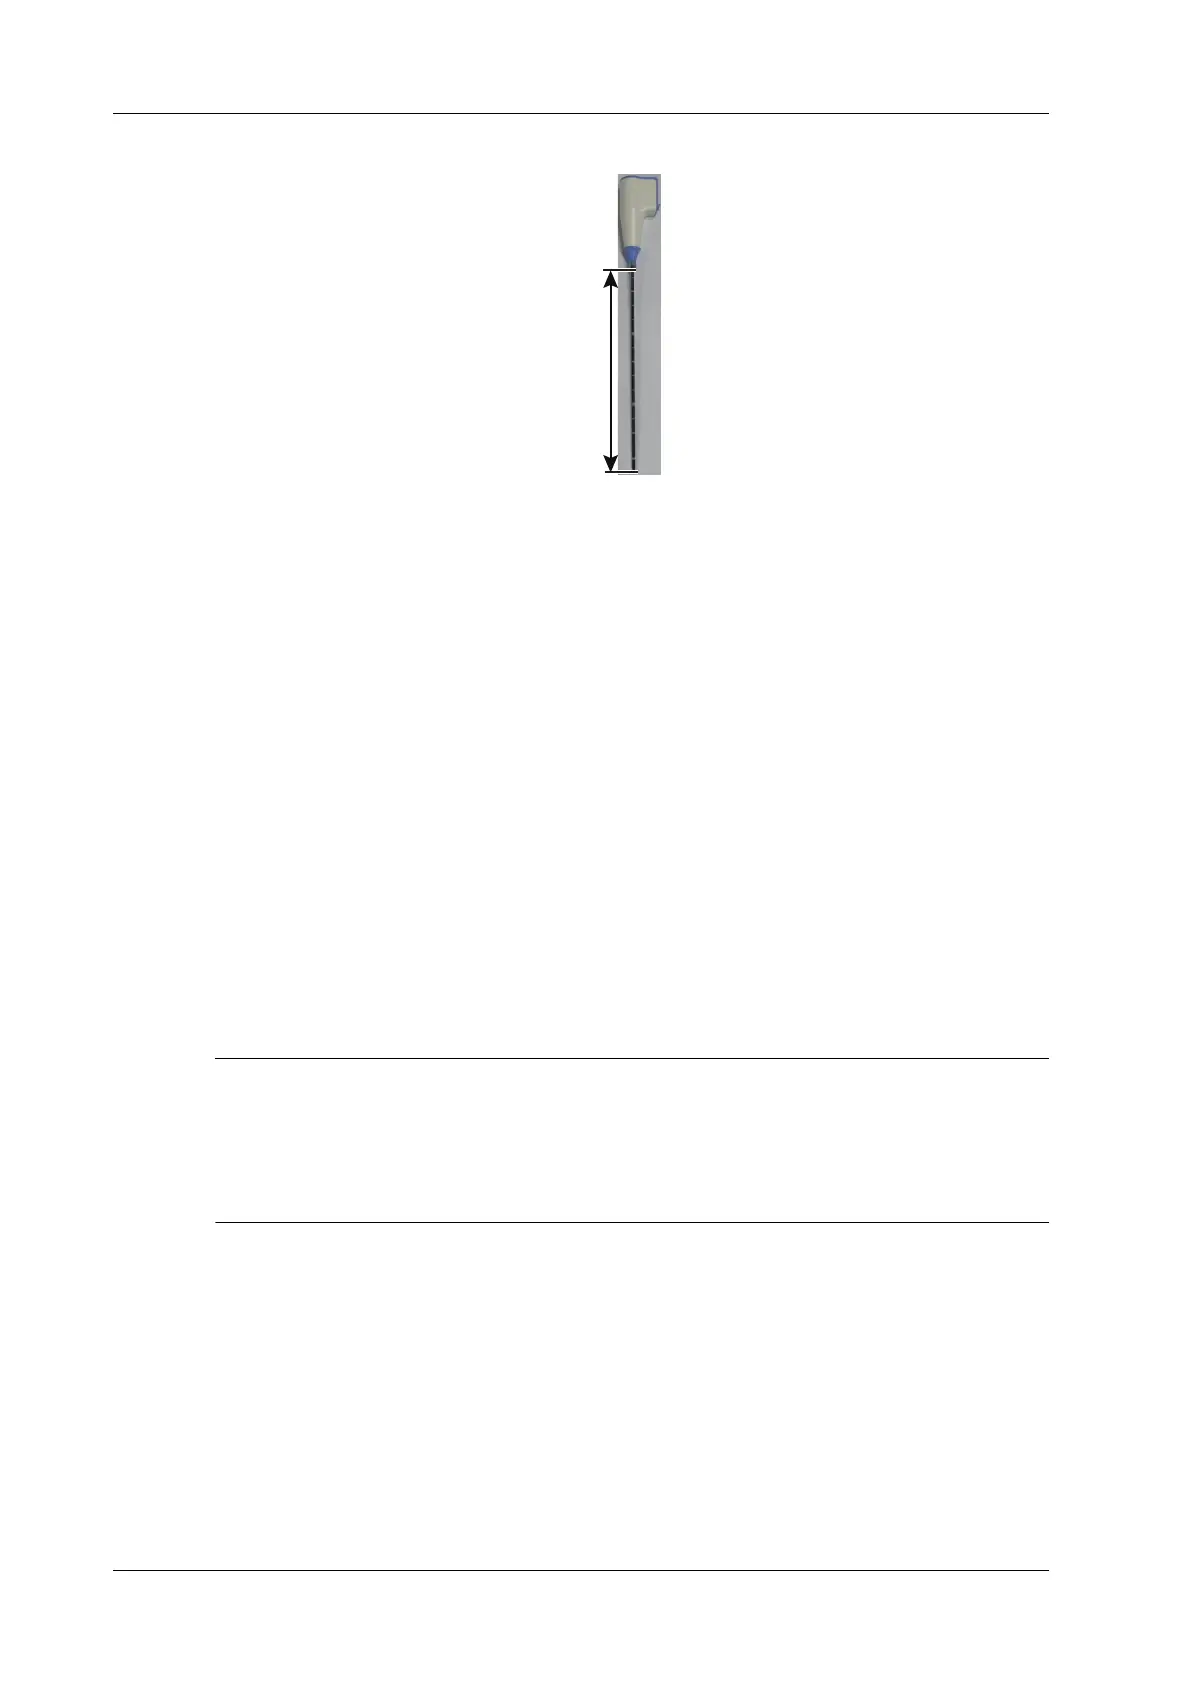
2. Precisely measure the distance between tip to the bottom.
NOTE:
• Use disinfected tool to measure the distance.
• Precise length data of the needle is important to the space magnetic navigation.
3. Tap [Needle Navigation] on the touch screen to turn on the feature. Select needle type and set
needle length.
Tap [Edit Needle] and enter “Needle name” “Length” (measured in the step 1) and “needle size
(needle model)”. Tap [Add] to add vTRAX/eTRAX information in the system. You can update
vTRAX/eTRAX needle data.
You can also adjust by rotating the knob under [Needle Length] on the touch screen.
4. Put the needle tip against the middle part of probe surface and press <Freeze>. Press <Caliper>
to enter general measurement and measure the distance between the tip and the probe surface.
5. Put the needle body on the probe surface horizontally and press <Freeze>. Press <Caliper> to
enter general measurement and measure the distance between the needle and the probe surface.
17.3.4 Mark
Marking procedure under non-Fusion mode
You can mark the tumor/lesion on the ultrasound image as indication for real-time biopsy.
• Keep the magnetic navigator and patient still after mark is added. Otherwise, space navigation
GPS result is affected.
• Make sure only one mark is left on the ultrasound image during needle navigation guidance
procedure. If there are multiple marks on the image, hide the marks.
Perform the following procedure:
1. Connect all accessories of magnetic navigator. Perform accuracy verification procedure.
2. Perform ultrasound image scanning and confirm position/size/structure of tumor/lesion.
Switch to the section with maximum size of the lesion.
3. Mark the lesion: Tap [Tissue Mark] and press <Cursor> to acquire the cursor. Roll the trackball
to move the cross onto the center of the lesion and press <Set> to anchor the center. Roll the
trackball until the whole lesion is enveloped and double-click <Set> to add the mark.
Rotate the knob under [Ablative Margin] to add a safe boundary for the mark. Refer to chapter
“6.15.6 Marks” for details.

 Loading...