12 - 24 Operator’s Manual
12 Probes and Biopsy
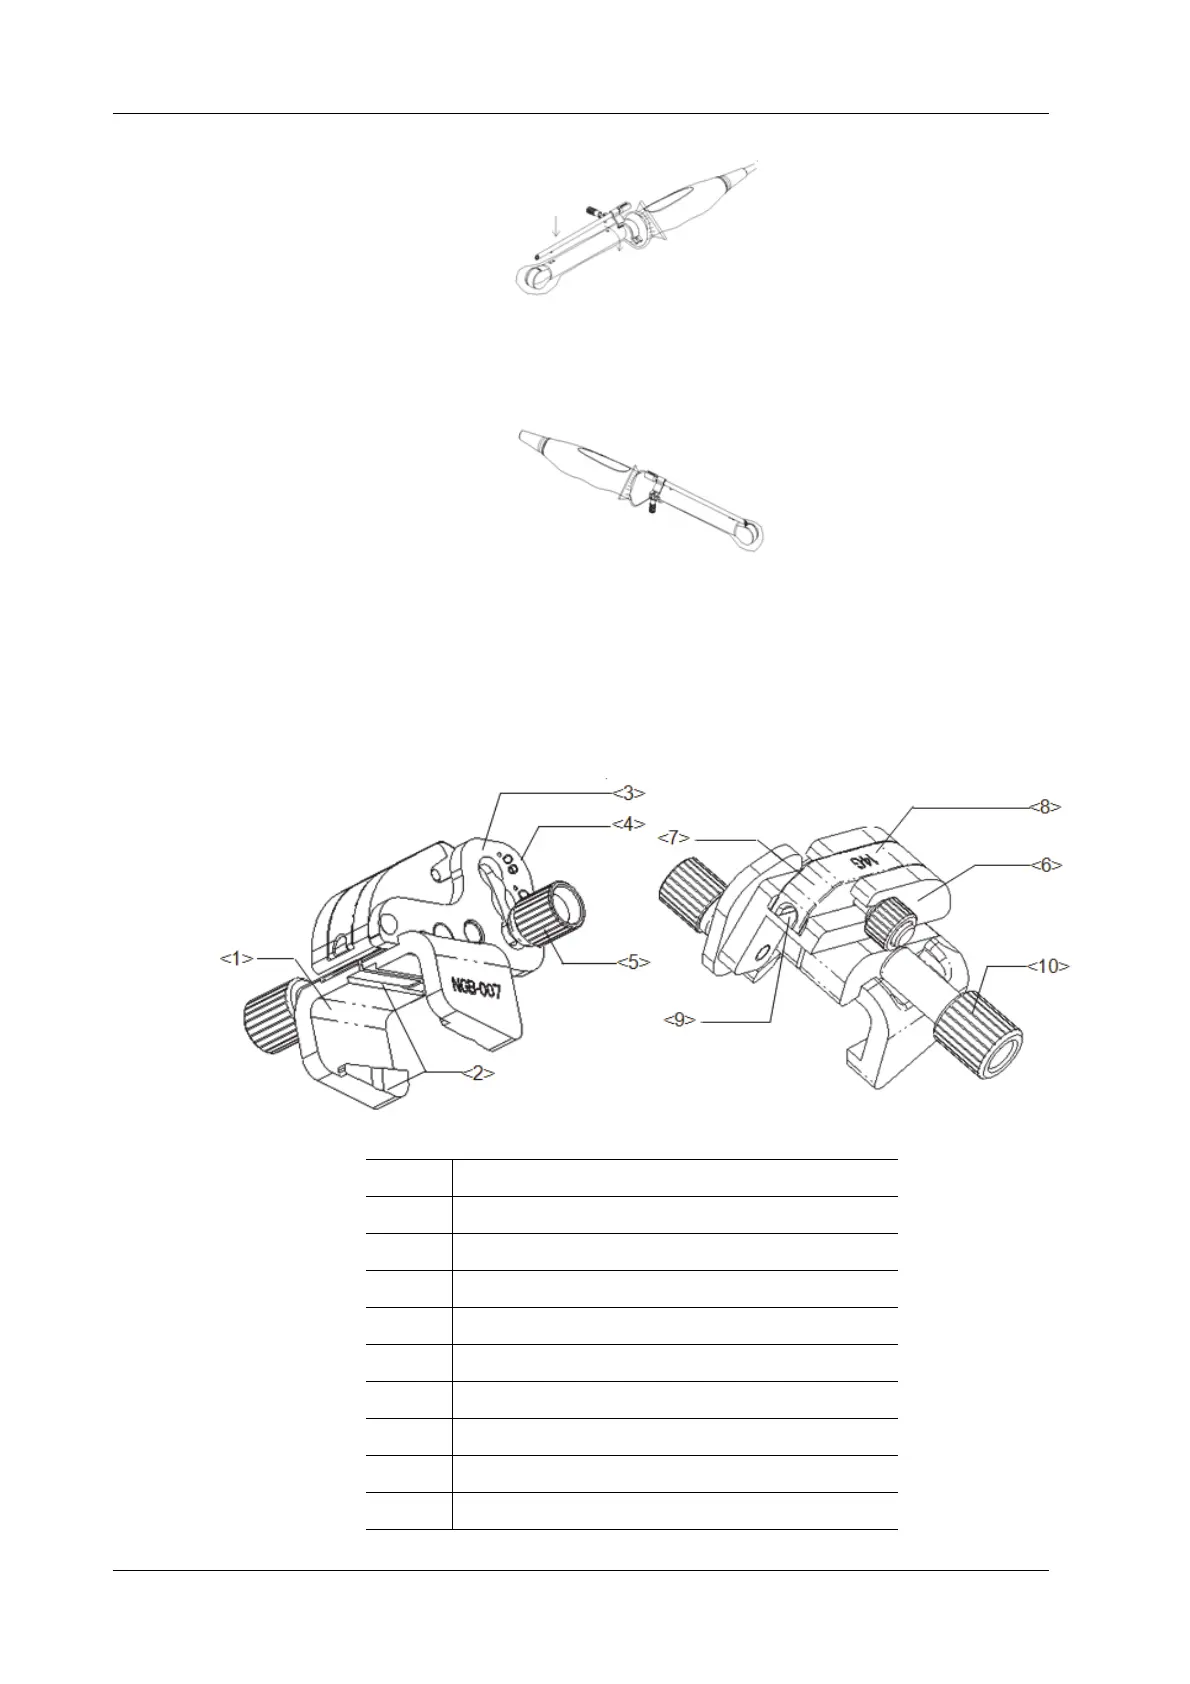
c. When the retaining clamp is turned to the correct position, the locking nut will lock the
retaining clamp and the needle-guided bracket is then mounted in the correct position.
2. Remove the needle-guided bracket:
Hold the probe in your left hand. Unscrew the locking nut with your right hand to open the
retaining clamp, then raise the needle-guided bracket to separate the locating bulge from the
locating grooves.
NGB-007 Metal/needle detachable needle-guided bracket
1 Support for needle-guided bracket
2 Tab and groove for the needle-guided bracket
3 Angle-adjusting base
4 Angle shift sign
5 Angle pinch nut
6 Angle block
7 Guiding block
8 Guiding block specification
9 Needle guide hole
10 Needle-guided bracket pinch nut