13. EtherNet/IP
TM
G3 Web Server
13.1 Integrated Web Page Configuration
The Numatics G3-EtherNet/IP
™
node utilizes an integrated web server for user access to configuration parameters and
diagnostic features. The “G3 Webpage” can be accessed via any standard web browser program. The following steps describe
how to connect to a G3 series Ethernet/IP
TM
to access the integrated webpage using Windows XP (see page 157 for Windows 7
instructions).
13.2 Connecting to a G3 Series EtherNet/IP
TM
Node
This section will discuss how to connect a computer to a G3 Series EtherNet/IP
TM
node. There are multiple ways to complete
this task, so only two will be discussed. All computer commands are shown in Windows 7.
1. Connect a 24VDC power supply to the valve manifold. The connector pin-out can be found on the side of the
EtherNet/IP
TM
node or on page 20 of this document. (Note: 24VDC only needs to be applied to the “+24VDC
(NODE & INPUTS)” pin to power the node.)
2. Connect an Ethernet cable directly from the manifold to the computer -OR- Connect an Ethernet cable from
the manifold to a router, hub, or switch. Connect a second Ethernet cable from the computer to the router,
hub, or switch. (Network lights should appear on the router, hub, or switch if the correct cables are used).
3. Turn on the computer. Also, make sure the manifold and the switch have power.
4. To communicate with an EtherNet/IP
TM
manifold the IP address of your computer must be known. To start
this process, left click on the “Start” button.
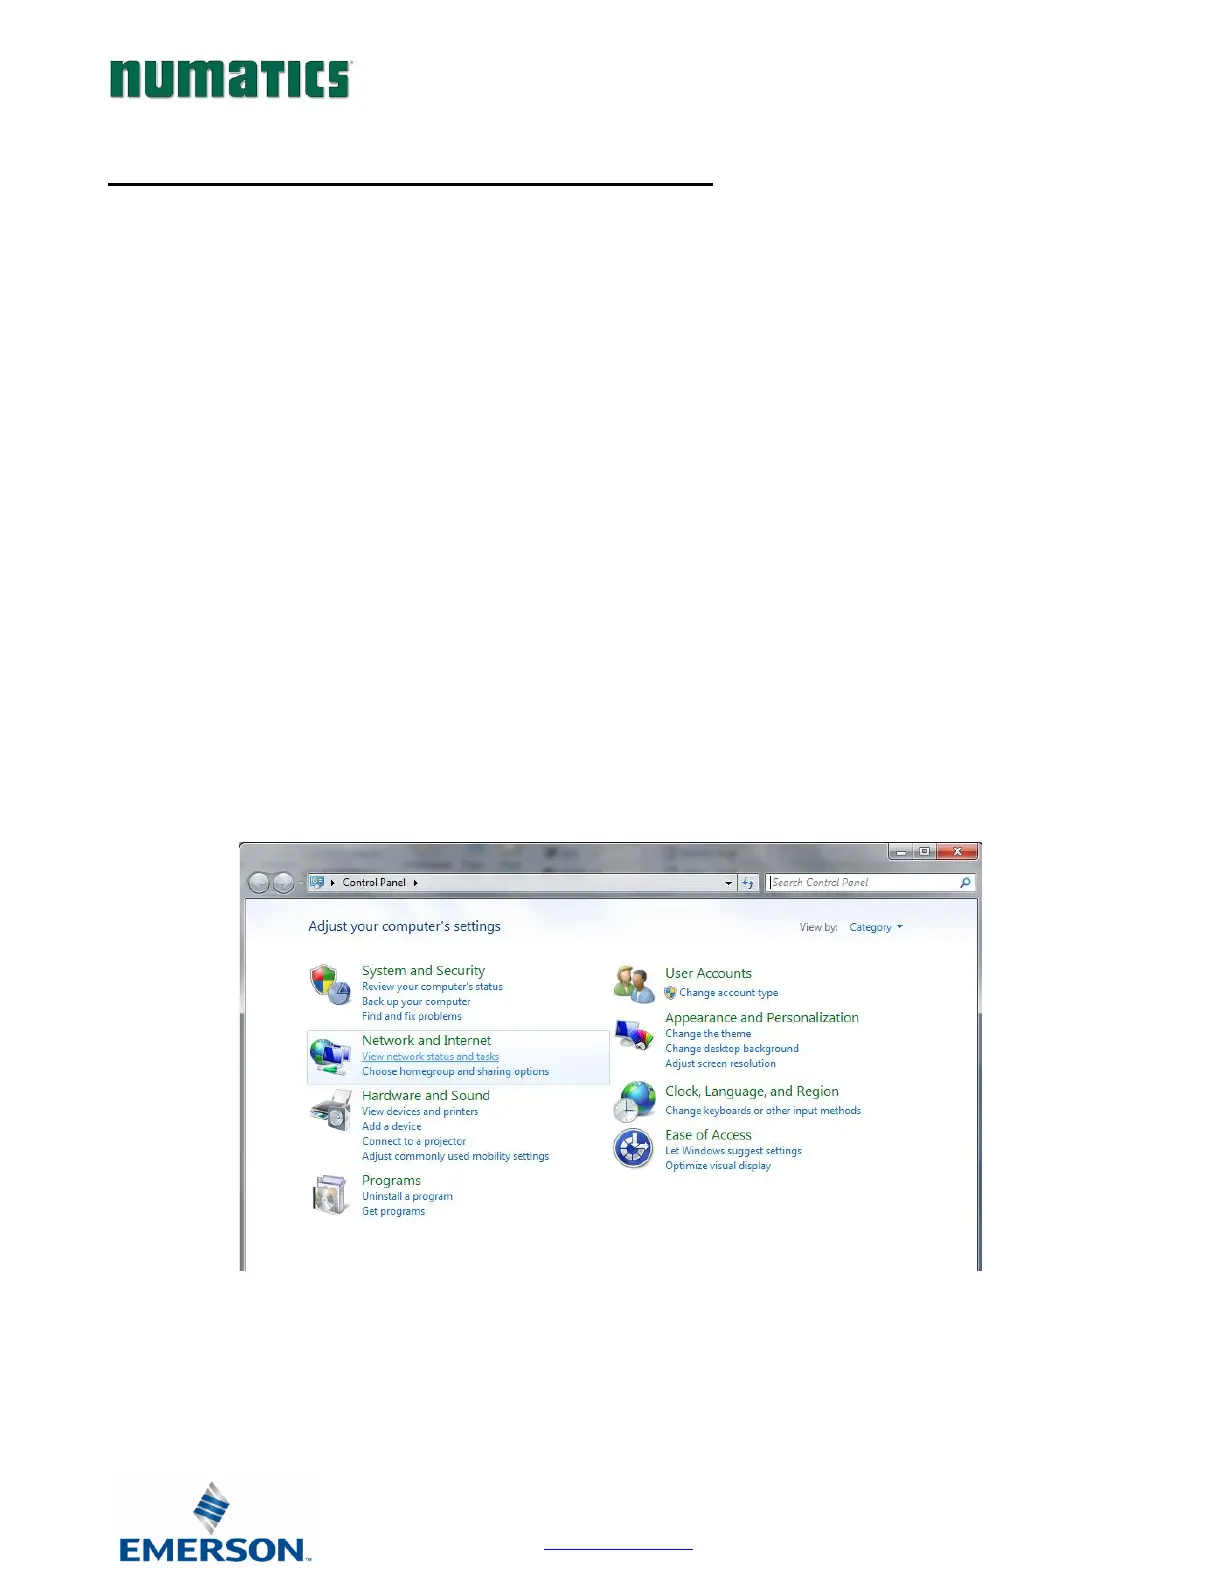
5. Left click on control panel, then left click view network status and tasks


 To Next Page