39
[Zoom OUT]: Reduce the Graphics size.
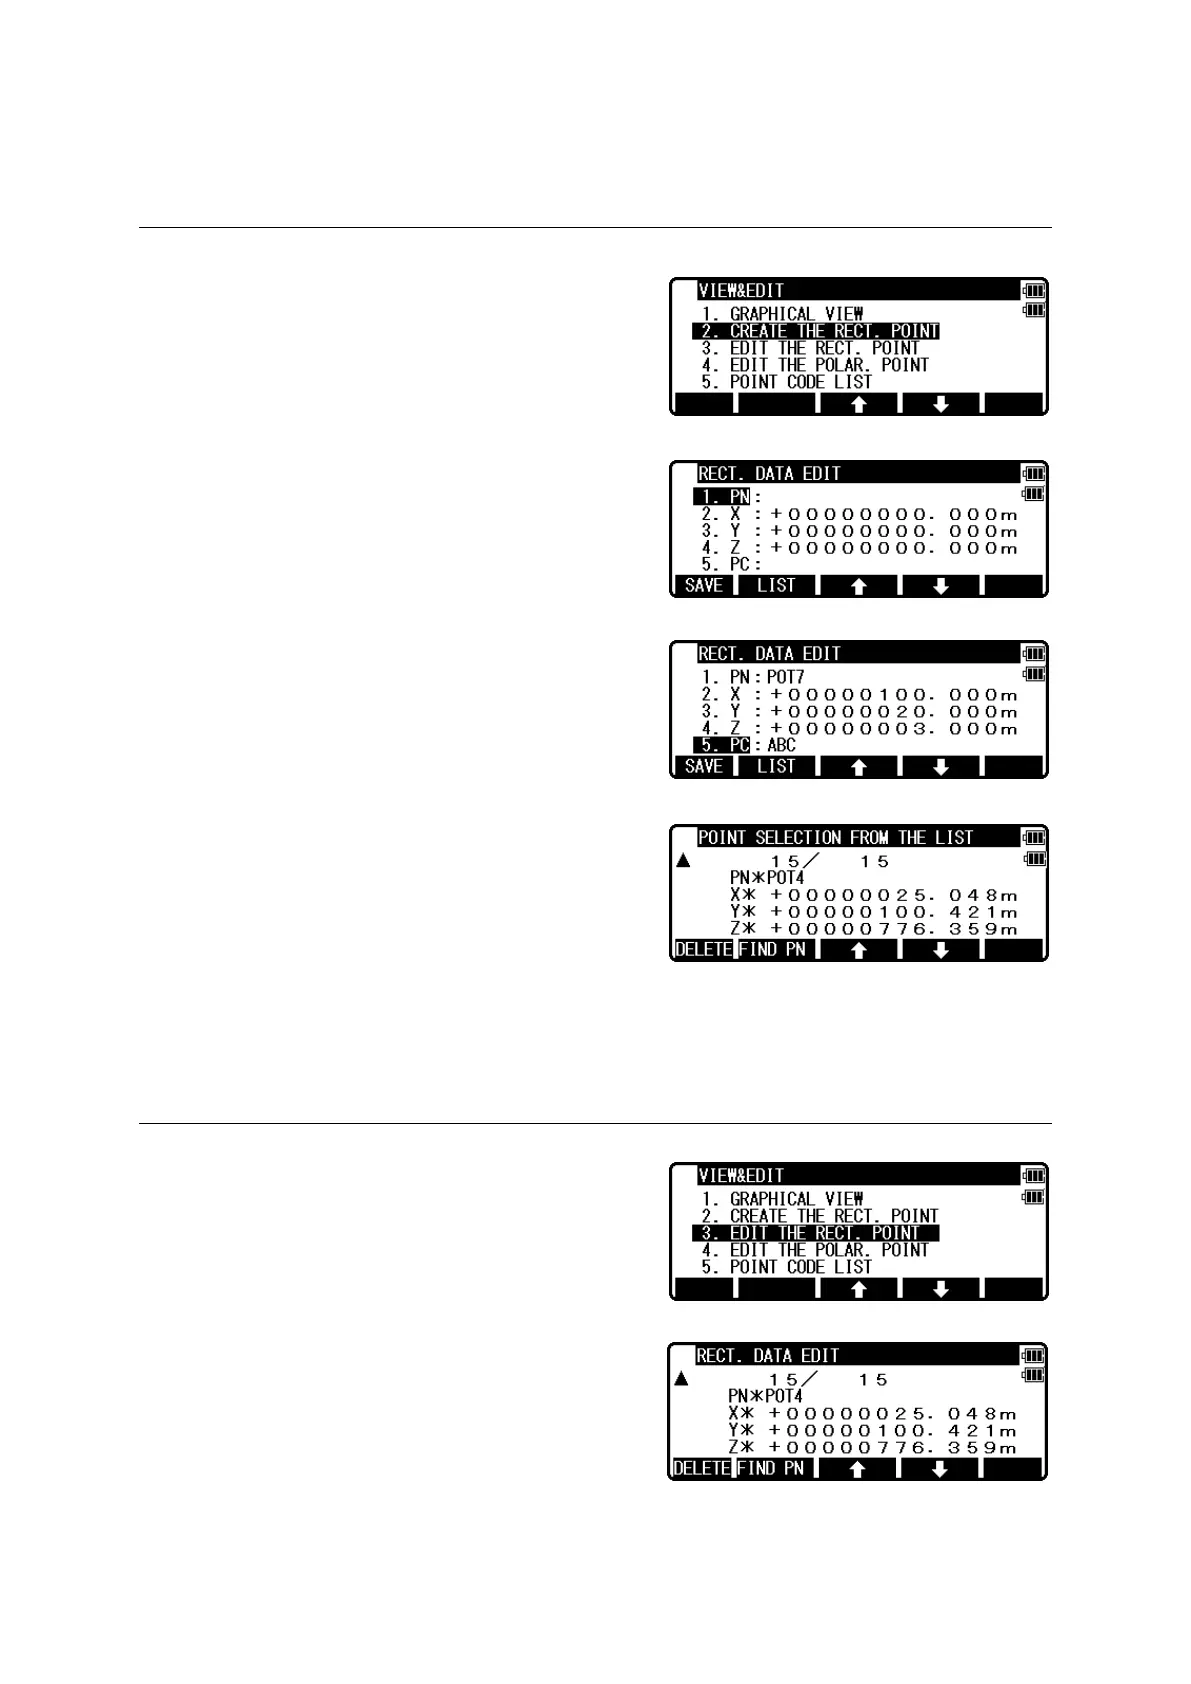
5.2 Create the Rectangular Point
Select 2. CREATE THE RECT. POINT and press
[ENT] to view the RECT. DATA EDIT screen.
Input the PN, X, Y, Z and PC.
Press [ENT] to save them.
Press [F2][LIST] to view the saved points.
The first line of the screen shows now displayed
point and the total number of points.
Press [F1][DELETE] to delete your desired point.
Press [F2][FIND PN] to find your desired point by
the PN input.
NOTE: For more details on research function, refer to “4.1.2 Coordinates, X,Y,Z,IH and PC
input”
5.3 Edit the Data
[RECT. DATA]
Select 3.EDIT THE RECT.DATA and press [ENT]
to view the RECT.DATA EDIT screen.
 Loading...