PAGE 6-6
1118824, VER. 00
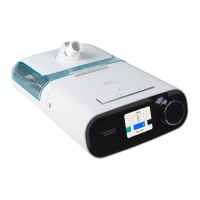
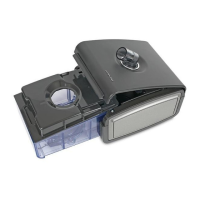
6.1.2 REPLACING THE USER INTERFACE (UI) KNOB
FIGURE 6-3: UI KNOB LOCATION
To remove the UI Knob:
• Pull the UI Knob straight up from the UI stem. A small flat blade screwdriver may be used to care-
fully pry the UI Knob from the device.
To Install the UI Knob:
1. Verify that the “D” clip is installed in UI Knob.
2. Align the flat side of “D” clip with the flat side of the UI stem.
3. Press the UI Knob onto the UI stem.
4. Rotate the UI knob and verify that it is secure and rotates freely.
F
IGURE 6-4: “D” CLIP IN UI KNOB
Included in Kit Tools Required
• UI Knob
Small flat blade screwdriver
NOTE
A “D” clip is installed in the UI Knob.

 Loading...