PAGE 7-111118824, VER. 00
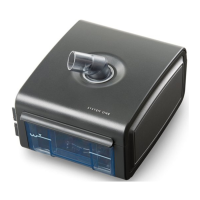
7.2.6 REPLACING THE HUMIDIFIER TOP HOUSING
FIGURE 7-10: HUMIDIFIER TOP HOUSING
TO REMOVE THE HUMIDIFIER TOP HOUSING:
1. Remove the Humidifier Tank Assembly. Refer to Replacing the Water Chamber Assembly.
2. Using a T8 Torx screwdriver, remove the four #4 x 1/2” screws that secure the Top Housing to the
Humidifier Bottom Housing.
3. Lift the Top Housing off of the Bottom Housing.
TO INSTALL THE HUMIDIFIER TOP HOUSING:
1. Place the Top Housing onto the Bottom Housing.
2. Secure the Top Housing to the Bottom Housing using the four #4 x 1/2” screws.
Included in Kit Tools Required
• Top Housing
• #4 X 1/2” screw (x4)
T8 Torx Screwdriver

 Loading...