Using Webster with a Projector 27
TS and Webster
®
• For a right click (Windows) or control-click (Macintosh), press the R
button.
• To page up or down, press the Next or Previous button (for example, if
PowerPoint is the active window, press Next to move to the next slide)
When using the stylus with your Walk-and-Talk Interactive Panel:
• To click, tap the panel once.
• To double-click, tap the panel twice rapidly or press the stylus button
furthest from the tip while hovering the stylus over the panel.
• For a right-click (Windows) or control-click (Macintosh), hold the stylus
to the panel for one second or press the stylus button near the tip while
hovering the stylus over the panel.
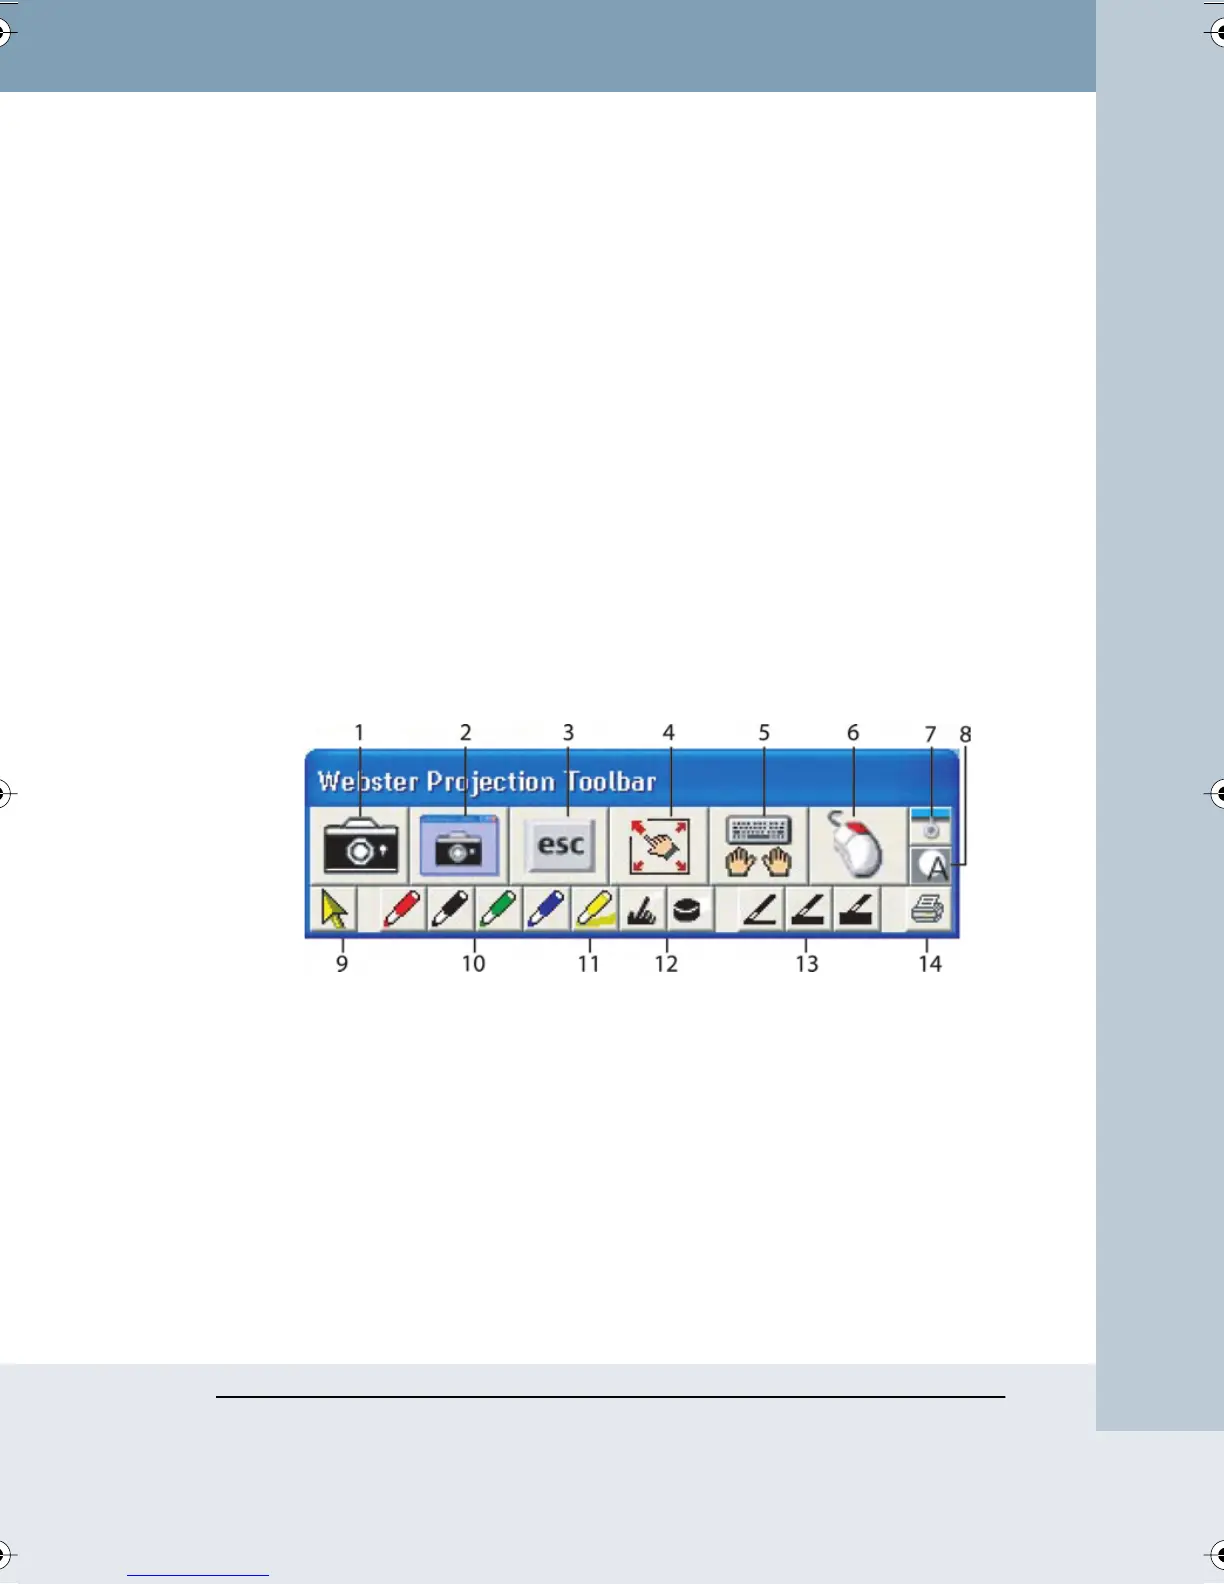
The Projection Toolbar
When you enter projection mode, a new toolbar appears with a single row
of tools. A second row of tools appears when Webster is not the active
window. The projection toolbar provides the following tools:
1 Snapshot: Capture a snapshot from the Polyvision product. The
projected computer screen and your writing are all included when
Webster is not the active application.
2 Screen Snapshot: Capture only the projected computer screen as a
snapshot.
3 Esc: Performs the equivalent to the “ESC” keystroke in the active
application.
4 Re-align: Re-align the projected image.
5 Keyboard: Show and hide the on-screen keyboard.
Webster_draft2.book Page 27 Friday, November 3, 2006 2:24 PM