28 Using Webster with a Projector
TS and Webster
®
6 Right Click (Windows only): For a right mouse click, tap this button,
then tap the PolyVision product.
Show Webster (Macintosh only): Bring the Webster window to the
front.
7 Reveal: Reveal the projected screen one line at a time by dragging the
“window shade” down.
8 Spotlight: Spotlight a portion of the screen with a circle of light.
9 Selection Tool: Move the cursor instead of adding writing to the
display. Click to stop projection mark-up and return to pointing the
mouse.
10 Pen Color: Mark up the projected image.
11 Highlighter: Highlight important items.
12 Erasers: Erase projection mark-ups.
13 Pen Width: Change pen width for mark-ups.
14 Print: Print the current image, including the projected computer
screen, on the default printer connected to the computer.
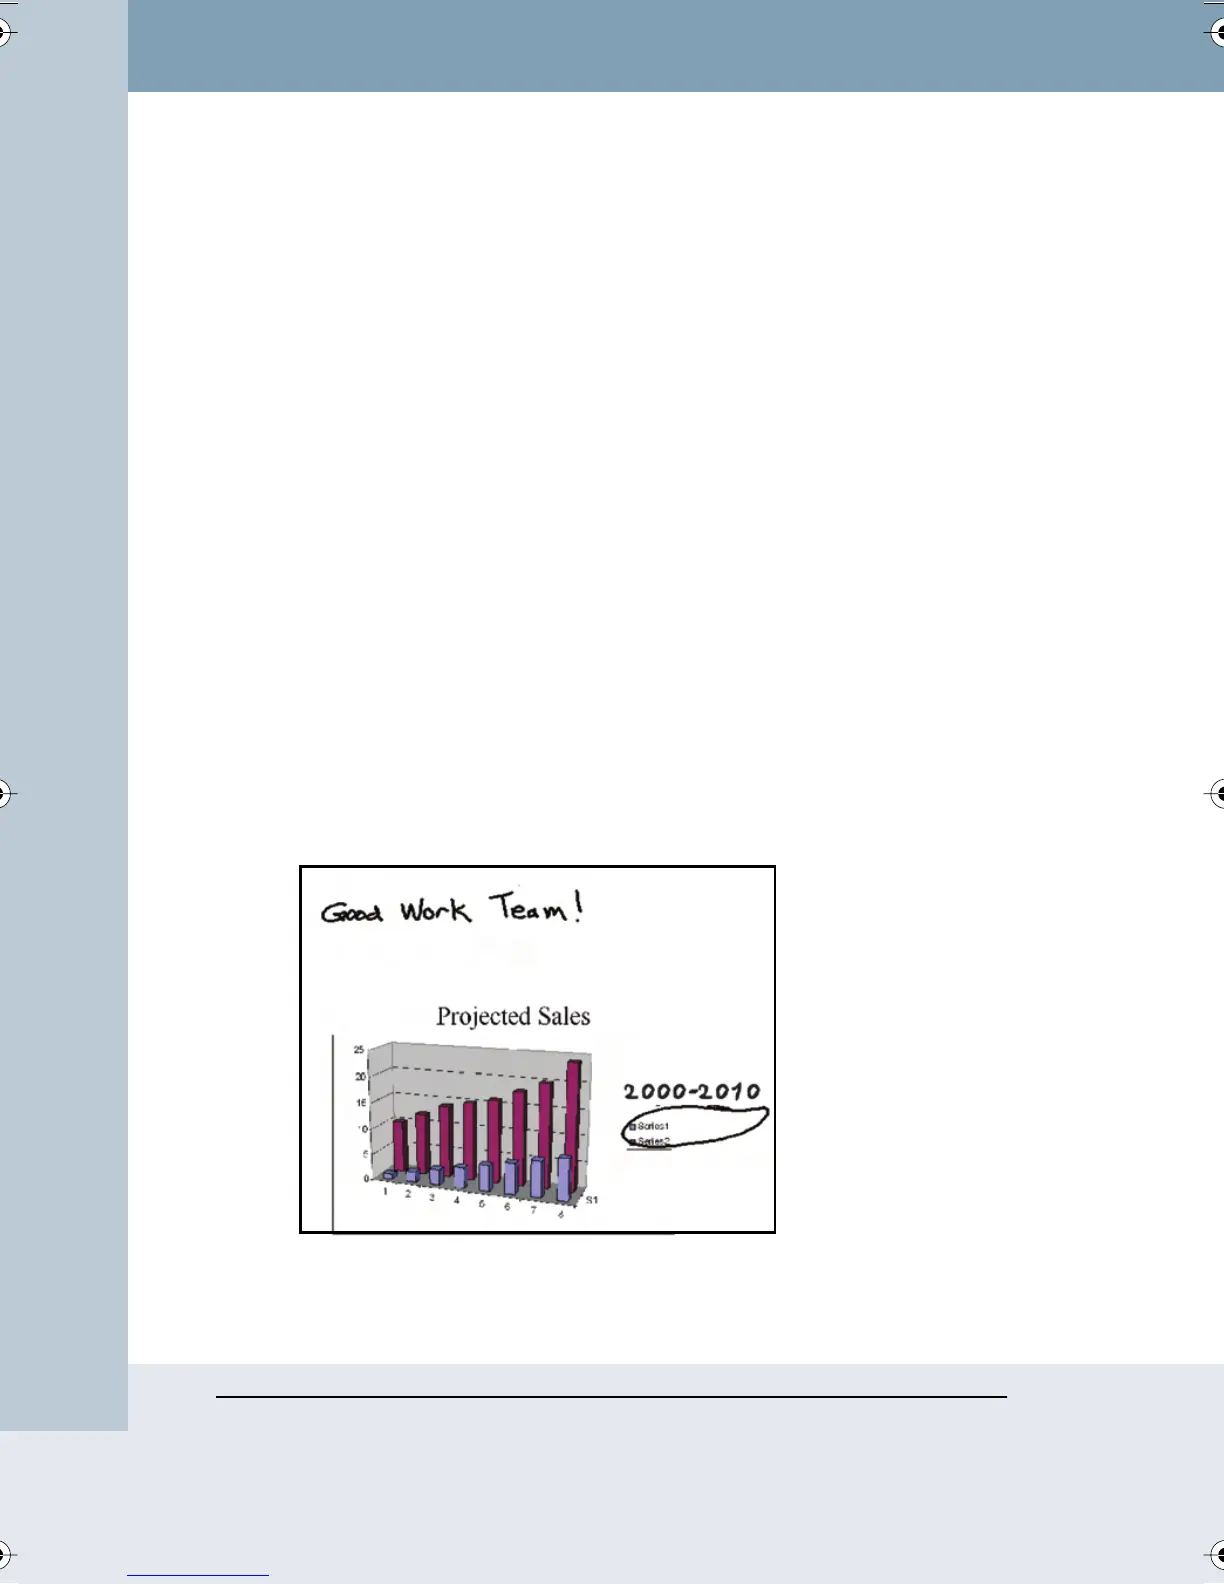
PROJECTION MARK-UPS
In projection mode you can mark up the projected computer screen. For
example, you can mark up PowerPoint slides during your presentation:
Webster_draft2.book Page 28 Friday, November 3, 2006 2:24 PM