38 Working with Snapshots
TS and Webster
®
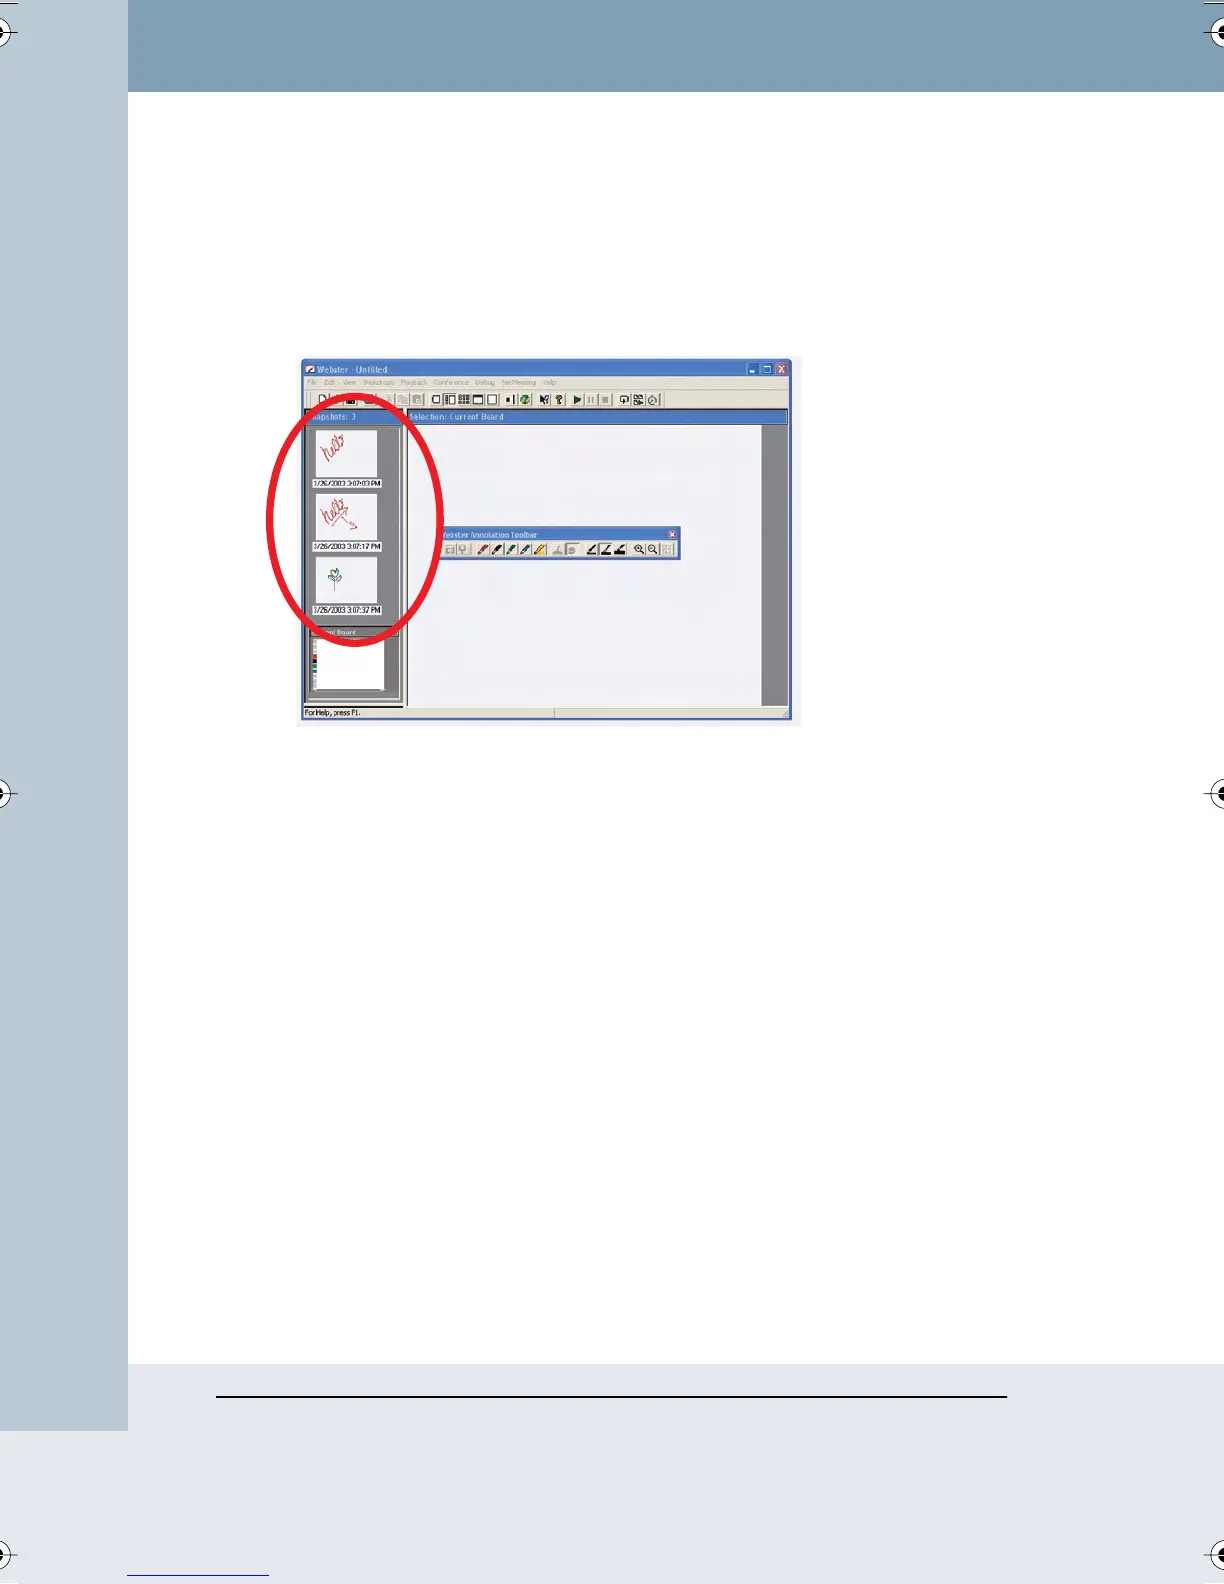
VIEWING SNAPSHOTS
When you capture a snapshot, a miniature “thumbnail” image appears in
the Webster software in the Snapshot pane. Snapshots appear in the order
you create them and include a caption with the date and time they were
created.
• To view and edit a larger image of a snapshot in the Selection pane,
click the snapshot.
• To scroll through the snapshots, use the Snapshots pane scroll bar
located on the right edge of the Snapshot pane or choose “Next
Snapshot” or “Previous Snapshot” from the View menu.
• To fill the window with a snapshot, double-click the snapshot or click a
snapshot and choose “Selection” from the View menu.
• To view all snapshots in the currently open Webster file, click the
Snapshots View button in the toolbar (Windows) or “View” tab
(Macintosh), or choose “Snapshots” from the View menu
.
• To zoom in on the Selection pane, click the zoom in button in the
annotation toolbar or choose “Zoom In” from the View menu, then click
an area in the Selection pane.
• To zoom out on the Selection pane, click the zoom out button in the
annotation toolbar or choose “Zoom Out” from the View menu.
• To return the snapshot to its original size after zooming in or out, click
the Fit to Window button on the annotation toolbar or choose “Fit to
Window” from the View menu.
Webster_draft2.book Page 38 Friday, November 3, 2006 2:24 PM