PLX51-PBM Setup
PROFIBUS DPV0/DPV1 Master or Slave to EtherNet/IP™ or Modbus® Gateway User Manual
ProSoft Technology, Inc. Page 19 of 196
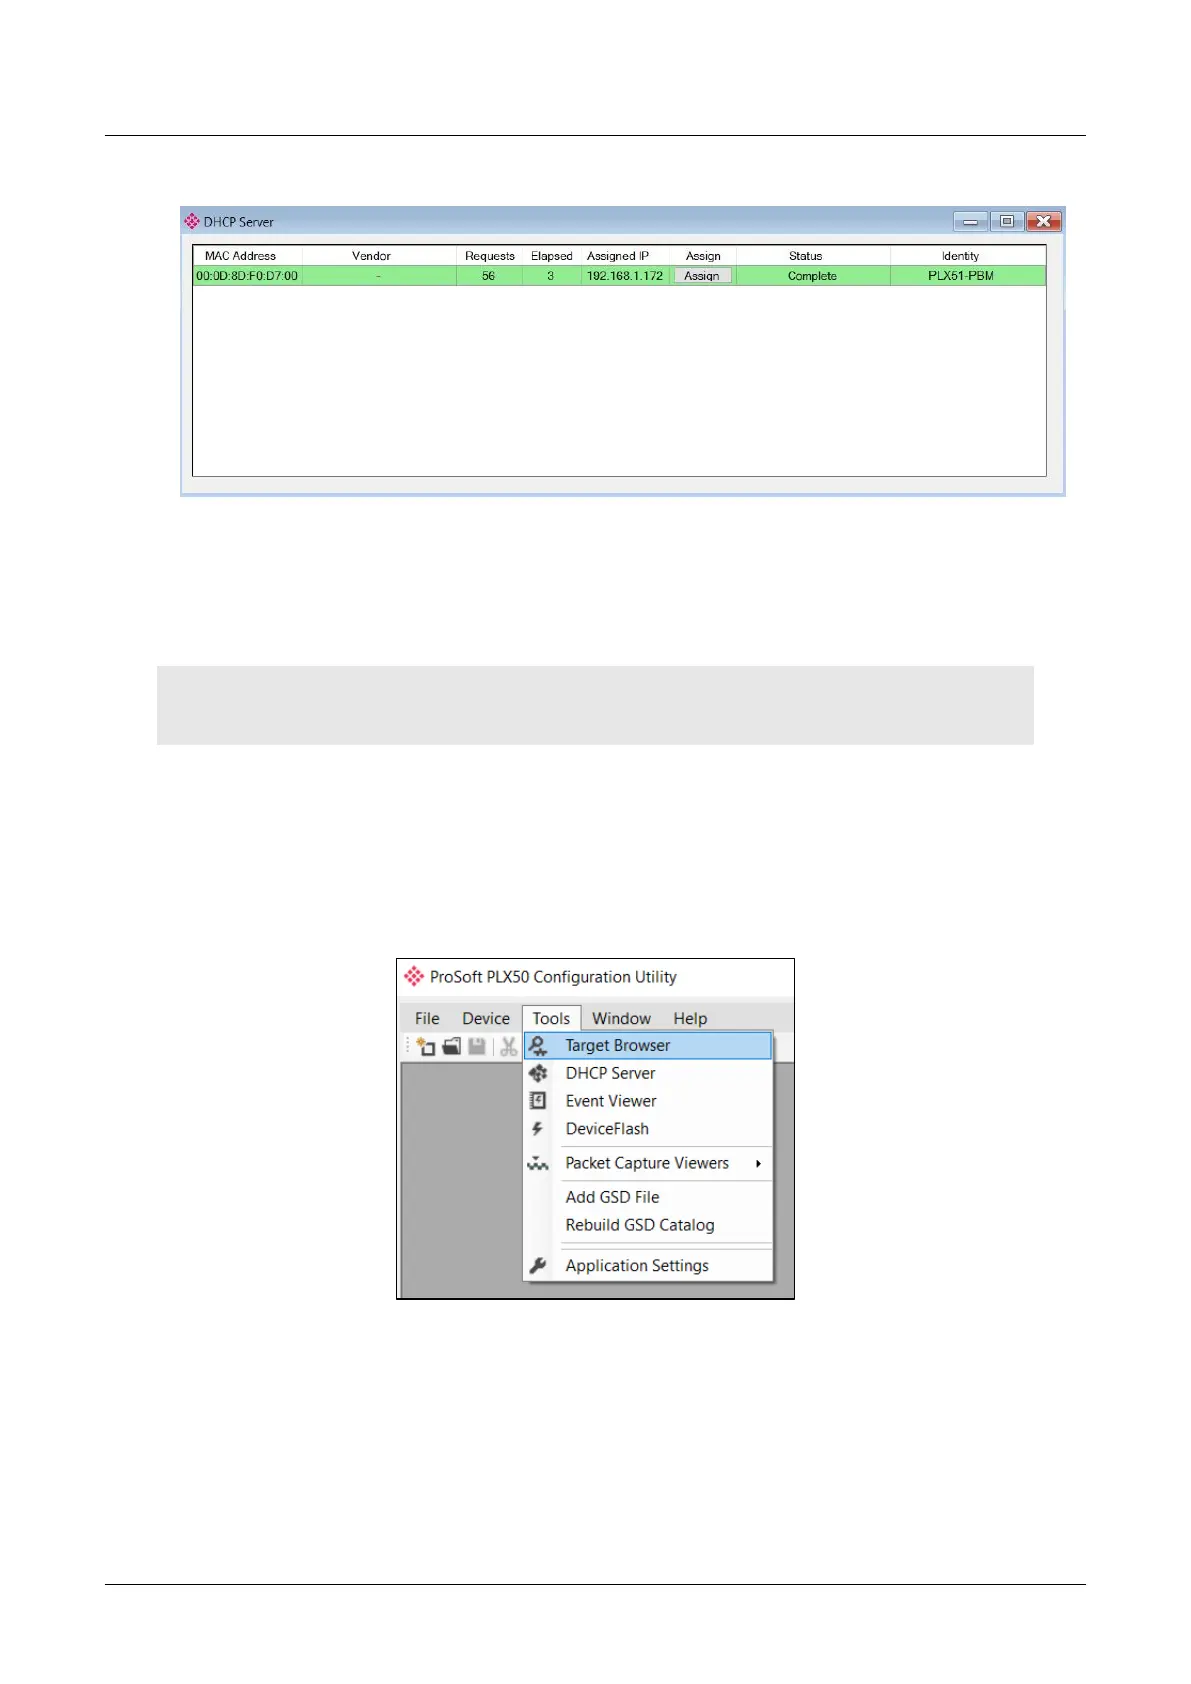
The successful assignment of the IP address by the device is indicated by the green
background of the associated row.
Figure 3.5. - Successful IP address assignment
It is possible to force the module back into DHCP mode by powering up the device
with DIP switch 2 set to the On position.
A new IP address can then be assigned by repeating the previous steps.
IMPORTANT: It is important to return DIP switch 2 back to Off position, to avoid the module returning to
a DHCP mode after the power is cycled again.
In addition to the setting the IP address, a number of other network parameters can
be set during the DHCP process. These settings can be viewed and edited in the
PLX50 Configuration Utility Application Settings, in the DHCP Server tab.
Once the DHCP process has been completed, the network settings can be set using
the Ethernet Port Configuration via the Target Browser.
The Target Browser can be accessed under the Tools menu.
Figure 3.6. - Selecting the Target Browser