RTE SEQUENCE screen appears to show the arrival alarmdistance. Just press
the-1
key to bypass this screen and return to the previous display
mode. Now the Boundary line is defined by the Route Plan but the distance
to maintain away from the boundary needs to be entered.
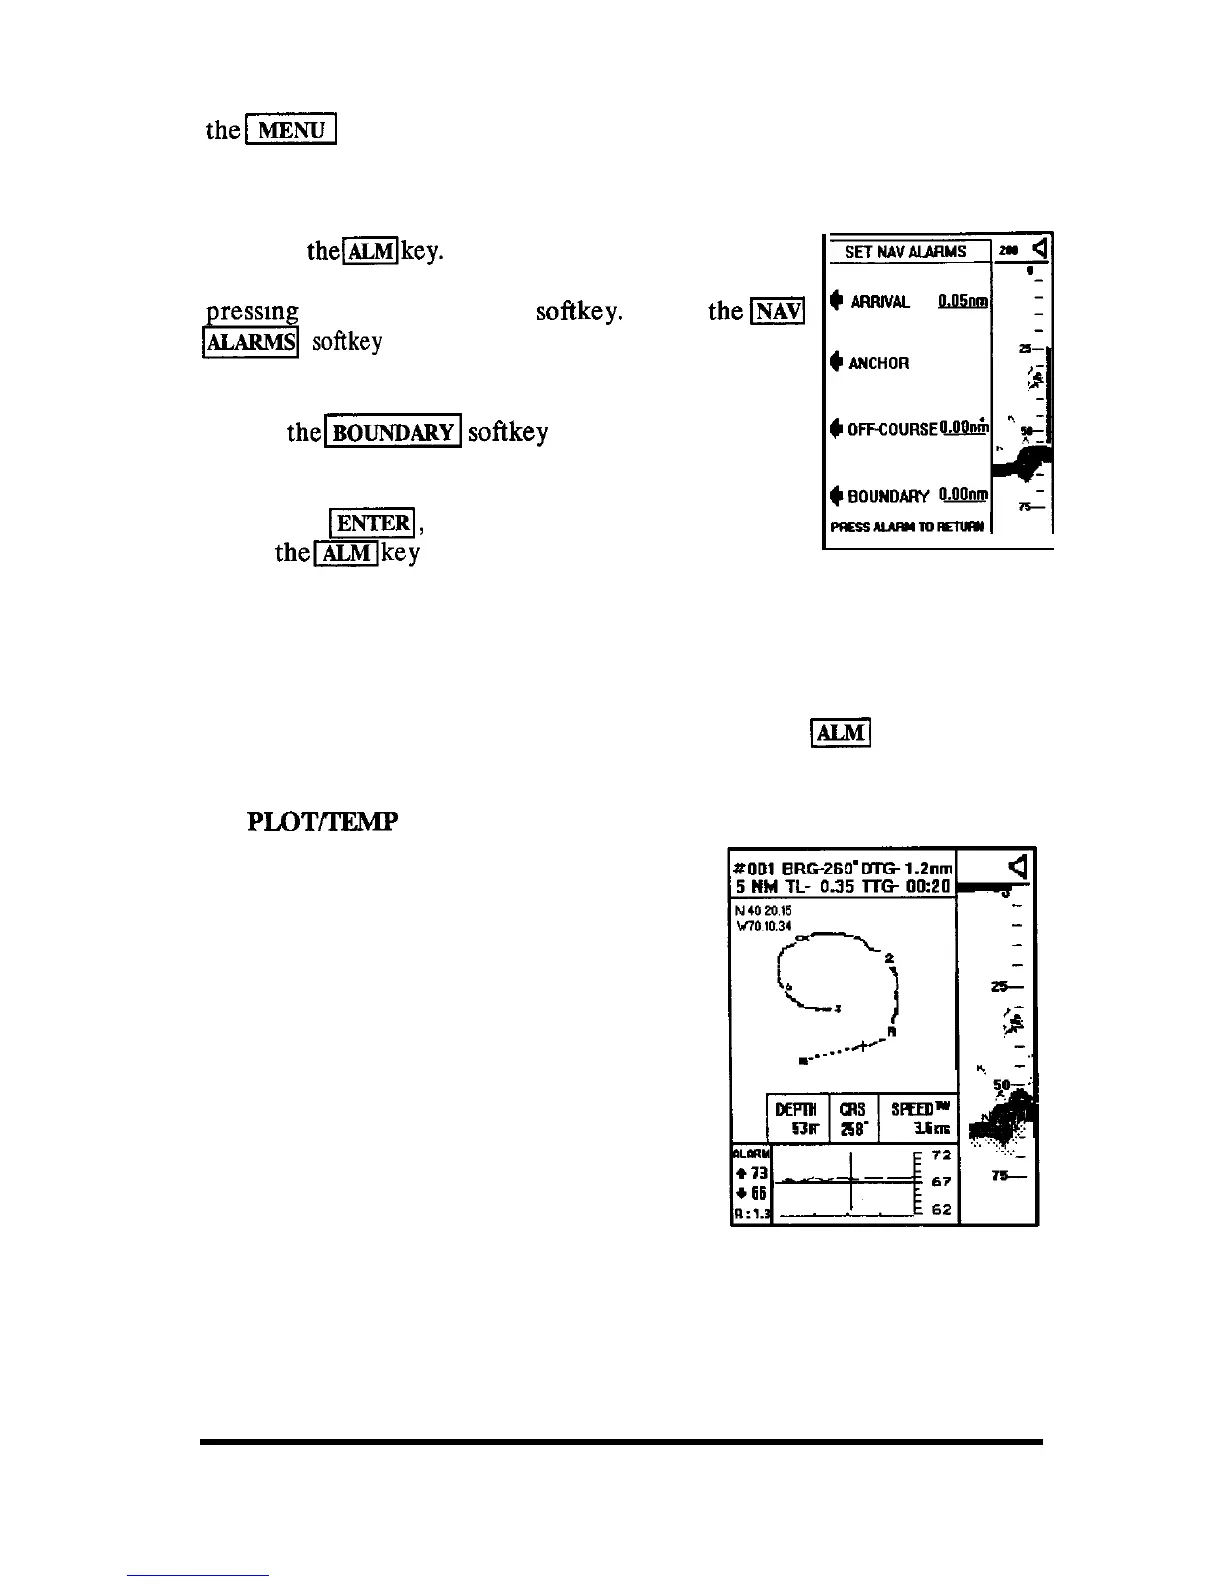
7. Press
themkey.
The SELECT ALARM menu ap-
pears and you can now select the NAVALARMS group by
ressing the corresponding
softkey.
When
them
b
ALARMS softkey has been pressed, the SETNAVALARMS
menu will appear.
Press
the\-
softkey
and enter the desired
clearance distance value to be maintained from the
center of the hazard area with the numeric keys. When
you press
I],
the BOUNDARY alarm is now set.
Press
themkey
to return to the previous display
mode.
--lolmwn
The Navigation display will now show that the route containing the
BOUNDARY
he is set
and activated. If the vessel should contact the perime-
ter of this boundary area, the alarm will sound and the” BOUNDARY”
message will appear on the displays of any mode. Press
m
to silence the
audio alarm.
33.6
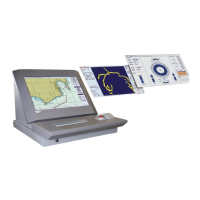
PLQTITEMP
Mode
One of the most useful modes combines the
Tracking Plotter with the Surface Water Temp
Graph to locate the warm water currents.The
Standard Fishfinding or A-SCOPE shares the
display area.
In this Mode you can record and
retrace your vessels track to your best fishing
spots..and back home again. The ‘Backing
Plotter also displays the symbols or first let-
ters of waypoints and event marks used to
mark your favorite fishing locations on the
plot screen.
When the Tracking Plotter mode appears
with the Fishfmding or A-Scope presentation on-screen together, finding
those productive ‘live” bottom areas on the first try could become almost
routine.
OPERATION 67