3.SP Mode Tables
25
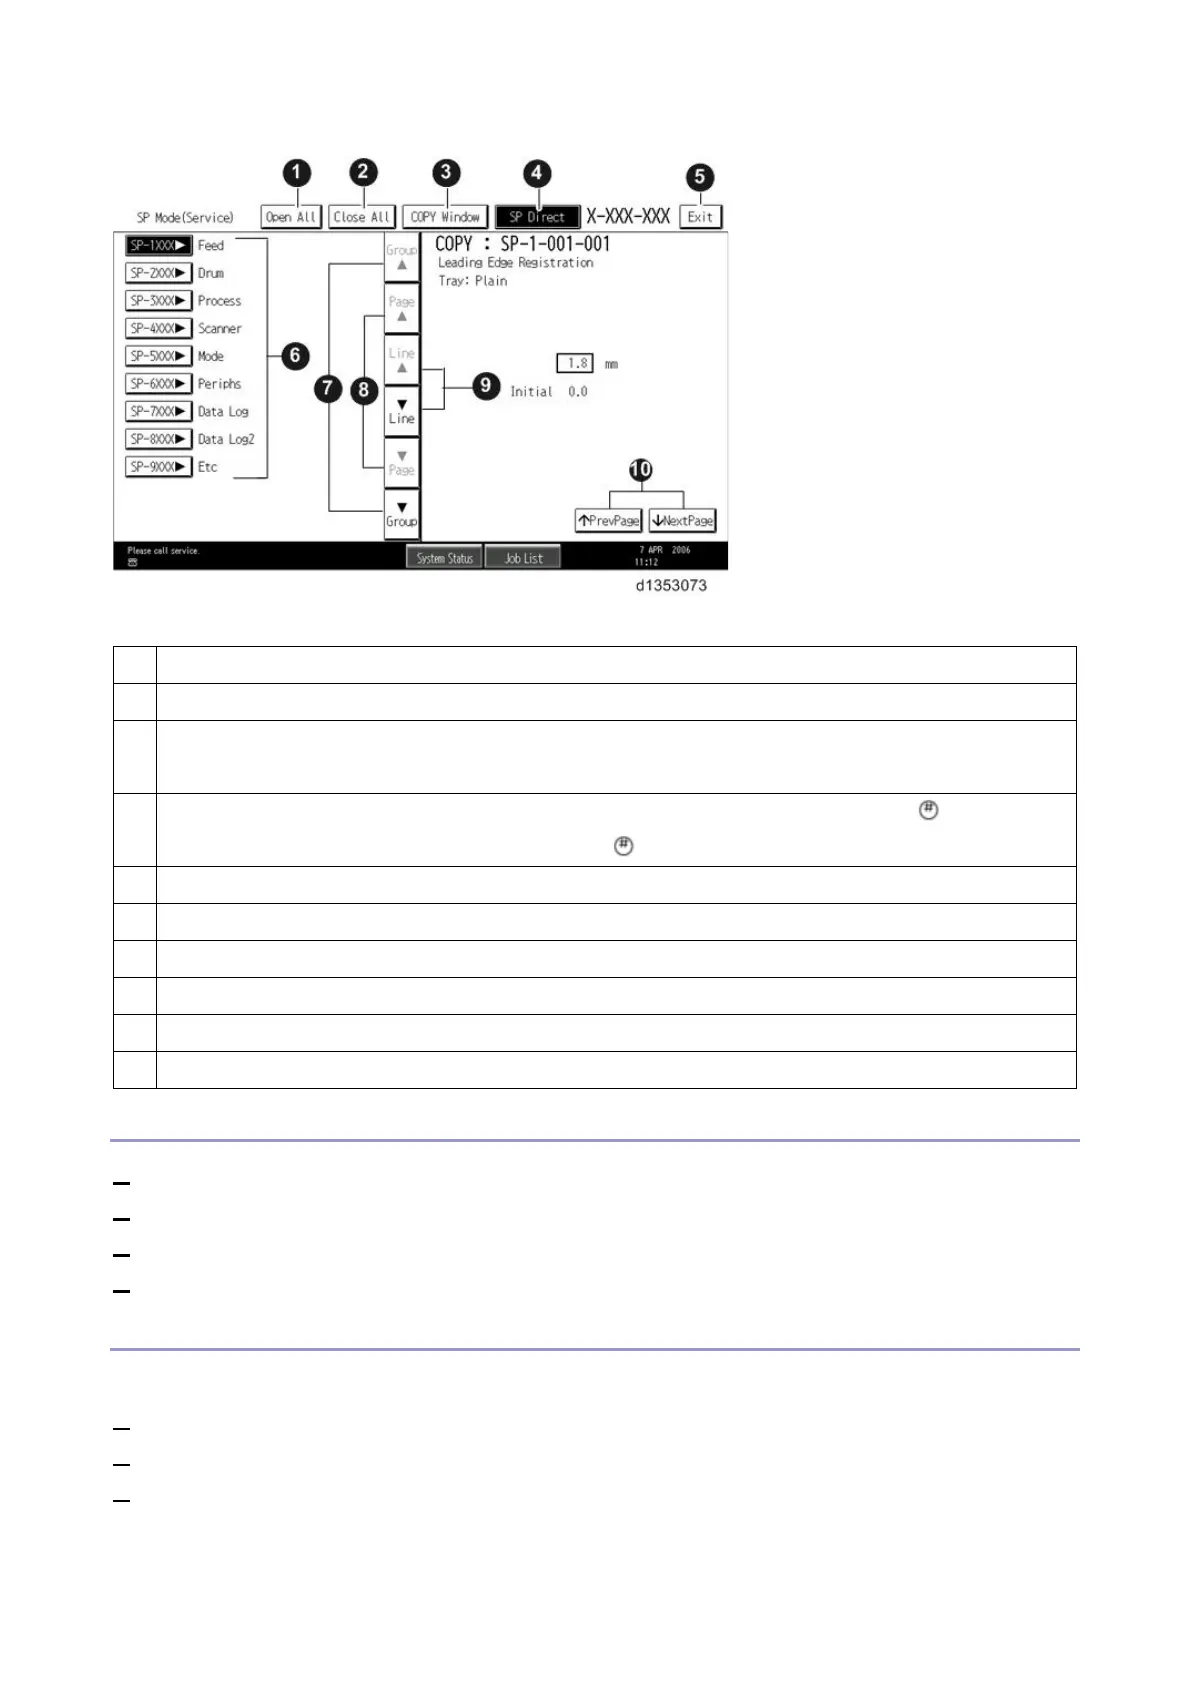
1 Opens all SP groups and sublevels.
2 Closes all open groups and sublevels and restores the initial SP mode display.
3 Opens the copy window (copy mode) so you can make test copies. Press SP Mode (highlighted) in the
copy window to return to the SP mode screen,
4
Enter the SP code directly with the number keys if you know the SP number. Then press . (The required
SP Mode number will be highlighted when pressing . If not, just press the required SP Mode number.)
5 Press two times to leave the SP mode and return to the copy window to resume normal operation.
6 Press any Class 1 number to open a list of Class 2 SP modes.
7 Press to scroll the show to the previous or next group.
8 Press to scroll to the previous or next display in segments the size of the screen display (page).
9 Press to scroll the show the previous or next line (line by line).
10 Press to move the highlight on the left to the previous or next selection in the list.
Switching Between SP Mode and Copy Mode for Test Printing
1. In the SP mode, select the test print. Then press "Copy Window".
2. Use the copy window (copier mode), to select the appropriate settings (paper size, etc.) for the test print.
3. Press [Start] key to start the test print.
4. Press SP Mode (highlighted) to return to the SP mode screen and repeat from step 1.
Selecting the Program Number
Program numbers have two or three levels.
1. Refer to the Service Tables to find the SP that you want to adjust before you begin.
2. Press the Group number on the left side SP Mode window that contains the SP that you want to adjust.
3. Use the scrolling buttons in the center of the SP mode window to show the SP number that you want to open.
Then press that number to expand the list.
 Loading...
