105 - 2001 TYPE 120/154/177
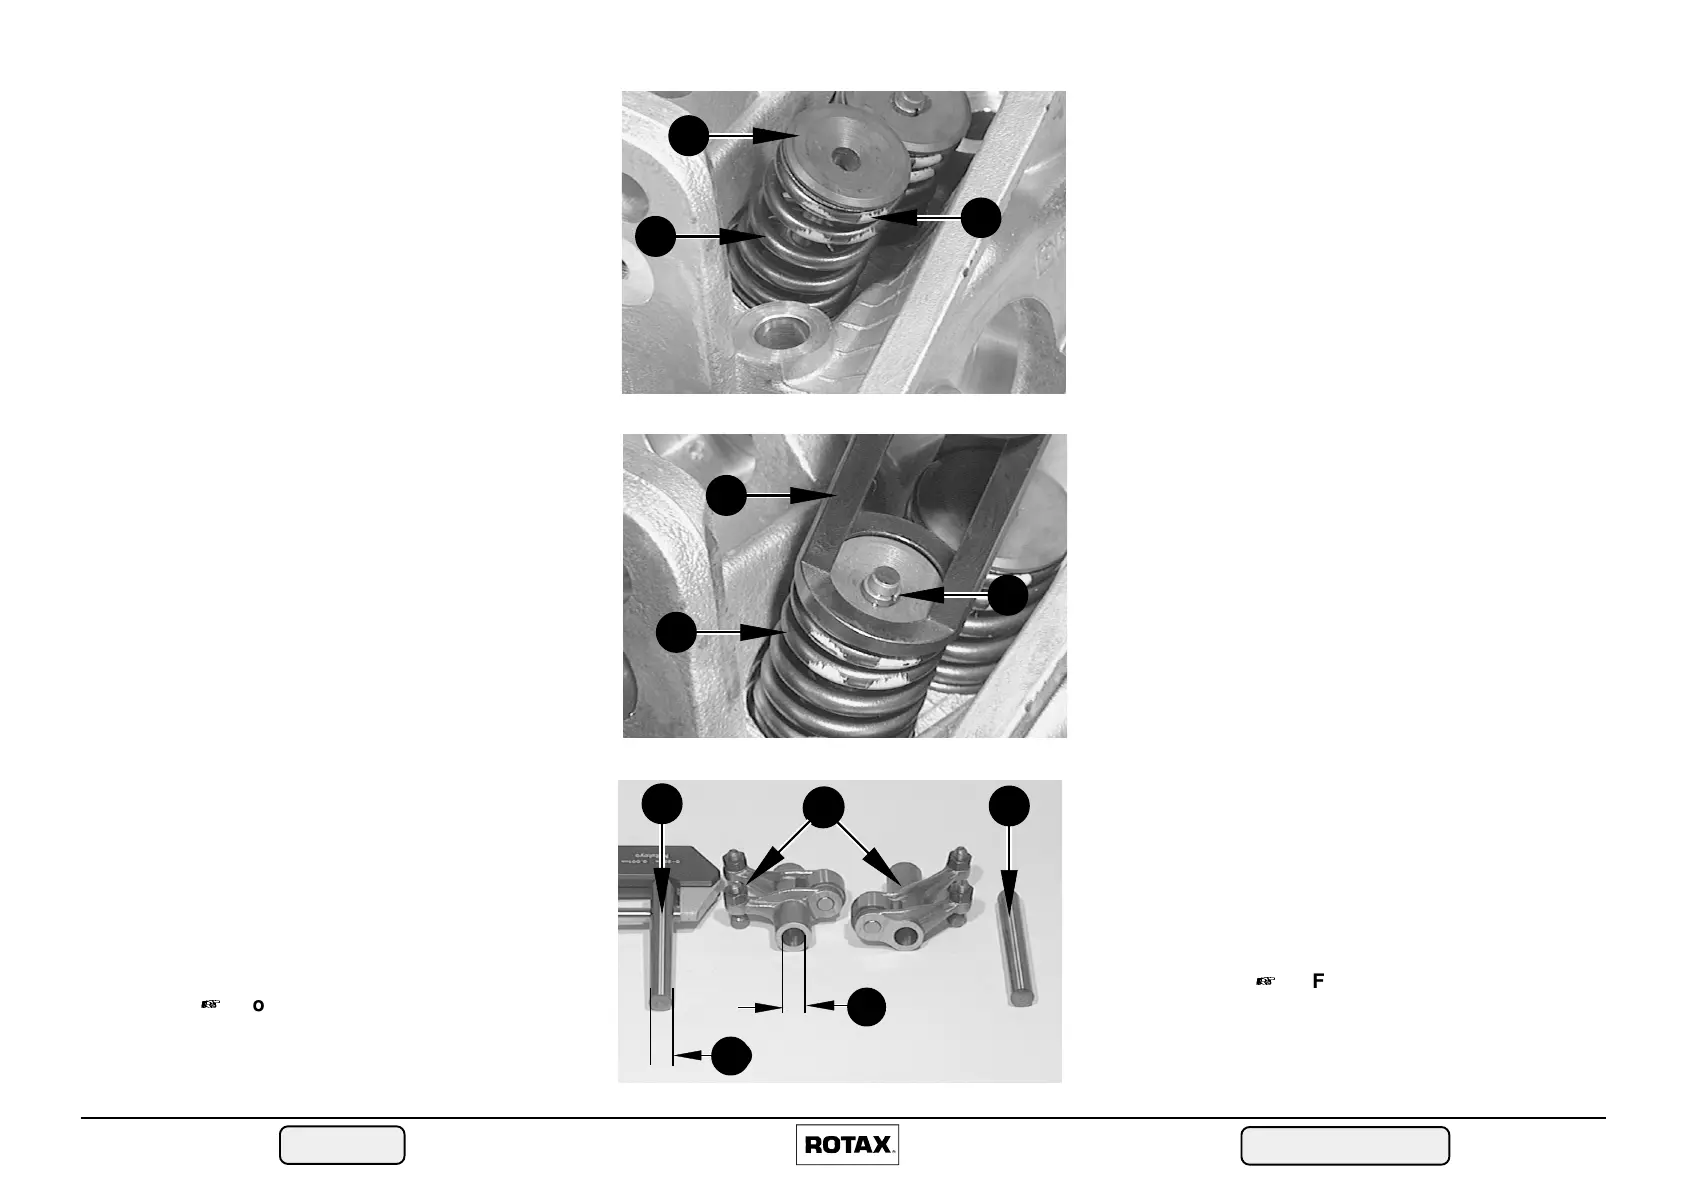
• Posare la molla valvola T ed il piattello molla valvola Y.
◆ Nota: Le molle delle valvole d’aspirazione e di
scarico sono uguali ma devono sempre
essere installate con il contrassegno
colorato U verso l’alto (dato l'avvolgimento
progressivo della molla).
■ Attenzione: Prima dell'inserimento dei semiconi I
spruzzarli con LOCTITE ANTI SEIZE
15378.
• Con l’attrezzo spingimolla valvola O ed un archetto di
compressione precaricare le molle valvole T ed inserire i
semiconi I.
Attrezzatura specifica
☞
Archetto compressione valvola
APRILIA
Attrezzo spingimolla valvola
codice ROTAX 0276 474
■ Attenzione: Scaricando l'archetto far attenzione che i
semiconi si incastrino bene nella sede
della valvola e che le molle valvola siano
posizionate perfettamente nelle loro sedi
— controllo visivo.
■ Attenzione: Controllare se le molle valvola sono
correttamente posizionate nel piattello molla
valvola. Se la molla non è ben posizionata,
lo stelo valvola si rompe sicuramente.
Bilancieri
• Controllare i pezzi a presenza di danneggiamento e usura.
• Misurare il diametro del foro per il perno W del bilanciere Q .
Limite di usura
+
Foro - bilanciere
d = max. 10,06 mm
• Put the valve spring T and valve spring retainer Y in
position.
◆ Note: The inlet and exhaust valves are the same
but must always be installed with the colored
mark U at the top (because of the way the
spring is wound).
■ Caution: Spray the half-cones I with LOCTITE
ANTI SEIZE 15378 before fitting them.
• Using the valve spring compressor O and a compressor
stand, preload the valve springs T and fit the half-cones I.
Service tool
☞
APRILIA spring compressor stand
Valve spring compressor
ROTAX code 0276 474
■ Caution: Before unloading the spring compressor
stand, make sure that the half-cones are
fitted properly into the valve seat and that
the valve springs are perfectly positioned
in their seats - visual check.
■ Caution: Check that the valve springs are correctly
positioned in the valve spring retainer. If
the spring is not properly positioned, the
valve stem will definitely break.
Rocker arms
• Check the parts for signs of damage or wear.
• Measure the diameter of the hole for the pin W in the rocker arm
Q.
wear limit
+
Hole - rocker arm
d = max. 10.06 mm
5
6
7
8
9
5
1
2
2
d
D
 Loading...


