-61-
Optical Adjustment
Before Adjustment :
1 Select the internal test pattern signal "Cross" from the projector's menu "Menu -> Setting -> Test pattern".
2 Adjust the focus by pressing the Focus U V buttons on the projector or remote control unit.
3 Press the Zoom U V buttons on the projector or remote control unit to set the TELE and WIDE. When focus is
changed at TELE and WIDE, following adjustment is necessary.
Adjustment :
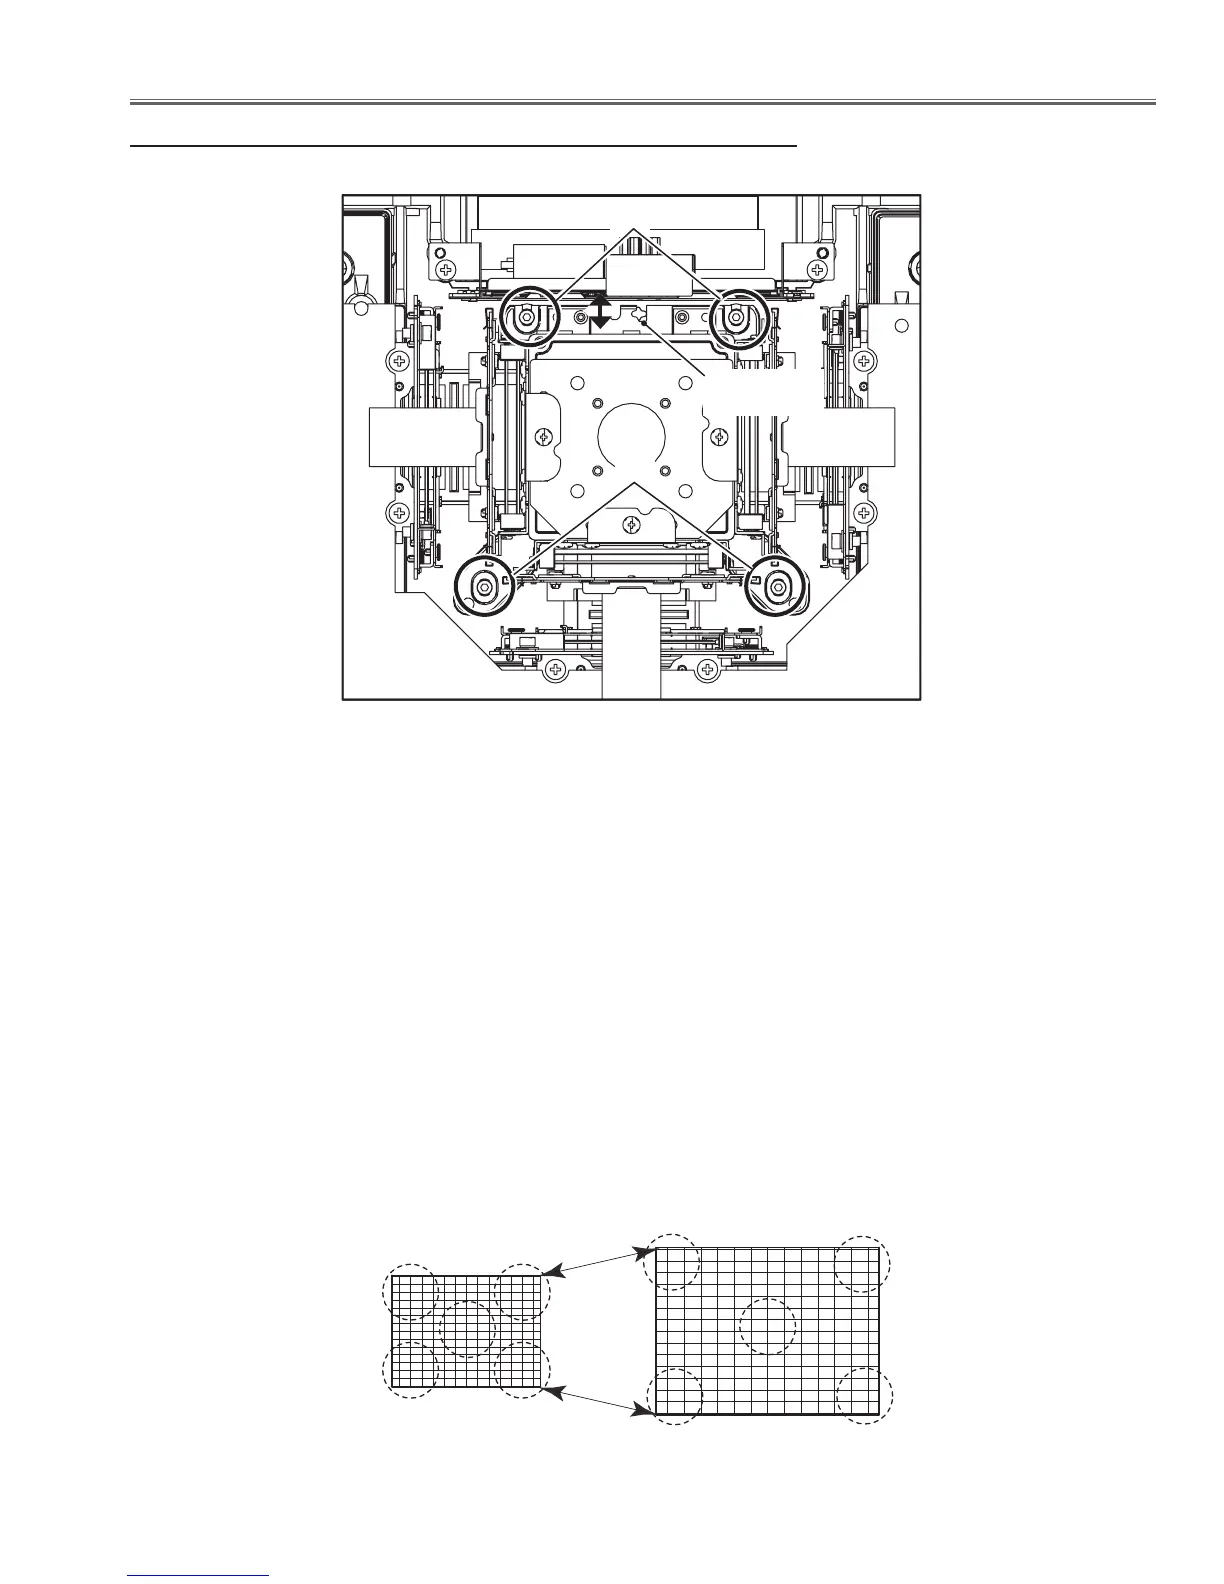
1 Loosen 4 screws-A using a hex wrench.
2 Set image size to the minimum, pressing the Zoom V button on the projector or remote control unit.
3 Adjust center part of grid pattern to sharp focus by pressing the Focus U V buttons on the projector or remote
control unit.
4 Set image size to the maximum by pressing the Zoom U button on the projector or remote control unit.
5 Insert a slot screwdriver into slot-B, turn it and adjust center part and four corners on the grid pattern to be sharp-
ened focus.
6 Repeat steps 2 to 5 until the focus does not shift by the ZOOM position between TELE and WIDE.
7 Tighten 4 screws-A to fix the assembly LCD panel / prism.
4. Back focus adjustment
A
A
LCD panel/prism
top view
Slot B
1
1
2
5
5
2
3
3
4
4
Minimum zoom (TELE)
Maximum zoom (WIDE)
 Loading...