-65-
Optical Adjustment
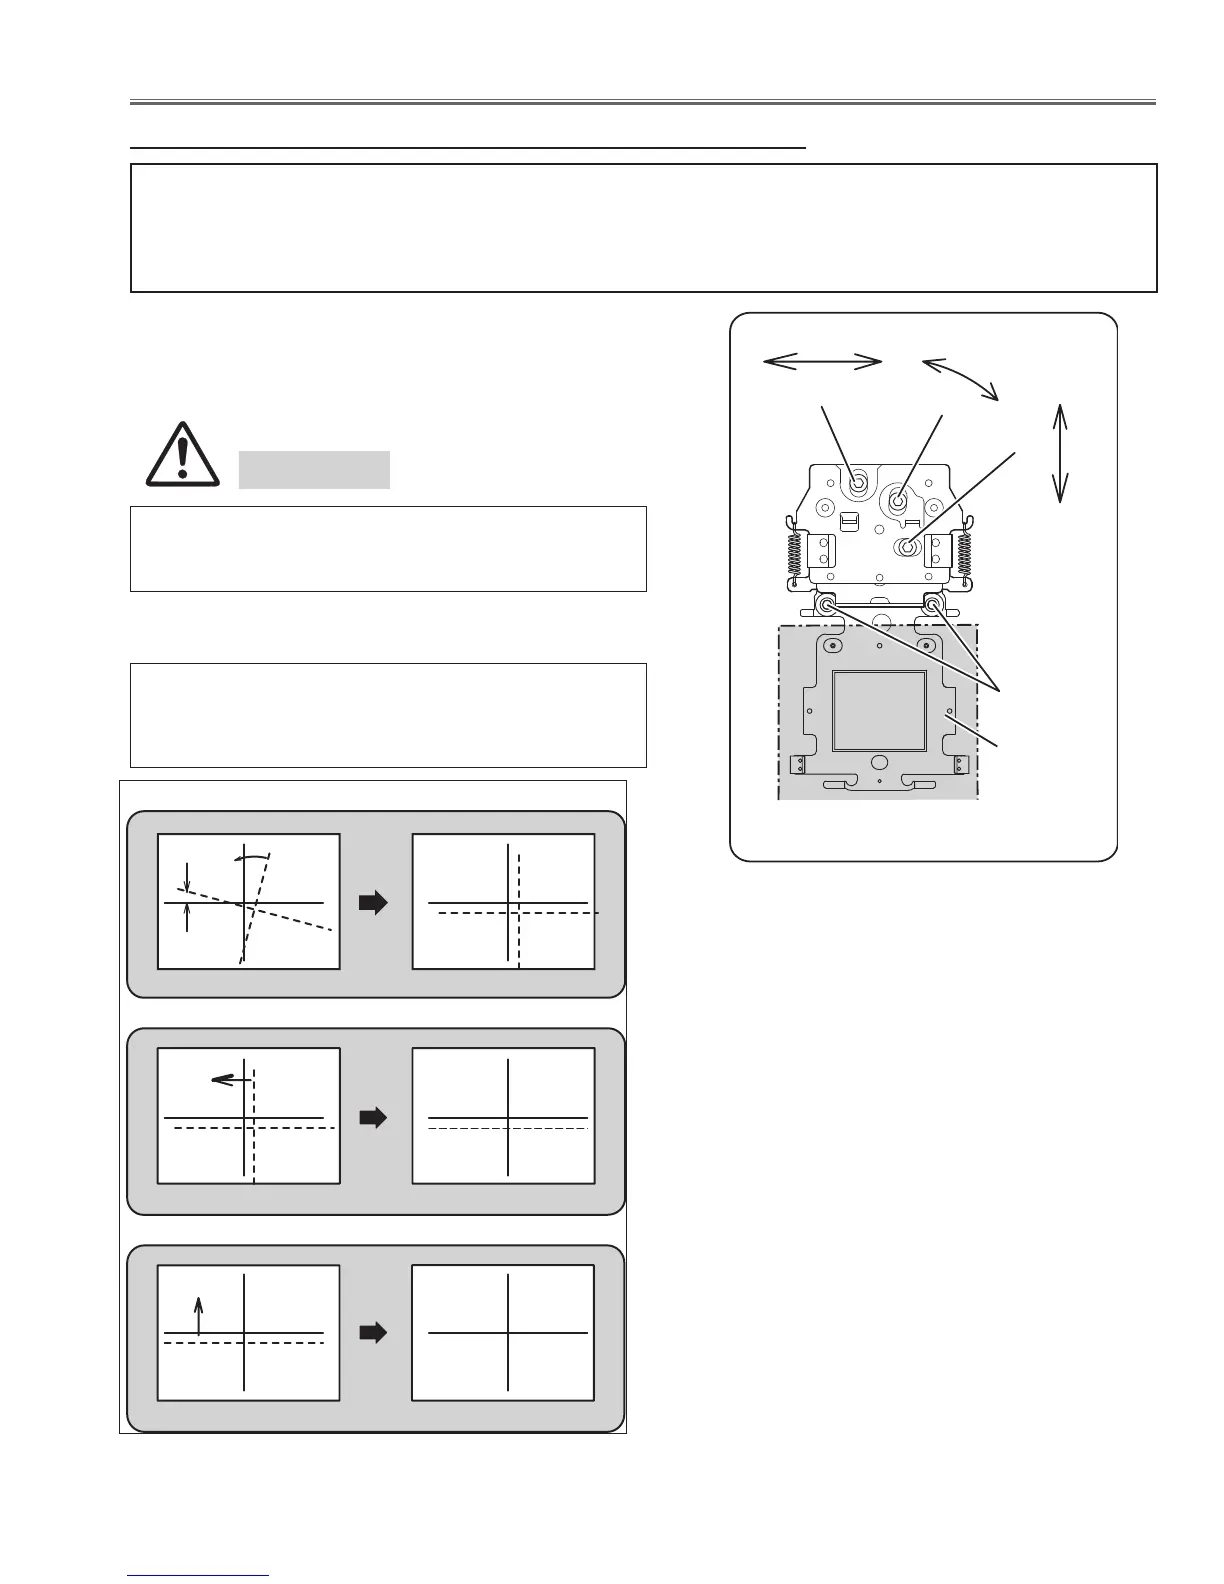
For convergence adjustment, use Green as the reference standard. Align Red and Blue with Green by adjusting
the position and angle of the Red and Blue LCD panel. Screws X, Y and Z are for convergence adjustment. When
adjusting the Green reference LCD panel, both on Red and Blue LCD panel should be adjusted with Green LCD
panel.
Adjustment
GREEN
Red or
Blue
Screw Z
Screw X
Screw Y
1 Select the internal test pattern signal "Cross" from the
projector's menu "Menu -> Setting -> Test pattern".
2 Turn the Red lines to be paralleled with Green lines by
adjusting screw-Z.
3 Adjust screw-X to converge Red and Green vertical
lines.
4 Repeat steps 2 and 3 until Red and Green vertical
lines converged properly.
5 Adjust screw-Y and converge Red and Green horizon-
tal lines properly.
6 Repeat step 2,3 and 5 until Red and Green lines con-
verged properly.
7 Tighten screws-A.
8 Remove Adjustment Tool from Prism/LCD panel unit.
[Before adjustment]
Make sure each Red,Green and Blue LCD panel unit has been
correctly installed, and that all focus adjustments have been
completed before preforming convergence adjustments.
1. Adjustment screw "Z" to turns the line.
2. Adjustment screw "X" to moves the line right and left.
3. Adjustment screw "Y" to moves the line up and down.
Line Movement and Screw Turning
Red (or Blue) Panel convergence adjustment
Do not insert the object into the optical block for blocking
the light, otherwise, optical parts may be damaged.
Caution
Note; When removing the convergence adjustment tool
after adjustment, loosen screws-B of Adjustment
Tool first, otherwise adjustment may be changed.
Note; If Red and Blue lines do not converge with green
lines, loosen screws-A of Green reference panel
and adjust Green panel slightly.
A
X
Z
Y
LCD panel
unit
(Prism/LCD Panel
assembly)
 Loading...