Section 03 ENGINE
Sub-Section 08 (EXHAUST SYSTEM)
03-08-7
NOTE:
Prior to verify leaks, plug all holes and
pressurize tuned pipe while immerging it in water.
INSTALLATION
Installation is essentially the reverse of removal
procedures. However, pay particular attention to
the following.
15, Exhaust Manifold
Make sure gasket(s)
no. 17
are properly posi-
tioned prior to finalizing manifold installation.
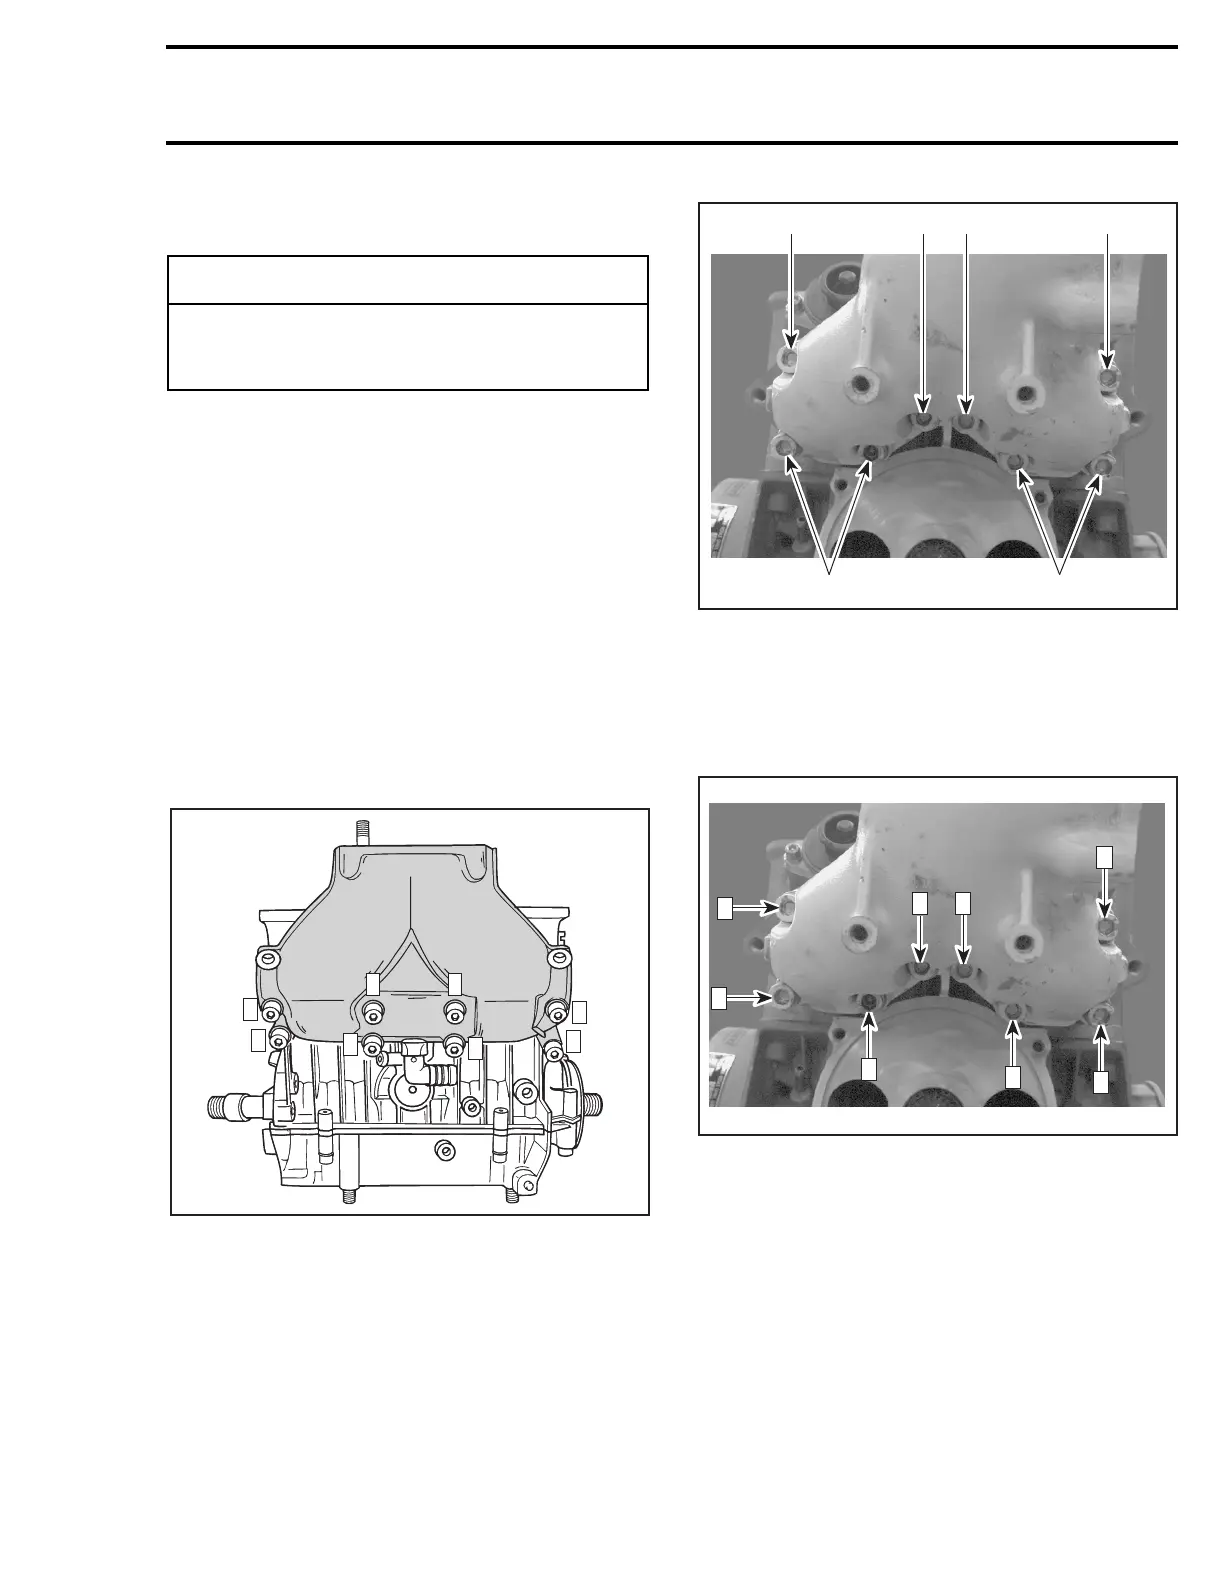
717 Engines
Apply synthetic grease on threads of screws
no. 14
.
Install and torque screws
no. 14
to 24 N•m (17
lbf•ft) as per following illustrated sequence.
787 Engine
Apply Loctite 515 on two screws
no. 14
. On the
other screws
no. 14
, apply synthetic grease on
threads. Install screws. Refer to the following il-
lustration for proper position of screws to the ex-
haust manifold.
1. Screw with Loctite 515
2. Screw with synthetic grease
Torque exhaust manifold screws to 24 N•m (17
lbf•ft) as per following illustrated sequence. Re-
peat the procedure, retightening screws to 40
N•m (30 lbf•ft).
10,11,12, Tuned Pipe
HX, GSX and GTX Models
Make sure to install the sealing ring
no. 16
on
tuned pipe cone if it was removed.
-
CAUTION
Always ensure water passages are not
blocked partially or completely while weld-
ing tuned pipe.
F01D59A
1 3
5
8
2
4
7
6
F01D82B
2
2
2
121
F01D82A
3
1
7 6
4
8
2
5