SEEDMASTER 2023
115
IMPORTING PRESCRIPTION MAPS
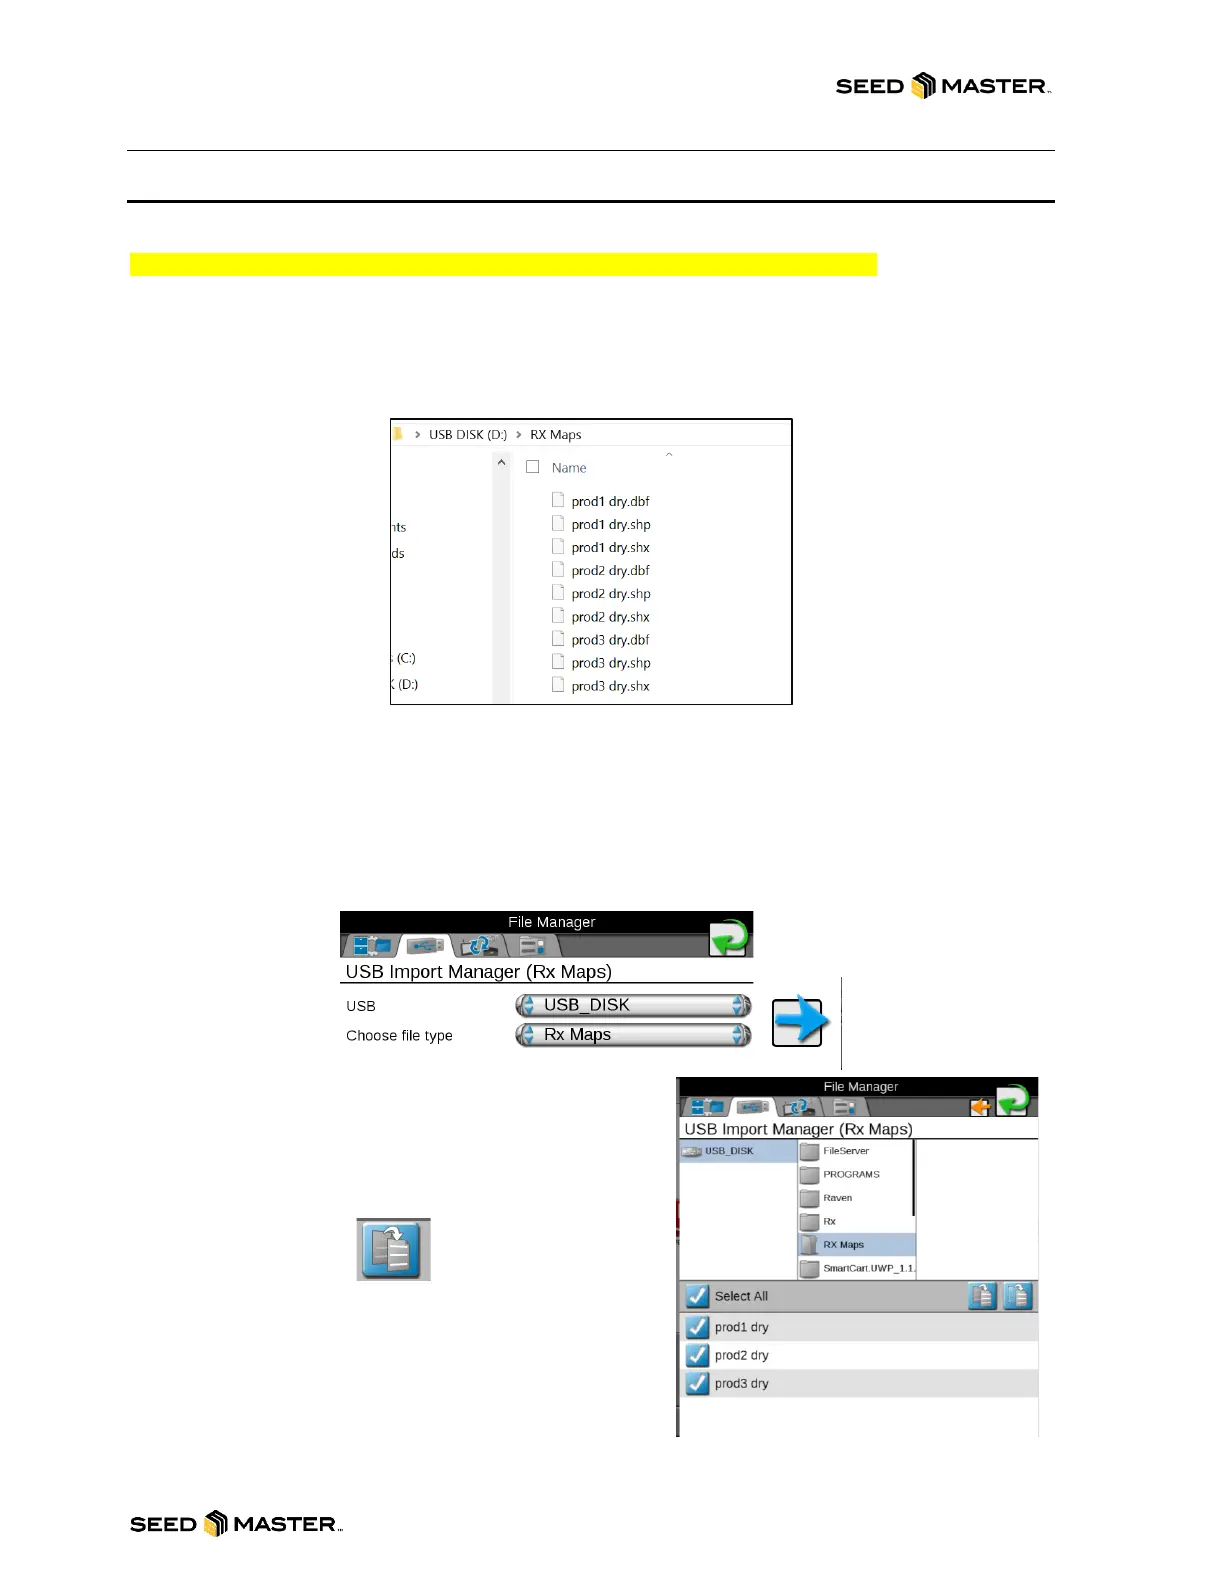
The RX map shape file needs to be loaded onto a USB drive before importing them to the Viper 4+.
NOTE: THE Viper 4+ needs to be unlocked for RX maps before they can be applied.
1. Insert a USB drive to your PC.
2. Create a folder called RX Maps on the root of the USB drive.
3. Copy the RX files to the RX Maps folder. There will be 3 files associated the RX map. See
below.
4. Insert the USB Drive into the Viper 4+.
5. Go to the Administrator Panel on the Viper 4+.
6. Touch the File Manager button.
7. Touch the USB Drive Tab.
8. Touch the drop-down menu for “USB” and choose your USB drive.
9. Touch the drop-down menu for “Choose file type” and choose “RX Maps”.
10. Touch the blue arrow pointing to the right.
11. Navigate to the RX Maps folder.
12. Choose the RX maps to import or Select All.
13. After selecting the RX maps, touch the import
button.
14. Touch the check mark to confirm the RX Map
import.
15. A pop-up window will appear when the files have
been successfully imported. Touch OK to finish.
16. Touch the green arrow to return to the main
screen.