SEEDMASTER 2023
108
CREATING A FLIP MAP AND BOUNDARY FOR FIELD
Follow the procedure below to create a flip map and
boundary for an entire field.
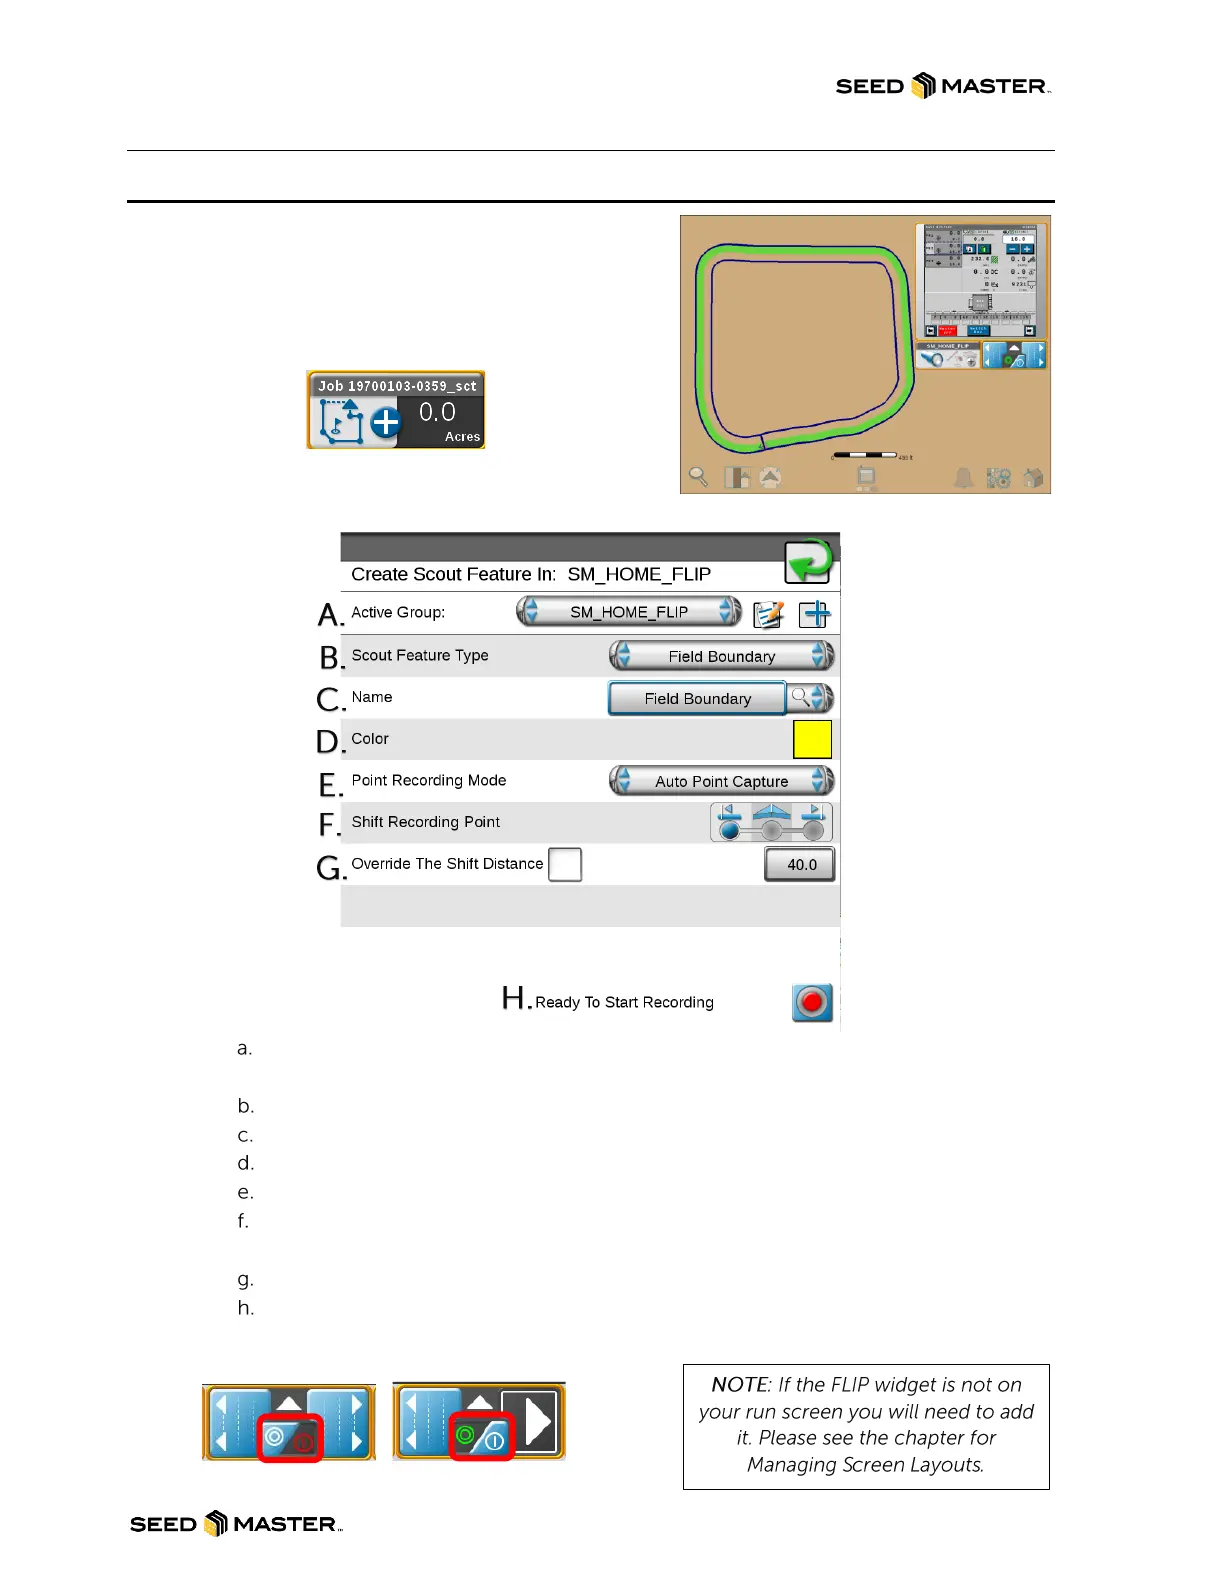
1. From the run screen, touch the Scouting Widget.
NOTE: If the scouting widget is not on your run
screen you will need to add it. Please see the
chapter for Adding Widgets to the run screen.
2. After touching the Scouting Widget, a window will
pop up. Follow the steps below to set up the FLIP MAP.
Name the Active Group: Touch the + sign and name the FLIP map the field name with
FLIP at the end.
Set the Scout Feature Type: Leave as “Field Boundary”.
Name: Leave as “Field Boundary”.
Color: Touch the grey color box and select the yellow color.
Point Recording Mode: Leave as “Auto Point Capture”.
Shift Recording Point: Select RIGHT if traveling counterclockwise or select LEFT if
traveling clockwise.
Override the Shift Distance: Leave unchecked.
Ready to Start Recording: After setup is complete touch the record button.
3. After setting up the field boundary you will need to enable FLIP. Turn on the FLIP widget by
touching the circles in the middle.
FLIP WIDGET OFF FLIP WIDGET ON