1-4. Notes on Board Replacing
1-4-1. Description on EEPROM Data
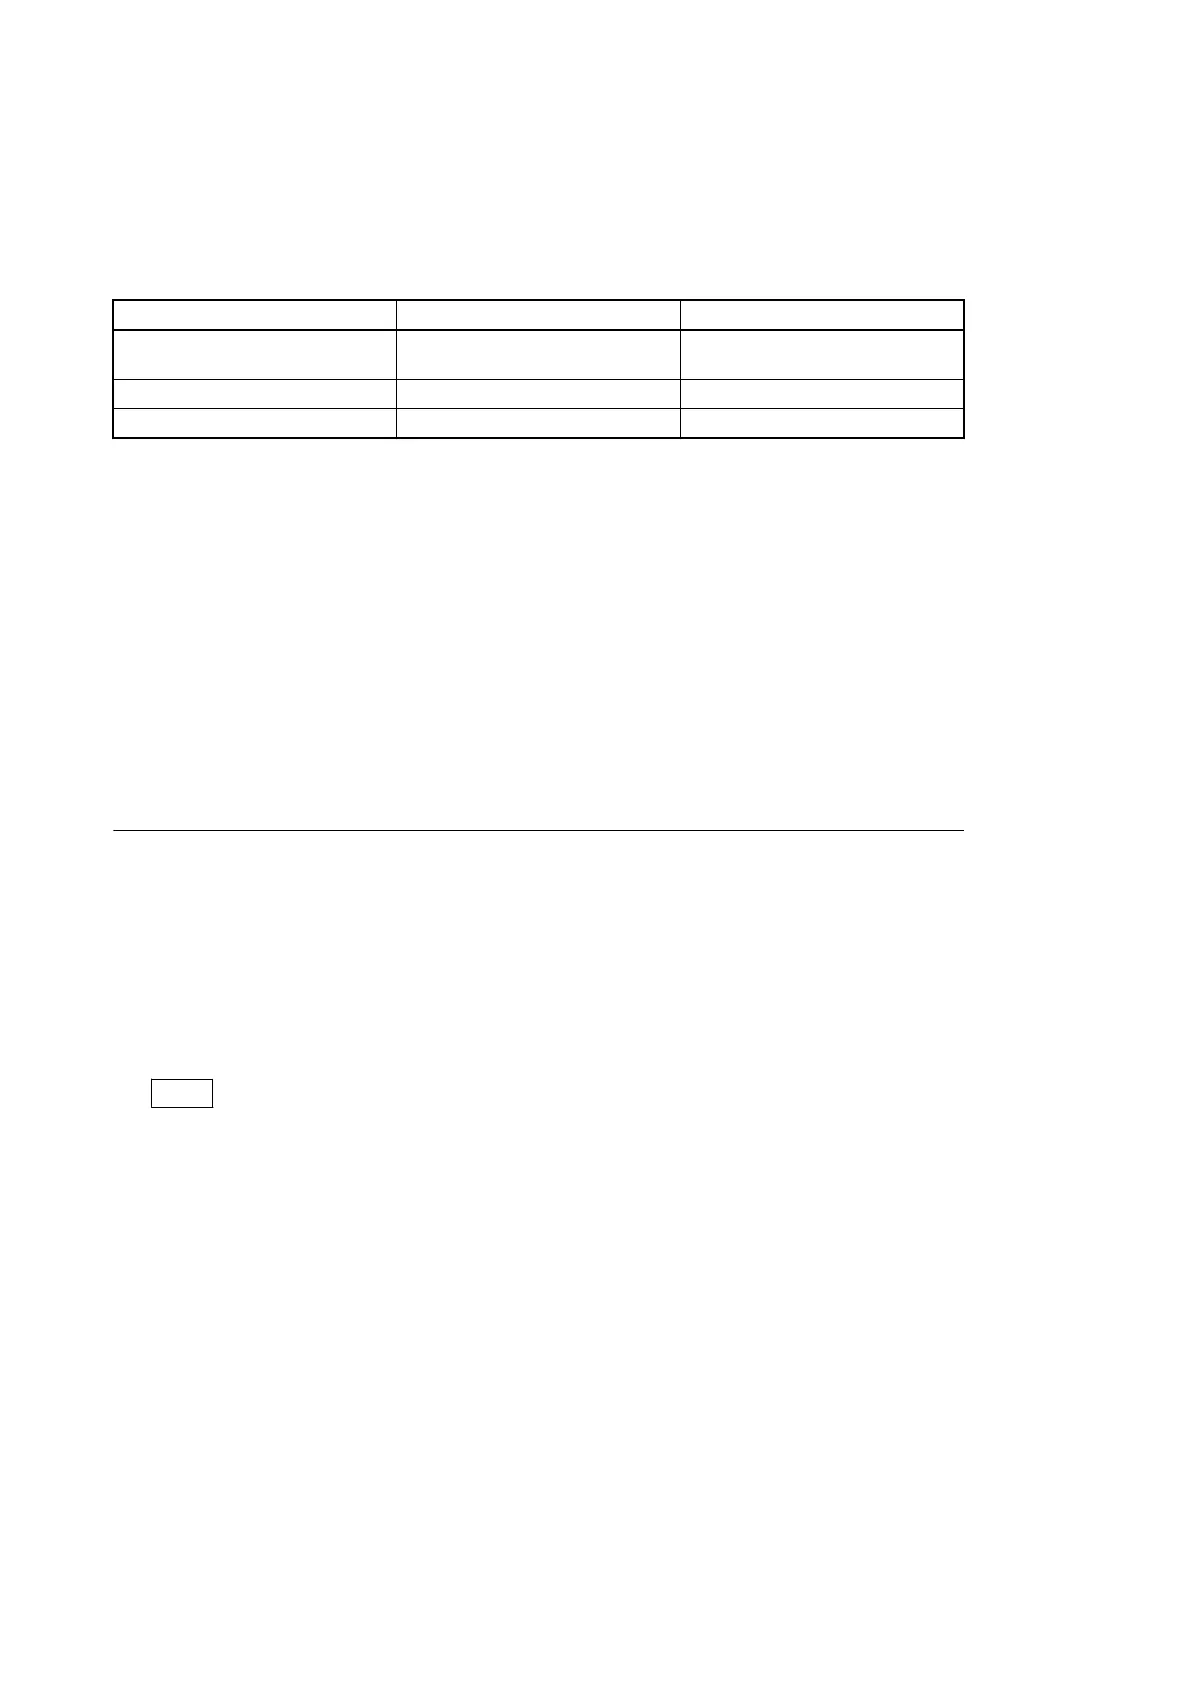
The table below gives the stored data of EEPROM (FRAM) on every printed circuit board.
Board Ref. No. Stored Data
IF-1278 IC204 CMOS adjustment data, RPN compensa-
tion data
SY-408 IC404, IC405 Paint data etc.
MB-1214 IC2 Model information data
• When replacing the board is needed, remove the IC attached to the former board and replace it to the new board.
• The EEPROM is the storing data inherent in the board.
The part number listed in “10. Spare Parts” is for EEPROM which is not programmed. If replacement is needed,
contact your local Sony Sales Office/Service Center.
1-4-2. Adjustment and Setting Required when Replacing the SY-408 Board
Camera setting status and files are stored in the SY-408 board. When the SY-408 board is replaced, contents of the
reference file, scene file, lens file, and operator file are lost. Store these files in a USB drive and then replace the SY-408
board.
The content of the OHB file stored in the OHB assembly is not lost.
Procedure
1. Store the reference file, scene file, and operator file in a USB drive.
• Reference file (Refer to “7-5. Reference File”)
• Scene file (Refer to “7-4. Scene File”)
• Operator file (Refer to “7-2. Operator File”)
2. Replace the SY-408 board. (Refer to “4-8-1. SY-408 Board/AT-189 Board”)
3. Upgrade the software to the latest version. (Refer to “6-1. Upgrading Software Programs”)
4. Execute REFERENCE (ALL) on the FILE CLEAR page of the FILE menu. (Refer to “7-5. Reference File”)
Note
Unless REFERENCE (ALL) is executed, the intercom operation panel may not function correctly.
5. Execute STORE FILE on the REFERENCE page of the FILE menu. (Refer to “7-5. Reference File”)
6. Execute the auto-adjustment. (Refer to “5-2. Automatic Adjustment”)
7. Load the reference file, scene file, and operator file stored in the USB drive in step 1.
• Reference file (Refer to “7-5. Reference File”)
• Scene file (Refer to “7-4. Scene File”)
• Operator file (Refer to“7-2. Operator File”)
8. Execute AUTO LEVEL on the AUTO SETUP page of the MAINTENANCE menu.(Refer to “7-5. Reference File”)
HDC4300
1-10