4 – Mixer configuration and settings
Mounting devices that are not on the Dante
network
Devices that are not connected to the Dante network can be
mounted virtually.
Connecting a device with a corresponding ID when the
Controller Settings page Routing control setting is “This Console”
will cause preamp and routing information to be applied.
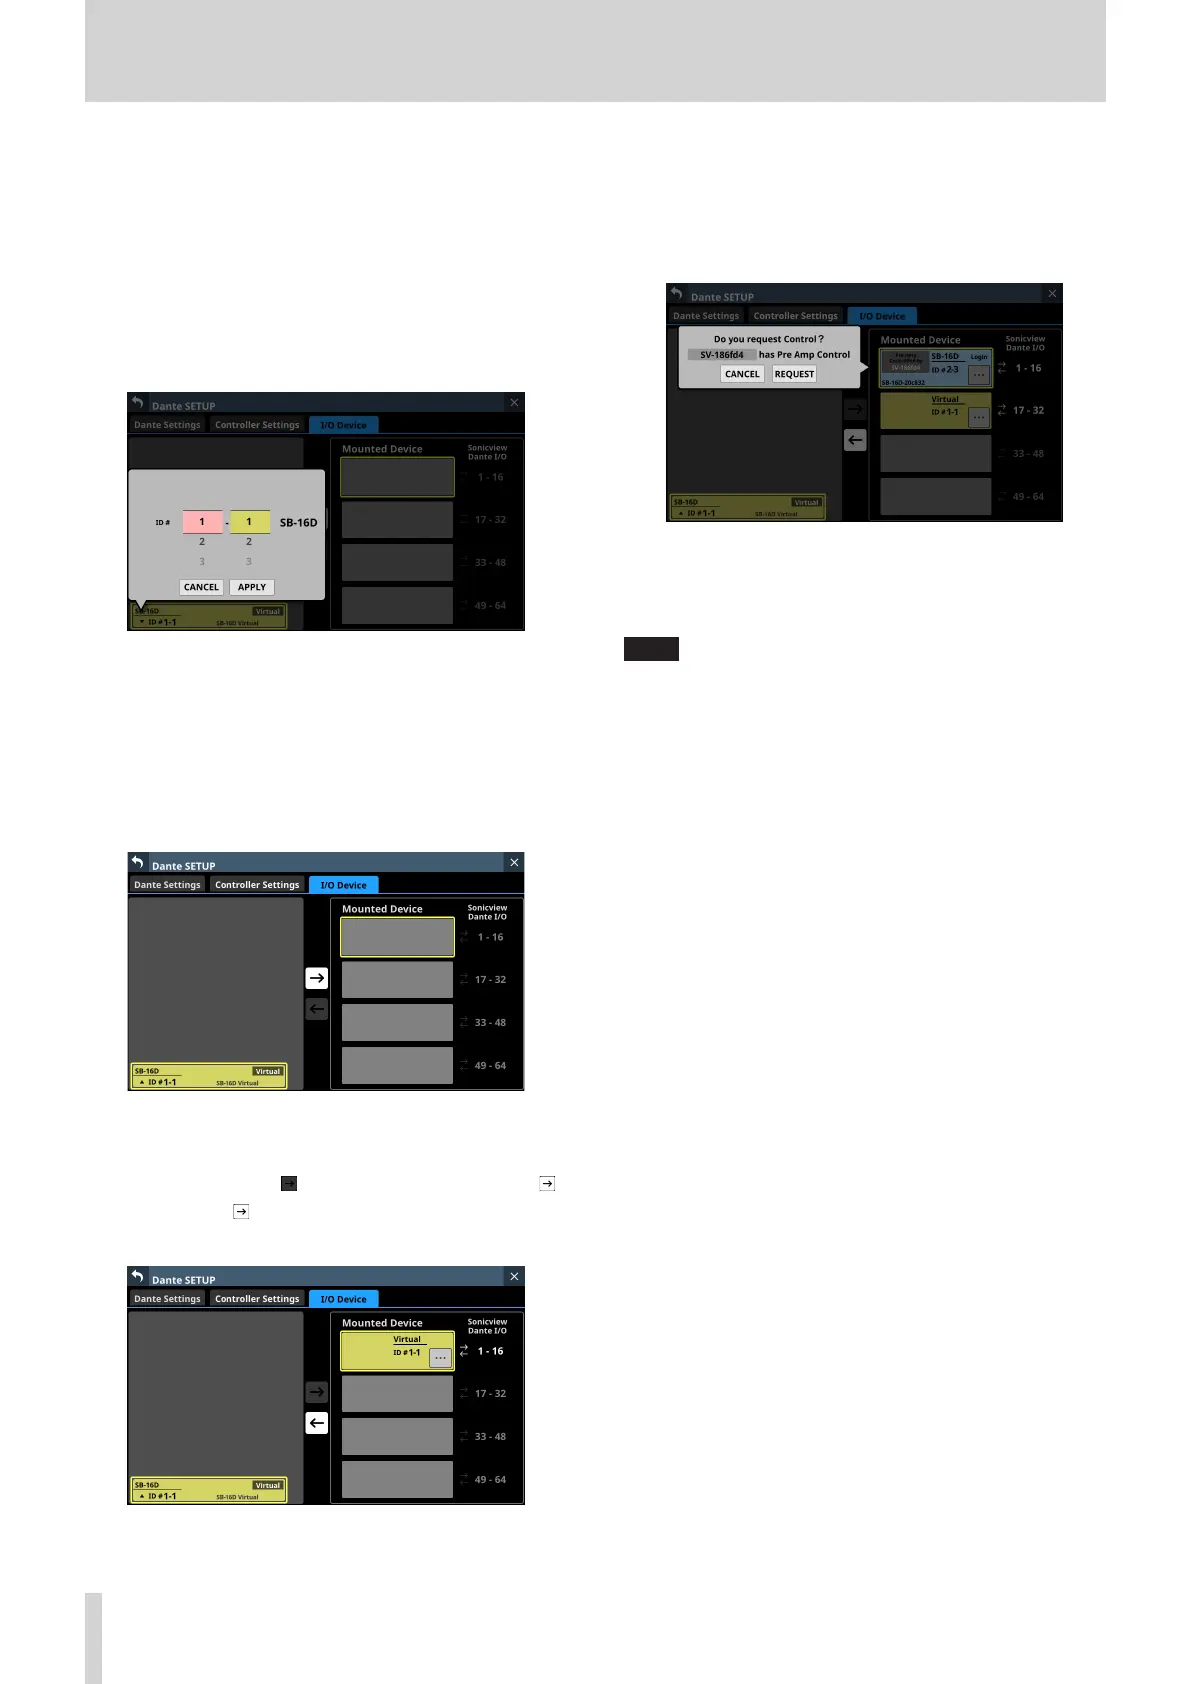
1. Tap the ID at the very bottom of the list on the left to open
a window where an ID number can be set for a virtually-
mounted device.
2. Swipe the options up and down to select the ID to mount.
Selections can also be changed by turning the LCD Knobs 2
and 3, which are lit pink and yellow.
If an ID that is already being used on the Dante network
is selected, that ID will be red and the APPLY button will
appear gray, showing the setting cannot be made.
3. Tap the APPLY button to confirm setting changes.
The selected ID number will be shown.
4. Tap the mounting destination on the right side (open
mounting slot).
The selected mount destination will be shown with a yellow
frame, and the central button will become highlighted ( ).
5. Tap the central button to mount it in the selected
position on the right side.
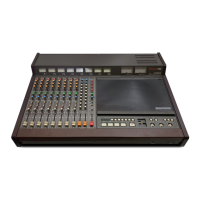
Setting control privileges after mounting
Control privileges can be requested after mounting.
1. Tap the control privilege display area for a mounted SB-16D
with control privileges that have not been acquired to open
a message.
2. Tap the REQUEST button to start requesting control
privileges.
Tap the CANCEL button to cancel requesting control
privileges.
NOTE
If control privileges are not acquired, control of the preamps,
GPIO (expansion mode), snapshot recall and output routing
for that SB-16D will not be possible from this Sonicview even
when mounted.
If control privileges are acquired, control of the above items
becomes possible, and sampling rate and reference level
settings for that SB-16D will be prioritized over those from
other Sonicview units.
64 TASCAM Sonicview 16/Sonicview 24 V1.1.0