2 – Names and Functions of Parts
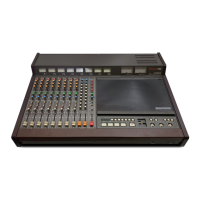
7 Channel color bars
These show the colors set for the modules assigned to the
selected layer. (See “Changing set module colors” on page
163.)
8 Channel faders
o When the SENDS ON FADER key is off (Sends On Fader
mode is off), these adjust the fader levels for the modules
assigned to the selected layer.
o When the SENDS ON FADER key is on (Sends On Fader
mode is on), these adjust the send levels to the selected
bus for the modules assigned to the selected layer.
9 Output meters
These are output meters for the MAIN L/R bus.
The OVER indicators light red when they reach or exceed
-0.00026 dBFS (16-bit full-scale value).
The bottommost indicator lights when above -70 dBFS.
0 HOME key
o When the Menu Screen or a settings screen is open, press
to return to the Home Screen on all touchscreens.
o Press and hold this key and the MENU key together for
5 seconds to open the LOCK SETUP screen. (See “LOCK
SETUP screen” on page 39.)
NOTE
Various shortcut operations are possible using this key
in combination with others. See “12 – List of shortcut
operations” on page 206 for details.
q MENU key
o Press this key to open the Menu Screen on the right
touchscreen.
o Press and hold this key and the HOME key together for
5 seconds to open the LOCK SETUP screen. (See “LOCK
SETUP screen” on page 39.)
NOTE
Various shortcut operations are possible using this key
in combination with others. See “12 – List of shortcut
operations” on page 206 for details.
w USER KEY A–F and indicators
Users can assign functions and colors to these keys as
they like. When functions that have different statuses are
assigned to these keys, they will light, blink and become unlit
accordingly. (See “USER DEFINED CONTROLS screen” on page
42.)
NOTE
Press one of these keys while pressing the MENU key to open
the screen that corresponds to its assigned function. (See “12
– List of shortcut operations” on page 206.)
e MUTE key and indicator (MASTER)
o This mute/unmutes.
o When the SENDS ON FADER is off (Sends On Fader mode
is off), this mutes the module assigned to the MASTER slot
on the Custom Layer Setup page of the Layer Key Setup
Screen (MAIN L/R by default).
o When the SENDS ON FADER key is on (Sends On Fader
mode is on), this mutes the selected bus master module.
o When a MUTE key is on (lit), the signal of the
corresponding module is muted.
o Depending on the DCA or Mute Group, the key will blink
when muted.
r SOLO CLEAR key and indicator
o The SOLO CLEAR indicator lights when any module is
being soloed.
o Press this when the SOLO CLEAR indicator is lit to end
soloing of all channels.
NOTE
The MONITOR SETUP screen MONITOR/SOLO page can be
opened by pressing this key while pressing the MENU key.
(See “Making monitor output and solo function settings” on
page 54.) (See “12 – List of shortcut operations” on page
206.)
t SOLO key and indicator (MASTER)
o This turns soloing on and off.
o When the SENDS ON FADER is off (Sends On Fader mode
is off), this solos the module assigned to the MASTER slot
on the Custom Layer Setup page of the Layer Key Setup
Screen (MAIN L/R by default).
o When the SENDS ON FADER key is on (Sends On Fader
mode is on), this solos the selected bus master module.
o When this key is on (lit), the signal of the corresponding
module is sent to the SOLO L/R bus.
o The key will blink if soloing is on because of DCA.
NOTE
The MONITOR SETUP screen MONITOR/SOLO page, which is
where various solo settings can be made, can be opened by
pressing this key while pressing the MENU key. (See “Making
monitor output and solo function settings” on page 54.)
(See “12 – List of shortcut operations” on page 206.)
8 TASCAM Sonicview 16/Sonicview 24 V1.1.0

 Loading...