Smart-Vue Module Overview and Installation
10 Administrator Guide v 2.2 Thermo Scientific Smart-Vue
®
Wireless Monitoring Solution
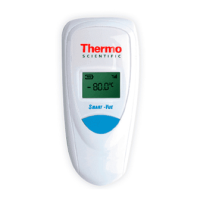
1.4.1 Refreshing the Module
Display with a Short Press
You may refresh the Smart-Vue display with the latest sensor readings by
performing a short press on the module’s push-button. Simply press the
button briefly to update and view the current reading.
CAUTION: Make sure you only press the button briefly, as a long-press
will active the automatic wireless network search feature.
1.5 Before you Begin In order to install Smart-Vue modules as described in this guide and the
Smart-Vue Client Software User Manual:
• Smart-Vue Server/Smart-Vue Client software must be installed and
ready to use.
• You must have appropriate access rights on your computer to configure
devices.
• A Smart-Vue receiver must be installed and ready to use on your
computer or network. The receiver may either be a USB receiver
connected directly to the Smart-Vue Server computer, or a TCP/IP
receiver connected to your local network via an Ethernet cable.
Note USB receiver installation is described in the Smart-Vue Server /
Smart-Vue Client Installation Guide on your Smart-Vue CD-ROM.
TCP/IP receiver installation is described later in this manual.
CAUTION: Modules with internal sensors should not be placed in
cold-rooms.
1.6 How to Place your
Smart-Vue Module for
Best Performance
For optimal operation, follow these recommendations when physically
placing your device:
• Do not place the module within 40 cm (16 in.) of another module.
• Make sure the wireless module is not placed on an electrical conduit or
cable tray (such as for computer network cables).
• For best results, place the module so that it faces the general direction of
the receiver antenna.
• Keep about 20 cm (8 in.) clear space around the module. For example, a
module that is “stuck” between two refrigerators may not communicate
effectively.

 Loading...