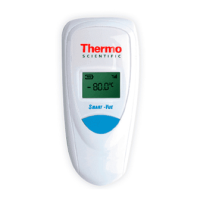
Smart-Vue Module Overview and Installation
Thermo Scientific Smart-Vue
®
Wireless Monitoring Solution Administrator Guide v 2.2 11
• Receiver and module placement, when possible, should be at a
minimum height of 2 meters (6 feet) to prevent wireless signal
attenuation. Receivers and modules placed lower than the
recommended height could result in excessive communication errors or
even communication failure.
• If you are using sensors connected by a cable:
• Make sure all cables are firmly attached
• You must be able to open and close the enclosure door without
forcing
• Flat ribbon cables must remain flush with enclosure door joints.
CAUTION: When routing a cable (if necessary) for any Smart-Vue sensor,
avoid direct contact with or close proximity placement of the sensor cabling
with any high voltage wiring. Cabling should be placed with no less than a
minimum of 5 cm (2 inches) distance from high voltage components. Also,
avoid running the sensor cable in parallel with high voltage wiring.
For all other manufacturers’ equipment, contact the manufacturer of the
instrument for instructions regarding proper placement of the sensor.
1.7 Recommended
Order for Installing
Modules
In addition to placing your Smart-Vue module as described for best wireless
performance, you may also optimize overall network performance by
proceeding as follows when installing multiple modules:
1. Examine the general layout of your site to determine the placement of
your Smart-Vue modules. The extent of your pre-installation site survey
depends on the number of modules to install. Feel free to contact your
sales representative for more information on this topic.
2. Place all modules in their final locations before running wireless setup.
3. Begin activation by pressing on the module’s button for 3 seconds (until
“Searching” is displayed on the screen), starting with the modules closest
to your receiver, working your way “out” in concentric circles. This
 Loading...