199
25. ROUTE SURVEYING
7. The next width peg can then be set by
pressing [OK].
• The center peg can be set-out by
pressing [S-O].
"15. SETTING-OUT
MEASUREMENT"
PROCEDURE Using observation to specify arbitrary width
pegs
1. Enter the road topo menu in the same
manner as shown above.
“PROCEDURE Using key entry
to specify arbitrary width pegs”
steps 1 to 3
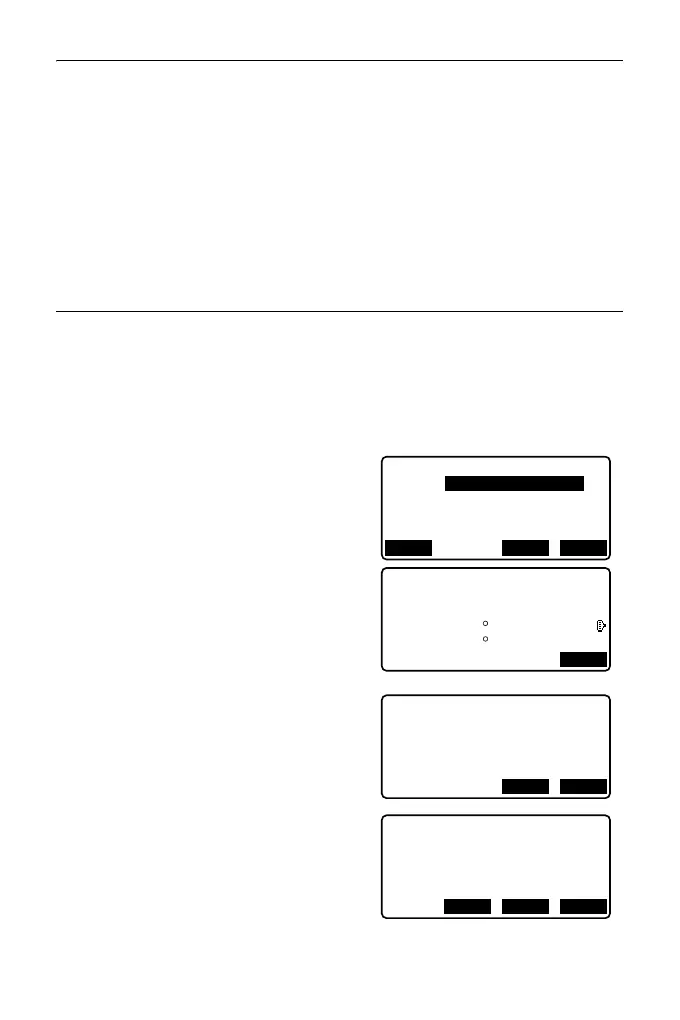
2. Sight the width peg and press [MEAS]
to start measurement. The
coordinates and measurement
distance of the width peg, vertical
angle and horizontal angle are
displayed.
Press [STOP] to stop the
measurement.
3. The coordinates and point name
shown in this screen are used to
display the results for the center peg.
4. Press [YES] in the screen shown in
step 3 to display the route width and
point name of the width peg.
5. The next width peg can then be set by
pressing [OK].
Np:
Ep:
Alignment/Road topo
0.000
0.000
LOAD MEAS OK
N
E
168.329
199.361
3.780m
78 43’26"
21 47’16"
STOP
SD
ZA
HA-R
Np:
Ep:
Alignment/Road topo
168.329
Confirm?
199.361
YESNO
N
E
173.318
Road topo/CL peg
196.031
Sta..ing
123.456m
No.2
OKREC S-O