EasyManuals Logo

Toshiba B-EX4 SERIES Service Manual

Toshiba B-EX4 SERIES
294 pages
To Next Page IconTo Next Page
To Previous Page IconTo Previous Page
Page #46 background imageLoading...
Page #46 background image
4. INSTALLATION PROCEDURE FOR OPTIONAL EQUIPMENT EO18-33027
4.4 RIBBON SAVING MODULE (B-EX904-R-QM-R)
4-28
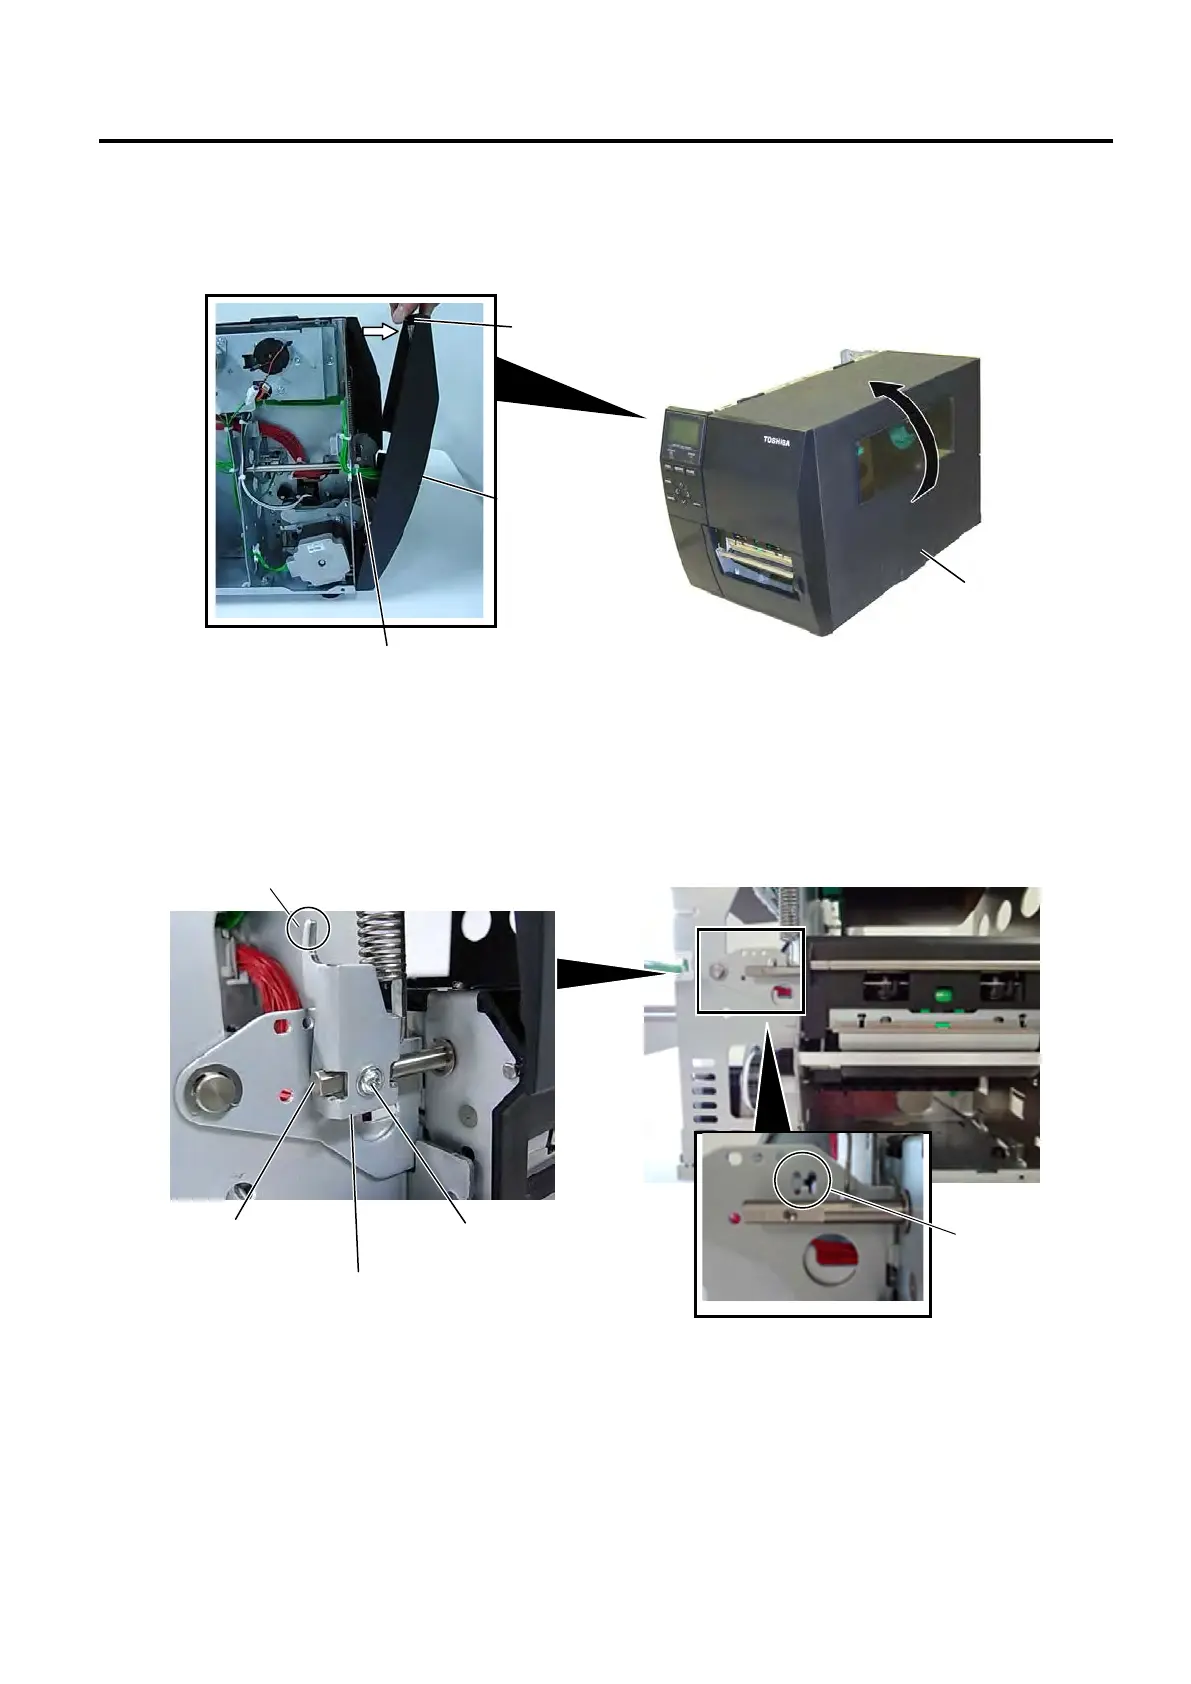
4. While holding the half opened Top Cover, release the hooks of the Operation Panel Ass’y and remove it
from the printer.
5. Disconnect the operation panel harness from the Operation Panel Ass’y.
4.4.2 Installing the Solenoid
1. Place the Head Up Link Plate onto the Head Up Shaft, as shown below.
Align the screw holes, then secure the Head Up Link Plate with the M-3x6 screw.
Operation
Panel Ass’y
Hook
Operation Panel Harness
Top Cover
Head Up Shaft
M-3x6 Screw
Head Up Link Plate
Head Up Arm
“H-shapecut

Table of Contents

Other manuals for Toshiba B-EX4 SERIES

Questions and Answers:

Question and Answer IconNeed help?

Do you have a question about the Toshiba B-EX4 SERIES and is the answer not in the manual?

Toshiba B-EX4 SERIES Specifications

General IconGeneral
Print TechnologyThermal Transfer / Direct Thermal
Power SupplyAC 100-240V, 50/60 Hz
Print Resolution203 dpi
Max Print Width104 mm
ConnectivityUSB, Serial, Ethernet
Media SensorTransmissive, Reflective
Media TypeRoll, Fanfold, Tag, Ticket
Media Width25.4 mm
Ribbon Width110 mm
Ribbon LengthUp to 600 m
Media Thickness0.06 – 0.19 mm

Related product manuals