Maintenance2140−1/A1
Winterthur Gas & Diesel Ltd.
2/ 14
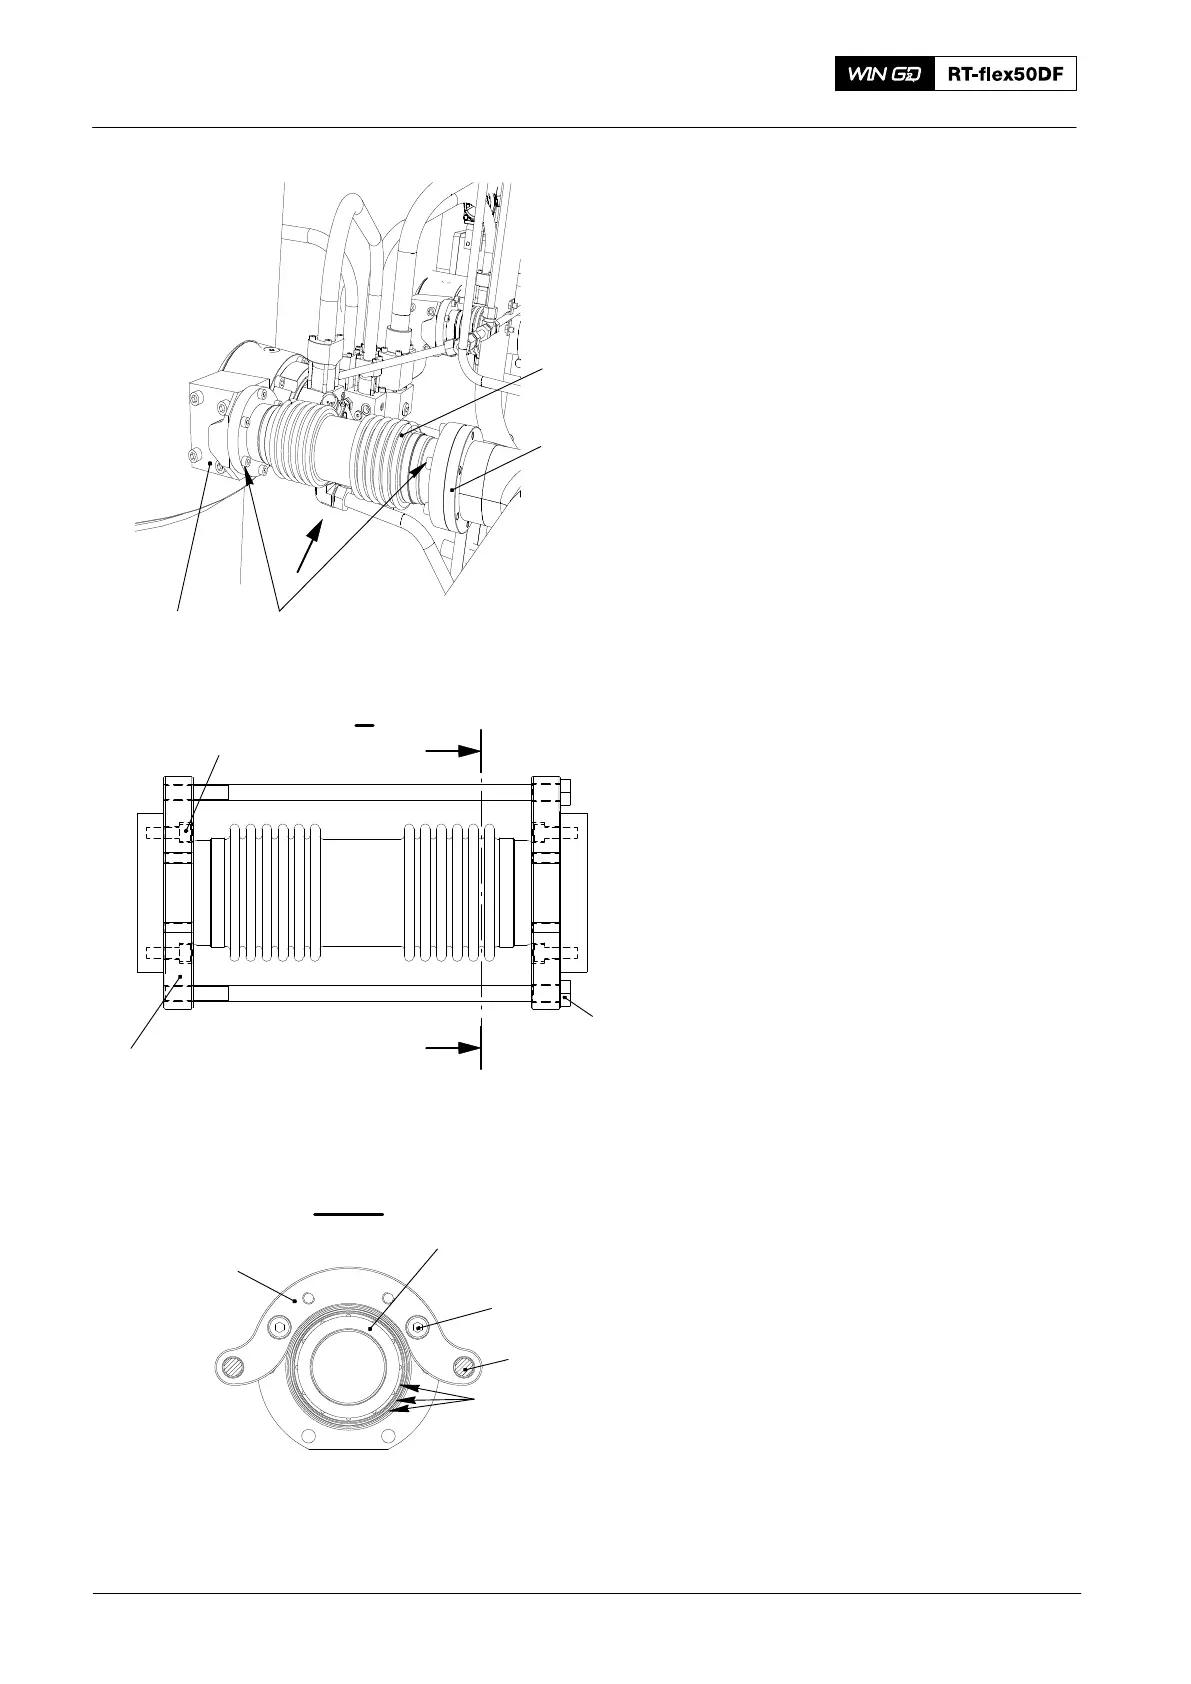
6) Apply Molykote G-Rapid Plus to the
tool (94890, Fig. 1).
7) Remove the screws (3) on each side of
the compensator (1).
8) Put the tool (94890) in position on the
compensator (1) as shown.
Note: The tool (94890) is shorter than the
installed length of the
compensator (1).
9) Attach the tool (94890) to the flanges of
the compensator (1) with the four
screws (5).
10) Tighten the four screws (5).
11) Tighten the two bolts (6) at the same
time to compress the compensator (1).
12) Continue to tighten the bolts (6) until
you can remove the compensator (1).
13) Carefully remove the tool (94890)
together with the compensator (1).
14) Do a check of the condition of the six
O-rings (7) (on the flange couplings) if
necessary, replace the O-rings.
15) Remove the tool (94890) from the
compensator (1).
16) Put the compensator in a dry, clean
area.
2016
Gas Admission Valve: Removal, Disassemble, Assemble, Checks, Installation
3
1
I
2
4
WCH03405
II
II
I
94890
II -II
WCH03404
Fig. 1
94890
5
1
7
6
5
6