Maintenance2722−2/A1
Winterthur Gas & Diesel Ltd.
6/ 7
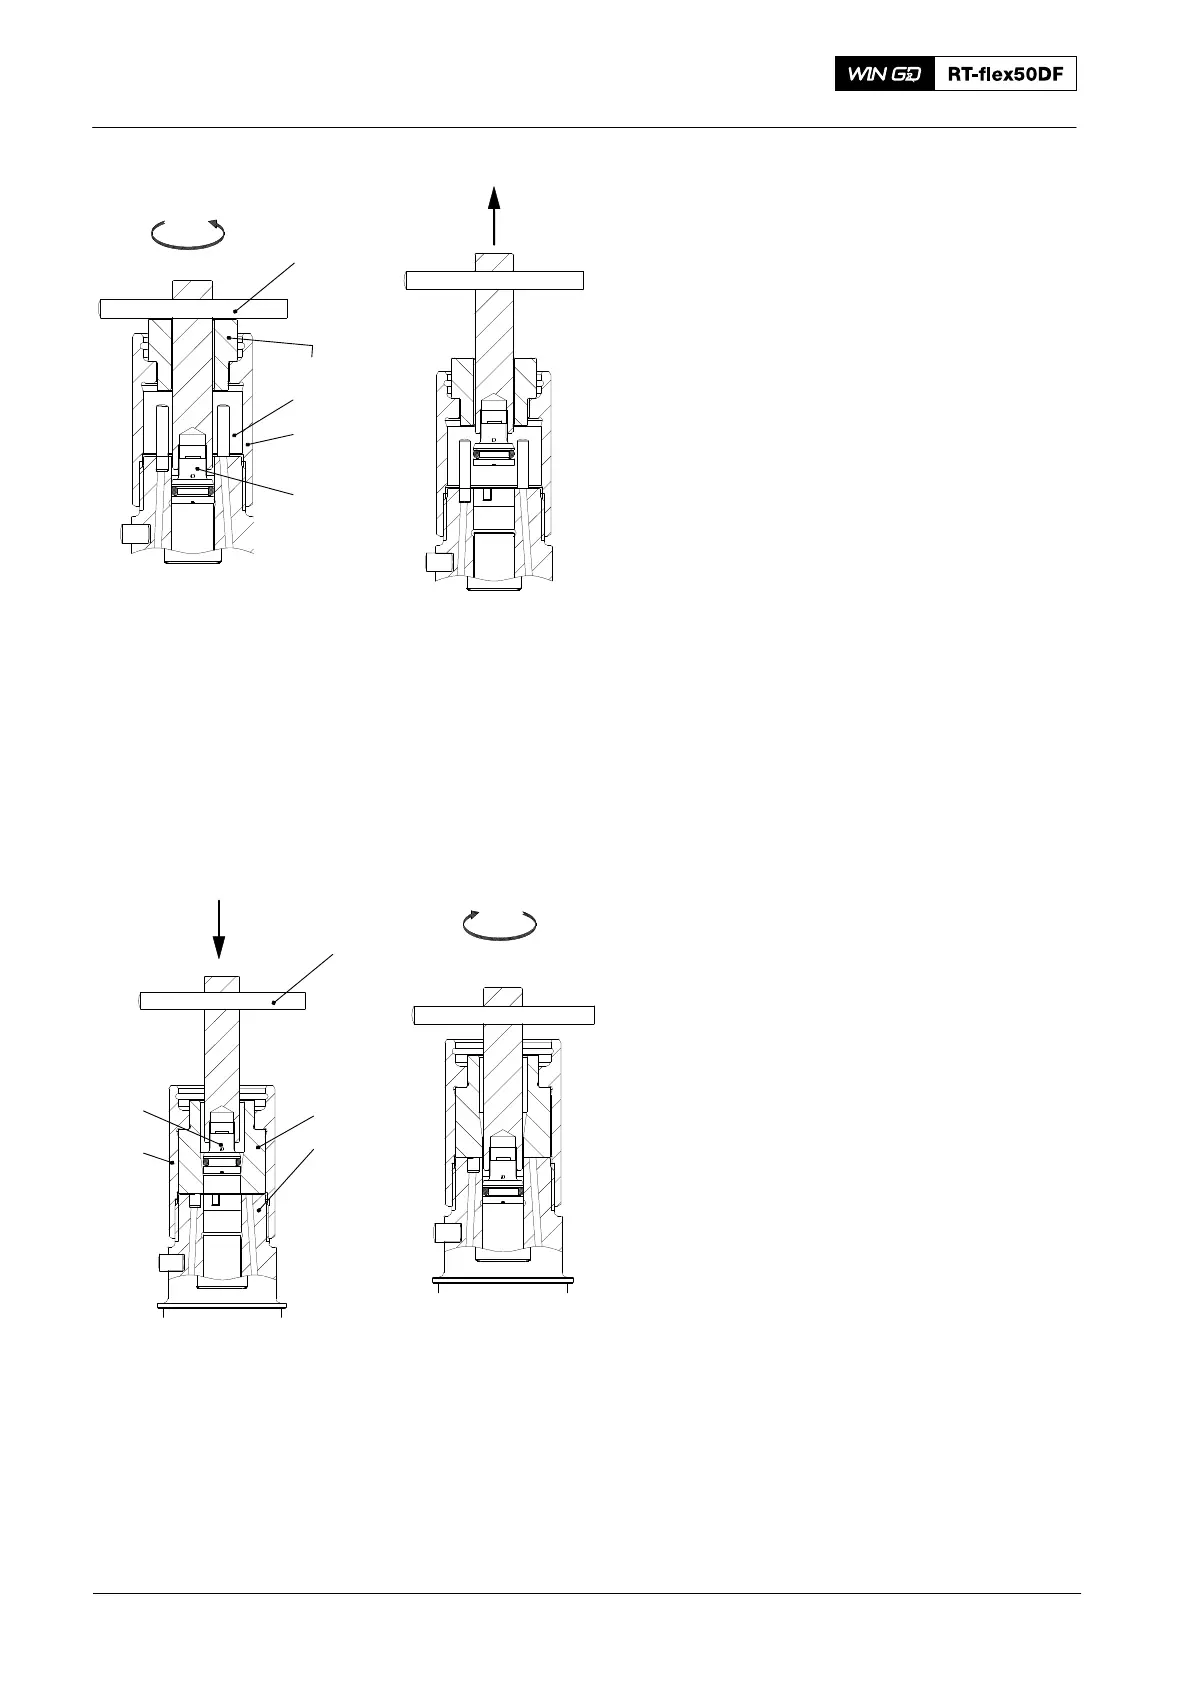
3.6 Pilot Valve − Removal
Note: When you do the step below, it is
not necessary to torque the
coupling nut (2, Fig. 4).
1) Remove the nozzle tip, refer to
paragraph 3.4.
2) Attach the coupling nut (2) to the
nozzle body (1).
3) Attach the bush (94289B) to the
coupling nut (2).
4) Put the T-handle (94289) through the
bush (94289B).
5) Engage the T-handle (94289) with the
pilot valve (3).
6) Turn the T-handle (94289) in the
direction shown.
7) Carefully remove the T-handle (94289)
and the pilot valve (3).
8) Remove the bush (94289B).
9) Examine all parts for damage and
corrosion. Replace parts that have
damage or corrosion.
3.7 Pilot Valve − Installation
1) Put the bush (94289A, Fig. 5) into the
coupling nut (2).
2) Engage the pilot valve (3) with the
T-handle (94289).
3) Put the T-handle (94289) and pilot
valve (3) through the bush (94289A).
4) Turn the T-handle (94289) to install the
pilot valve (3).
5) Remove the T-handle (94289) and the
bush (94289A).
6) Remove the coupling nut (2).
7) Install the nozzle tip, refer to
paragraph 3.5.
2016
Injection Valve: Disassemble, Checks, Assemble
94289B
94289
WCH03003
Fig. 4
3
1
2
WCH03003
94289A
Fig. 5
94289
1
3
2