Maintenance2728−1/A1
Winterthur Gas & Diesel Ltd.
4/ 6
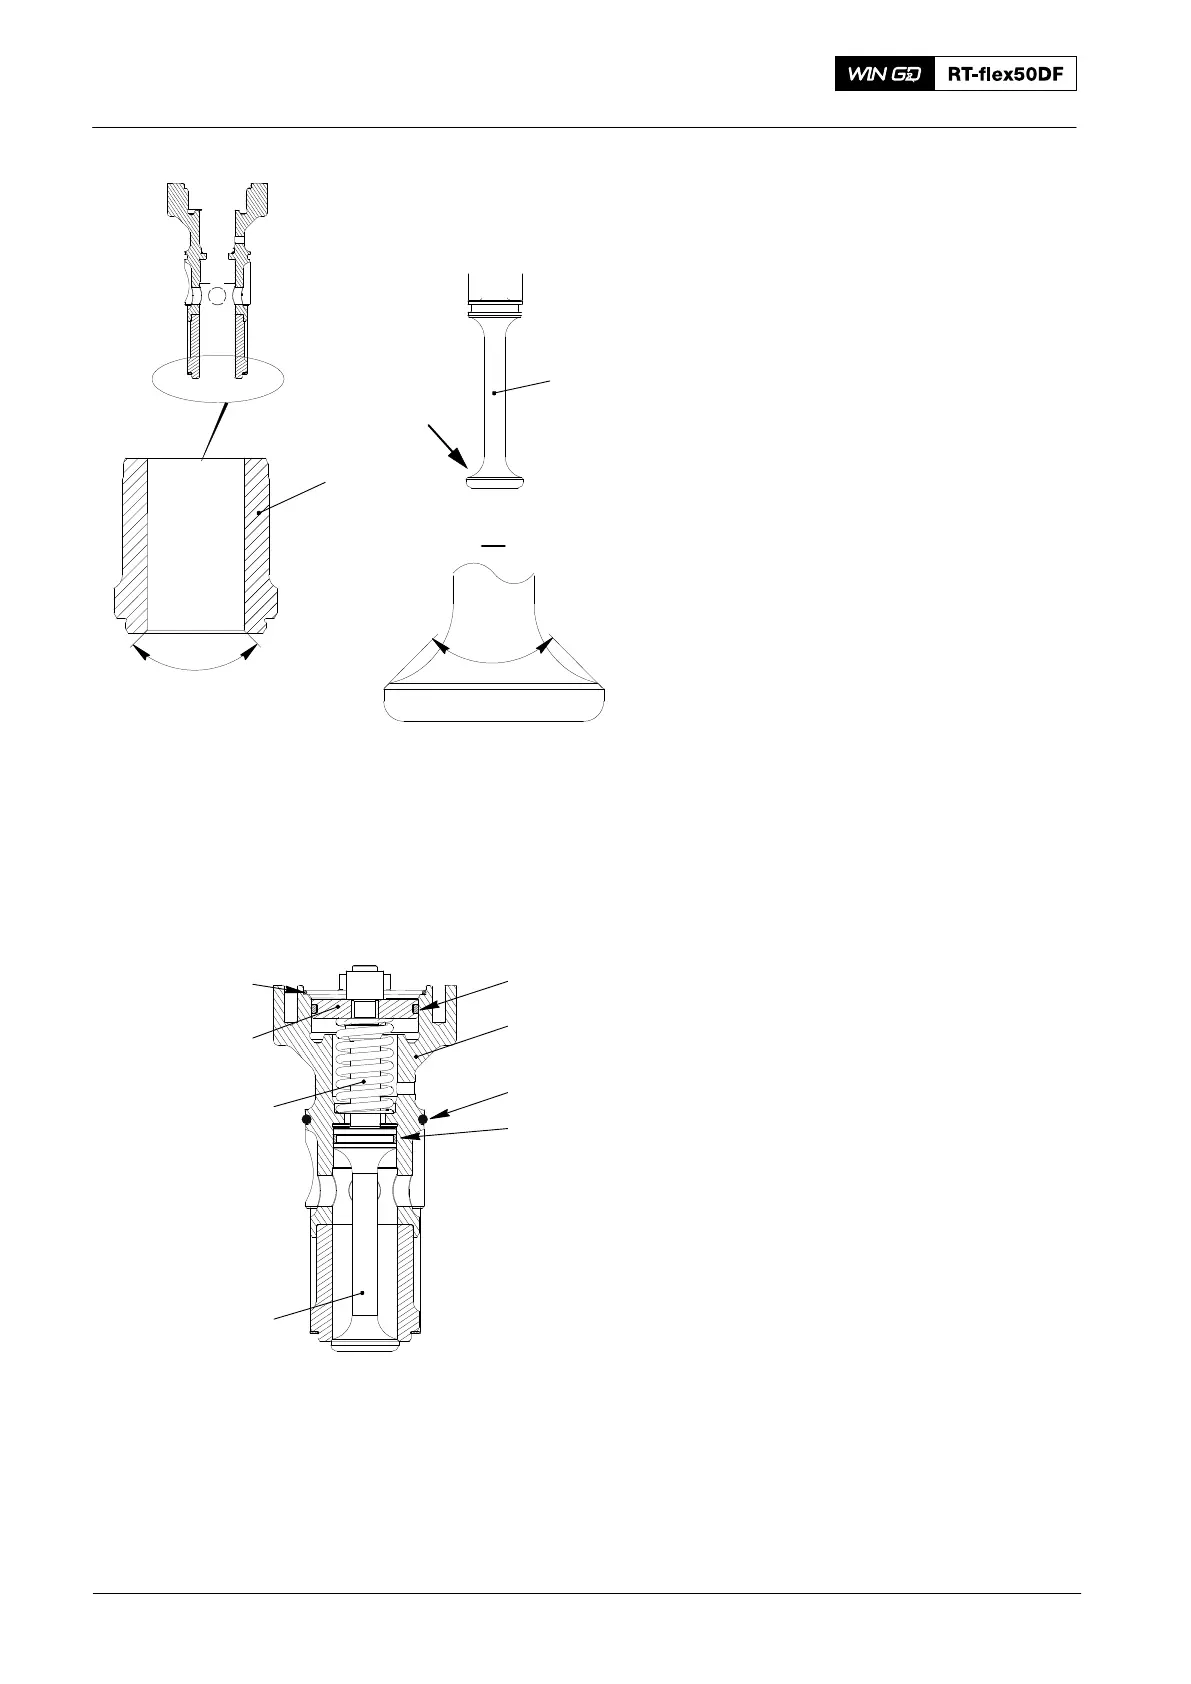
5. Grind
1) If the seating faces of the housing (1,
Fig. 5) and the valve spindle (2) have
minimum damage, do as follows:
a) Manually grind the seat faces of
the housing (1) and the valve
spindle (2).
b) Make sure that you keep the
radius to the values given.
2) If the seating faces of the housing (1)
and the valve spindle (2) have more
than minimum damage,
do as follows:
a) Use a machine tool to grind the
seating face of the housing (1)
and valve spindle (2).
b) Manually grind the seating faces
of the housing (1) and the valve
spindle (2) to get a good finish.
c) Make sure that you keep the
radius to the values given.
6. Assemble
1) Clean all the parts of the starting air
valve.
2) Put a small quantity of oil on all the
parts.
3) Put a small quantity of oil on the new
O-rings (3 and 8, Fig. 6) and the piston
rings (1, 4).
4) Put the two new O-rings (3, 8) in the
housing (2).
5) Put the new piston rings (1, 4) on the
piston (7).
6) Put the valve spindle (5) into the
housing (2).
7) Put the compression spring (6) into the
housing (2).
8) Put the piston (7) in position on the
valve spindle (5).
2016
Starting Air Valve: Removal, Disassemble, Grinding, Assemble, Installation
90°
WCH03192
1
WCH03192
I
2
WCH03192
91°
I
Fig. 5
WCH03192
3
8
4
5
6
1
7
2
Fig. 6