Maintenance3403−3/A1
Winterthur Gas & Diesel Ltd.
4/ 5
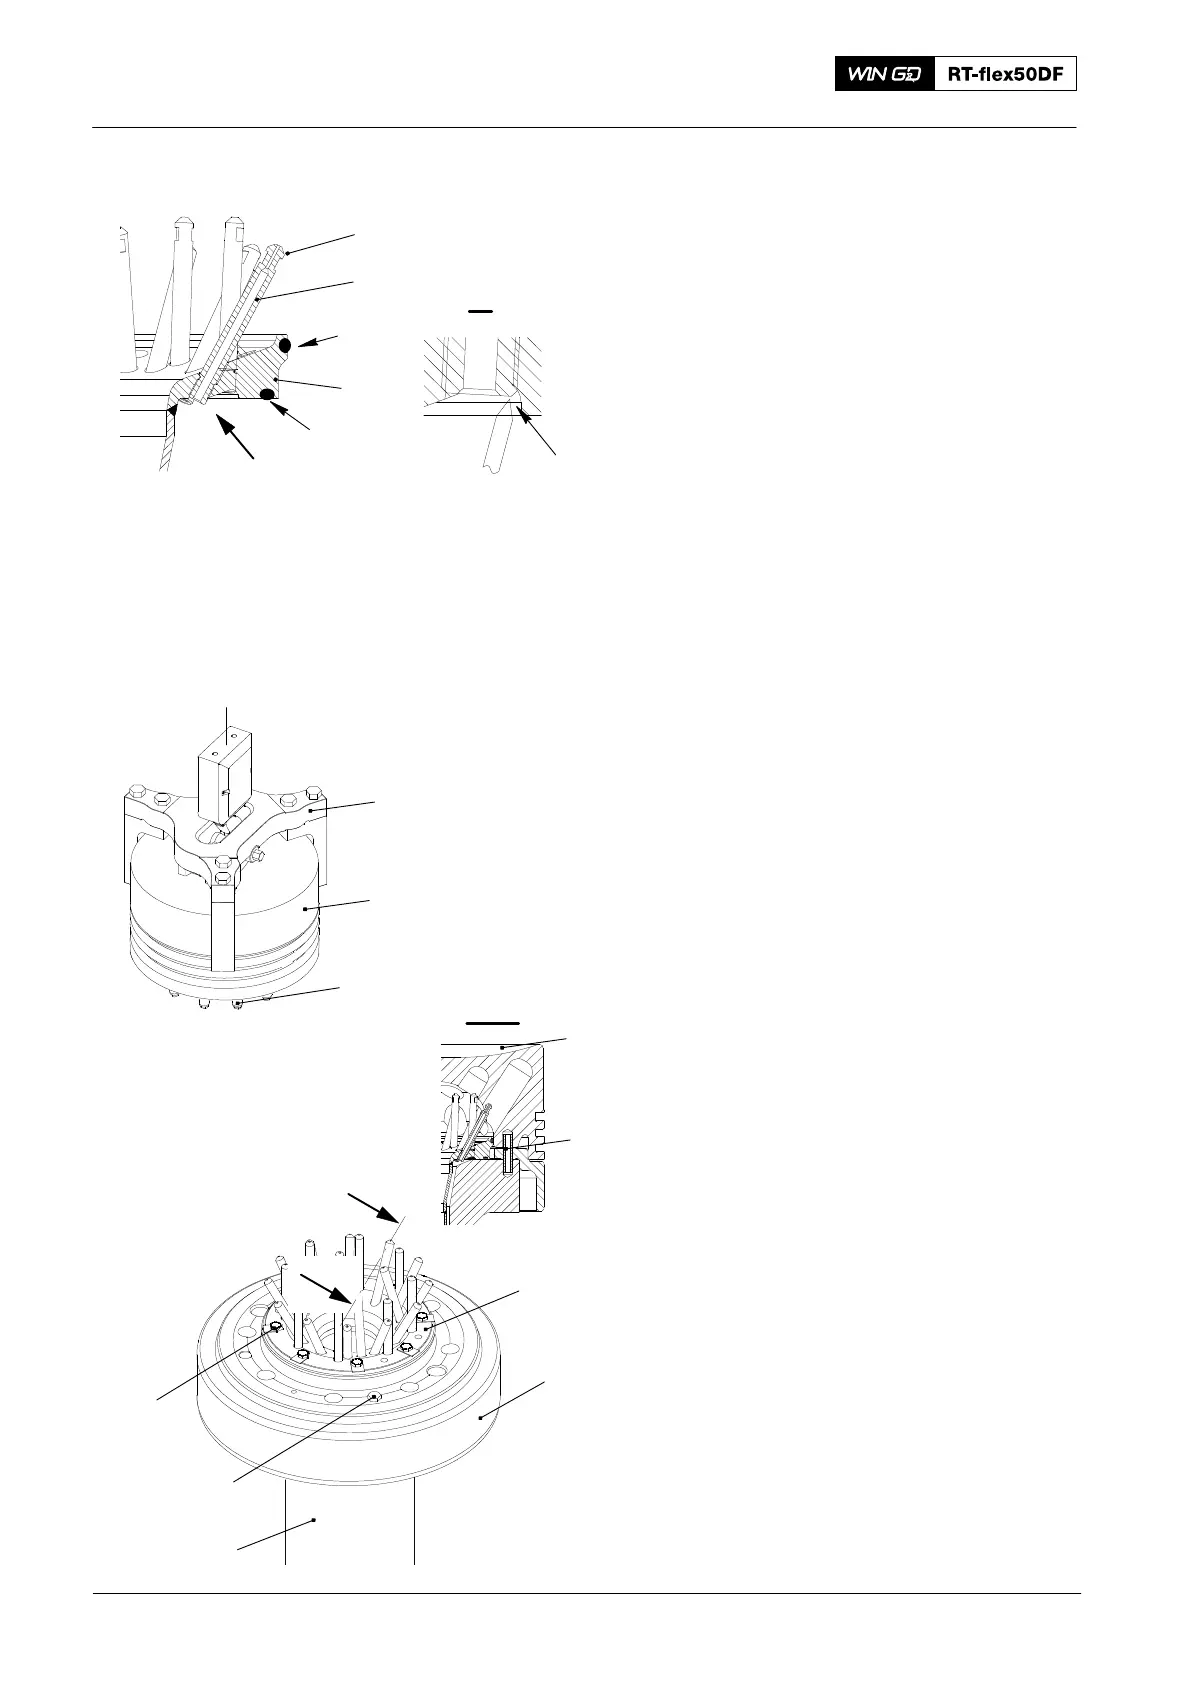
3. Assemble
Note: Do not install pipes or nozzles that
have damage.
1) Apply LOCTITE No. 0270 to the thread
of the pipe (2, Fig. 5).
2) Use the applicable tool to install the
pipe (2) to the spray plate (4).
3) Use a center punch to lock the pipe (2)
in position.
4) Apply Loctite No. 0270 to the thread of
the nozzle (1).
5) Put oil on the new O-rings (3).
6) Install the two new O-rings (4) on the
spray plate (4).
7) Install a new O-ring to the piston rod.
8) Attach the spray plate (5, Fig. 6) to the
piston rod (6) with the 12 screws (8).
9) Torque the 12 screws (8) as follows:
a) Symmetrically torque the 12
screws to 12 Nm.
b) Symmetrically torque the eight
screws to an angle of 30° . This is
equal to to a torque value of
22 Nm.
Note: When you do step 10), make sure
that the dowel pin (3) engages in
the related hole in the piston
skirt (5).
10) Attach the piston skirt (5) to the piston
rod (6) with the two screws (7).
11) Operate the engine room crane to
lower the piston head (1) on the piston
skirt (5). Make sure that the dowel pin
(3) engages with the hole in the piston
head (1).
2016
Piston: Disassemble and Assemble
4
5
6
7
8
WCH03092
Fig. 6
Fig. 5
Center
Punch
here
I
I
1
2
4
3
3
1
94341
2
WCH03299
3
1
I
I
I - I